What's inside
As an Amazon Associate I earn from qualifying purchases. This post may contain affiliate links at no extra cost to you.
Knocked soles are the fastest way to ruin a well-tuned hand plane. It only takes one drop or one hard knock against another plane in the bottom of a bag to put a burr on the edge of the mouth, dent the toe, or throw the sole out by a thou or two. That doesn’t sound like much, but on a No. 4 or No. 5 that you use for finishing, you will feel it as chatter or as a plane that suddenly won’t take an even shaving across the width. The fix is lapping the sole again, which is time you don’t want to spend on site.
The goal when transporting planes isn’t just carrying them. It’s keeping each sole isolated, preventing lateral impact, and keeping cutters from contacting metal. Most general tool bags fail at all three because they are one big open compartment.
As an Amazon Associate we earn from qualifying purchases at no extra cost to you.

Sections
Our Top Picks
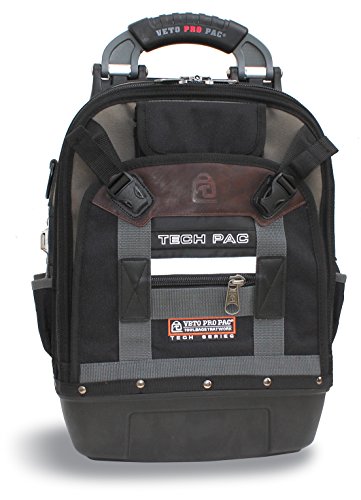
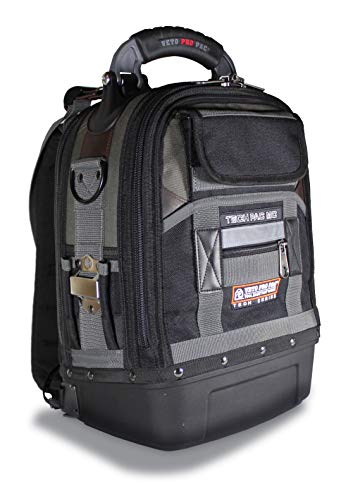
What actually damages a plane sole in transit
Soles are usually cast iron, flat to within 0.0015″ to 0.003″ on a decent new plane. Damage happens in three ways. First, plane-to-plane contact. A 4 lb. No. 5 sliding into a 5.5 lb. No. 6 with even 2 inches of travel inside a bag hits hard enough to chip the iron or peen over the edge of the mouth. Second, plane-to-tool contact. A loose chisel, square, or hammer will dent a sole faster than another plane will. Third, grit and moisture trapped against the sole. A bag bottom that collects sawdust and damp will start light rust in a day, which then pits if left.
Retracting the iron until it is just flush with the sole helps, but it doesn’t protect the sole itself. A thin piece of wood or plastic under the sole does more. What works best is a bag system that holds each plane upright or separated so it cannot slide.
What to look for in a plane-friendly bag
Forget marketing about “heavy-duty” and look at internal structure:
Individual compartments or vertical dividers. You want rigid dividers that create slots roughly 3″ to 3.5″ wide for bench planes. Thin fabric dividers do nothing – the planes just flop over and hit each other. Look for dividers with a plastic or plywood stiffener inside.
Padded bottom and sides. At least 10mm of closed-cell foam on the bottom makes a real difference. Unpadded canvas or leather over plywood transmits every bump from the truck bed straight to the toe of the plane.
Sole protection. The best setups include a way to keep the sole off the bag floor – either a wooden insert, a raised padded rail, or a separate sock/slip cover for each plane. A simple 1/4″ plywood false bottom covered in felt is better than any amount of extra foam.
Does not tip over. Tall, narrow totes with a flat bottom are more stable than soft duffels. A bag that tips when you set it down is how soles get knocked on concrete.
Weather handling. Waxed canvas or 1680D ballistic nylon with a waterproof base keeps moisture out. Fully waterproof hard cases trap moisture in, which can be worse if you put planes away damp.
Bag types compared
There are four common ways carpenters carry planes, and they protect very differently.
| Bag Type | Sole Protection | Capacity | Weight / Bulk | Trade-off |
|---|---|---|---|---|
| Open-top tote with rigid dividers | Very good if dividers are stiff and planes ride toe-down | 3-5 bench planes (No. 3 to No. 7) | Heavy, 4-6 lbs empty | Best access on site, but open top lets in rain and dust |
| Padded tool roll / plane roll | Good for 1-2 planes, excellent sole isolation | 1-3 planes depending on size | Light, rolls to ~6″ diameter | Slow to access, not good for daily carry of a full set |
| Closed-top tool bag with removable dividers | Good, if you add sole guards | 2-4 planes plus saws and marking tools | Medium, 3-5 lbs empty | Best all-around, but dividers often too flimsy stock |
| Hard case with foam insert | Excellent against impact | 2-3 planes | Heavy and bulky | Maximum protection, poor to carry on site, traps moisture |
Best options by how you work
For site work carrying 3+ planes daily: Open tote with custom dividers. This is what most site carpenters who use hand planes actually end up with. A carpenter’s open tote with a flat, reinforced bottom and shop-made dividers from 1/4″ plywood or 6mm MDF is more protective than any expensive off-the-shelf bag. Make slots that are snug – you should have to lower the plane in vertically, not drop it. Line the bottom with a strip of dense foam or carpet underlay and add a thin hardwood runner so the sole rests on wood, not fabric that holds grit. If you don’t want to build, look for a rigid carpenter tool tote with dividers that has a hard bottom and vertical partitions you can reinforce.
For 1-2 planes to and from the shop: Padded plane roll or socks. If you only take a No. 4 and a block plane to site, a roll is lighter and actually protects better because each plane is wrapped separately. Waxed canvas rolls with a fleece or felt lining prevent the sole from rubbing. The failure mode is putting a plane away with the iron proud – it will cut through the roll over time. Always retract the iron fully. A cheap alternative that works surprisingly well is a pair of heavy wool plane socks with a leather sole patch. Combined with any basic bag, they stop 90% of knocks for under $20.
For mixed kit (planes, chisels, squares): Closed bag with modular inserts. If you carry marking and measuring tools along with planes, a zip-top bag keeps everything together in the van. The stock plastic dividers in most closed top tool bag with padded dividers are usually too thin to stop a No. 5 from tipping into the next slot. Fix it by adding a plywood divider or by storing each plane in its own slip cover inside the bag. Keep chisels in a separate roll, never loose with planes.
When a hard case makes sense. A hard case with pick-and-pluck foam is unbeatable for long transport or checked baggage. You can cut a pocket for each plane so the sole never touches anything. For daily site use it’s overkill. It is heavy, you can’t reach in quickly, and if you close it up with damp planes after working outside, you will get rust spots by morning. Drill a couple of 1/4″ vent holes or add a few silica gel packs if you go this way.
Cheap fixes that work as well as expensive bags
You don’t need to spend $150 to protect soles. Three shop-made fixes outperform most premium bags:
1. Magnetic sole guards. A 3″ wide strip of magnetic tool holder material or a thin piece of plywood with a rare-earth magnet glued in, stuck to the sole during transport. It prevents metal-to-metal contact and keeps grit off. Cost is a few dollars per plane.
2. Toe-down storage. Store planes toe-down between dividers, not flat on their soles. That way the sole can’t skid and the iron is not the lowest point. It also stops the plane from sliding along the bag bottom when you brake.
3. Dedicated plane box inside a general bag. Build a simple open-top plywood box that fits inside your existing tool bag. Even a 10″ x 14″ x 6″ box with two dividers and a felt-lined floor isolates planes from everything else. Many carpenters find a small tool roll in waxed canvas for hand planes plus this plywood insert is the most practical combo – the roll protects each sole, the box stops crushing.
Avoid thin neoprene sleeves sold as “plane covers.” They hold moisture against the iron and don’t add impact protection. Felt, canvas, or leather breathes better and cushions more.
What to avoid
Any bag where planes can lie on their sides in a pile. If you can hear them clunk when you swing the bag, the soles are getting hit. Also avoid bags with a single large compartment and elastic loops meant for screwdrivers – they won’t hold a 4 lb. plane vertical. And skip bags with metal hardware or rivets on the inside walls where a sole can strike.
If you carry Lie-Nielsen, Veritas, or other premium planes, the cost of one sole re-lap or mouth repair outweighs any bag. For vintage Stanleys or modern Stanley/Spear & Jackson site planes that you tune yourself, a basic tote with shop-made dividers and plane socks is plenty. You don’t need a hard case for planes you can replace for $60 at a boot sale.
Setting up whichever bag you choose
Before first use, empty the bag and vacuum it. Put a light coat of paste wax on each sole and retract the iron. Load the heaviest plane (usually the jointer) in the center slot over the handle so the bag balances. Planes should fit snug with about 1/8″ clearance on each side – too loose and they knock, too tight and you drag the sole on the divider getting it out. Add a 2″ x 12″ offcut of MDF or hardwood at the bottom of each slot for the sole to rest on, and replace it when it gets grooved.
Check the bag after a week of use. If you see bright rub marks on the dividers at sole height, the slots are too narrow or the padding is worn through. If you see rust freckles on the MDF runner, you are putting planes away damp – wipe them and add a small oiled rag in the bag.