What's inside
As an Amazon Associate I earn from qualifying purchases. This post may contain affiliate links at no extra cost to you.
Sections
Our Top Picks
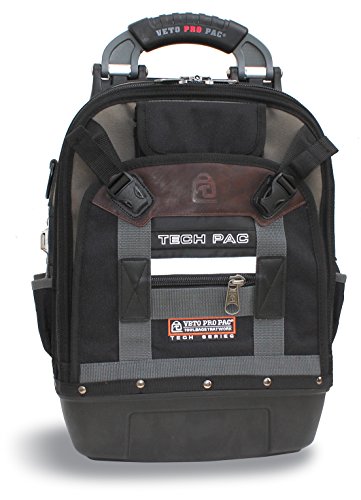


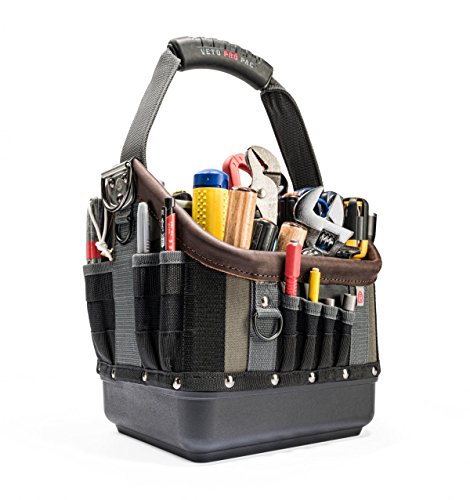
What a site bag needs to do
A useful site bag for hand planes and layout tools is not just a large sack with a shoulder strap. It needs to keep sharp edges from knocking into measuring tools, stop small items disappearing into the bottom, and carry comfortably alongside a tool belt or larger kit. The right choice depends on whether you move between rooms, work from a vehicle, or carry only a few tools up a ladder.
Start by measuring the longest tool you want to carry. A typical 9-inch combination square needs a compartment longer than 9 inches once you allow room for its stock and a protective sleeve. A small block plane may fit in a tool tote, while a longer bench plane can need a dedicated compartment or its own case. Don’t buy by advertised capacity alone: check the internal dimensions and pocket layout.
As an Amazon Associate we earn from qualifying purchases at no extra cost to you.

Protect cutting edges and soles
Plane irons and chisels can nick other tools when they shift in transit. Fit edge guards or wrap the tools before putting them in a bag, even if the bag has padded pockets. Keep plane irons retracted, and avoid storing a plane on its side against a metal square or hammer. A soft divider helps, but it is not a substitute for protecting the cutting edge.
Look for a reinforced base and enough structure that the bag stays open while you load it. A floppy bag is lighter and often cheaper, but tools pile together when it tips over. That makes it easier to damage an edge and harder to find a marking knife or pencil. For a site kit that gets set down on concrete, a water-resistant base also helps protect tools from damp floors; it will not make the whole bag waterproof.
Choose a layout that matches the kit
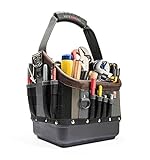
Open-top totes are quick to reach into and suit a compact daily set: block plane, chisels, tape, pencil, square and marking gauge. A divided tote is better if you want planes separated from layout tools. Deep pockets can swallow short items, so check that the pockets are sized for the tools you actually carry, not just numerous.
A zipper-top bag offers more protection from dust and rain on the journey, but it slows access during repeated measuring and marking. A shoulder bag is convenient for carrying a small kit between floors; a broad, adjustable strap matters more than extra pockets once the load gets heavy. If the bag is likely to carry more than about 10 to 15 pounds, test how it hangs when loaded. A narrow strap can dig in, and a bag that swings freely can bump finished work.
For a compact, compartmented setup, compare divided carpenter tool totes. If you carry a longer plane or want more coverage, look at zippered tool bags with long compartments. Verify the internal length before ordering; a pocket that is an inch too short is wasted capacity.
Compare common bag types
| Type | Best for | Main drawback |
|---|---|---|
| Open tote with dividers | Frequently used hand tools and quick access | Limited protection from rain and falling debris |
| Zippered tool bag | Transporting a mixed kit between jobs | Slower to open and access individual tools |
| Tool roll | Keeping chisels or marking tools separated | Needs a flat surface and does not protect bulky planes well |
| Small parts pouch | Pencils, knives, gauges and fasteners | Too small to serve as the main bag |
Keep layout tools usable
Squares and rules are easy to damage in a crowded bag. Keep a combination square in a sleeve or a long pocket where its blade cannot flex against heavier tools. Store a marking gauge so its beam cannot catch on a chisel edge. Pencils, marking knives and awls belong in separate narrow pockets: loose points can puncture a fabric lining or scratch a plane sole.
Don’t pack a heavy plane above delicate layout tools. A loaded bag that gets dropped from bench height can bend a thin rule or shift a square’s stock. Put the heaviest tool low and near the center, with lighter items around it. If your bag has no internal dividers, use a small tool roll for the chisels and a sleeve for the square rather than relying on loose fabric pockets.
When a belt or separate pouch helps
A tool belt is useful for a tape, pencil, knife and a few fasteners during repetitive work, but it is a poor place for a chisel set or plane. Those tools add weight, can catch on framing and may fall when you bend or climb. Keep the cutting tools in the bag and carry only what you need for the current task. A small layout-tool belt pouch can keep a tape and marking tools close without turning the belt into a storage bin.
For a tidy kit, use one main bag for transport and a small roll or pouch for the tools you use at the bench. This also makes it easier to bring only the layout tools needed for a job. A canvas chisel roll is an inexpensive way to separate edges from the rest of the kit; it is not padded enough to protect chisels from a hard impact, so don’t leave it loose under heavier tools.
What to check before buying
Check the stated dimensions, pocket depth, base reinforcement, strap stitching and zipper quality. If possible, test the bag with your actual tools. A pocket should hold a square securely without forcing it in, and a plane should sit without pressing its iron against fabric or another tool. Inspect stress points where the handles or strap attach; a strong fabric body does little good if those seams fail.
Paying more makes sense for a bag that gets carried daily, has a stable base and has dividers in the right places. For an occasional home project or a light set of chisels and measuring tools, a basic tote plus a tool roll may work just as well. Avoid buying extra capacity you will fill with tools you rarely use. A smaller, organized bag is easier to carry and makes it less likely that the tool you need is buried underneath the plane.