What's inside
As an Amazon Associate I earn from qualifying purchases. This post may contain affiliate links at no extra cost to you.
Sections
Our Top Picks
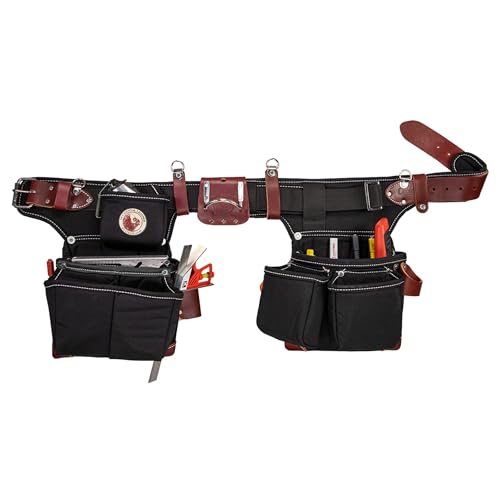 Occidental Leather Adjust-to-Fit OxyLight FramerAdjust-to-Fit – Right Hand14.5 x 14.4 x 4.4 inches4.15 PoundsCheck on Amazon

What first fix actually requires
First fix is stud walls, joists, noggins, door linings, and roof work before plasterboard goes up. You are moving constantly, cutting, measuring and nailing all day. You need a hammer, tape, speed square, utility knife, pencil, nail bar or cats paw, and a handful of fasteners within reach without walking back to the bench. Everything else is dead weight.
A typical first fix carry is 2.5 to 4 kg before you add fasteners. A pouch with 30-40 90mm ring shank nails adds another 0.7 kg, a full 1kg tub of 65mm screws adds a kilo. If your rig cannot manage that weight comfortably for 8 hours, you will feel it in your lower back and hips before lunch.
As an Amazon Associate we earn from qualifying purchases at no extra cost to you.


Tool belt: strengths and weaknesses
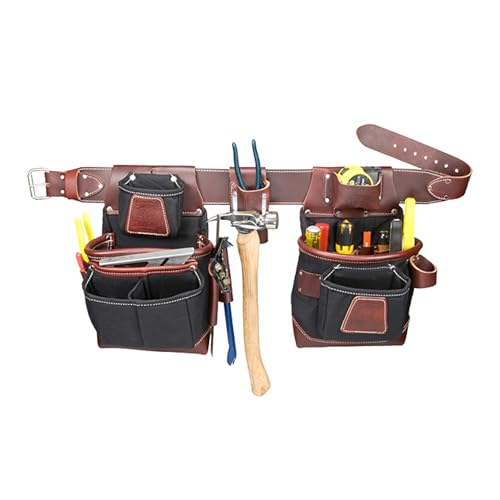
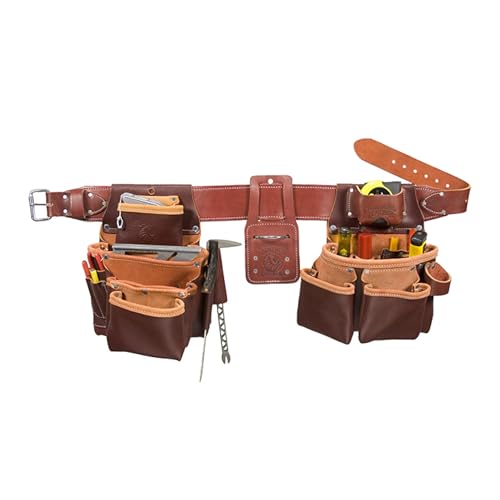
The traditional carpenter tool belt is two pouches on a wide belt, usually with a separate hammer loop and tape clip. Leather holds its shape and protects against punctures from chisels and nail bars, nylon is lighter and dries faster if you get rained off.
For first fix, the belt wins on speed and access. Pouches sit at hip height where your hands naturally fall. You can grab nails without looking, re-holster a hammer one-handed, and drop offcuts straight into a pouch. Nothing sits on your chest to snag when you are wrestling a stud into place or climbing through joists.
The failure modes are predictable. A cheap 50mm belt with no padding will dig into your hips under 3 kg+ and sag within months. The stitching where pouch meets belt tears first, then the belt holes stretch and you are constantly hitching it up. Suspenders fix most of that by moving 60-70% of the weight to your shoulders, but a basic belt-only setup concentrates everything on the iliac crest. If you already have hip or lower back issues, that matters over a full week.
Belts are also poor if you need to carry more than the essentials. Add a drill driver, pry bar, and a full chalk line and you run out of room or start banging tools against door linings.
Tool vest: strengths and weaknesses
A carpenter tool vest spreads the load across shoulders, chest and back with 10 to 20 pockets. Good vests use padded mesh, chest pockets for pencils and markers, deep hand-tool pockets and D-rings for a tape or hammer.
On first fix the main advantage is weight distribution and capacity. Instead of 3-4 kg hanging from your hips, the vest puts it on your torso. You can carry a full day’s pencils, spare blades, bits, ear plugs, phone and a few hand tools like a block plane or bevel gauge without a separate bag. For carpenters who are up and down ladders or working overhead fixing joists or head binders, that balanced load reduces hip fatigue and stops the pouches swinging when you climb.
The downsides show up fast in tight first fix work. Chest pockets can catch on studwork when you turn sideways in a 400mm centre wall. Vests are hotter. In summer a non-mesh vest adds a full layer and you will sweat through it. Access is slower for bulky items: pulling a 300mm speed square or a 600mm level from a vest pocket is awkward compared to a belt pouch. And dust extraction is worse; MDF and stud dust settles in every open pocket.
Cheap vests also fail at the zippers and pocket seams. If the front buckles are plastic, they crack when you kneel on them. Look for metal hardware and bar-tacked pockets if you go this route.
Belt vs vest head to head for first fix
| Feature | Tool Belt (with braces) | Tool Vest |
|---|---|---|
| Weight distribution | Hips + shoulders if braced, otherwise hips only. Best under 4 kg. | Even across torso. More comfortable over 4 kg or for overhead work. |
| Speed of access | Fastest for hammer, tape, square, nails at hip height | Fast for pencils, blades, small tools. Slower for large squares and nail bars. |
| Capacity | 2 pouches, typically 6-8 tool slots | 12-20 pockets, better for bits, fixings and PPE |
| Mobility in stud walls | Slim profile, nothing on chest to snag | Can catch on studs, heavier and hotter |
| Heat and comfort | Cooler, but hips take load without braces | Warmer, better for back/hips on long days |
| Durability | Leather lasts 5+ years if stitched well; nylon frays at belt loops | Mesh tears at seams; zippers are first failure point |
| Price for decent quality | $60-$140 for belt + braces | $70-$160 for ventilated, padded vest |
Weight, fatigue and real-world comfort
If you weigh your rig after loading for a wall framing session, most carpenters carry 3 to 5 kg. At that weight a belt with padded 75mm webbing and Y-braces is fine for most people. The braces are not optional if you are over 3.5 kg; they stop the belt dropping and reduce hip pressure by more than half.
A vest only pulls ahead when you have to carry more or work overhead for hours. Fixing ceiling joists or hanging door linings with arms raised shifts how weight feels. A belt load pulls down on your spine when you reach up; a vest keeps the weight centred and does not swing when you lean back. Carpenters over 85 kg bodyweight or with previous lumbar strain often report less next-day soreness with a vest for that reason.
For speed on cut-and-nail cycles, the belt is still quicker. Time yourself: drawing a speed square, marking, cutting and nailing a stud. The belt saves 2-3 seconds per cycle because the square and pencil are at hand height. Over 100 studs that is 5 minutes you do not lose digging in chest pockets.
What to carry and what to leave in the bag
First fix rewards a light rig. Carry: 16oz or 20oz framing hammer, 8m tape, speed square, utility knife, carpenter pencils, small nail bar, and one pouch for fixings. Leave in the tote: chisels, hand plane, large try square, and full boxes of fasteners. Refill the pouch at breaks instead of hauling a kilo of screws all day.
If you frame with a nail gun, you can cut further. Some carpenters run a single pouch and hammer loop only, with a nail belt for coils. That drops belt weight to under 2 kg and is noticeably easier by 3 pm.
Which should you buy?
Buy a belt with braces if your first fix is mostly stud walls, floors and roof carpentry at waist to chest height and you value speed and a slim profile. It is cooler, faster to take on and off, and cheaper to replace when a pouch blows out. Just do not buy a thin fashion belt; get a 75mm padded belt with metal buckle and separate braces that clip to the pouches, not just the belt.
Buy a vest if you do a lot of overhead work, need to carry fixings plus PPE all day, or find hip belts painful after 4-6 hours. Choose a mesh-backed vest with adjustable sides and hammer loop at hip, not chest height, so the hammer does not swing into studs.
For many first fix carpenters the best setup is a hybrid: a light belt with one pouch and hammer loop for nailing tools, plus a thin vest or chest rig with 4-6 pockets for pencils, blades, bits and tape. You keep bulk at the hips where it is fast, but move the lighter, high-count items to your torso to save your hips. That way you stay under 3 kg on the belt and avoid the full-vest heat penalty while still having everything you need within reach.