What's inside
As an Amazon Associate I earn from qualifying purchases. This post may contain affiliate links at no extra cost to you.
Carrying a hand plane, chisel set, and layout square takes more than a large bucket. A good bag needs enough structure to protect sharp edges, enough width for a plane, and pockets that keep marking tools from becoming a tangled, damaged mess. The right choice depends on whether you are moving between a workshop and a jobsite or carrying a compact kit all day.
As an Amazon Associate we earn from qualifying purchases at no extra cost to you.
Sections
Our Top Picks

What the bag must hold
A typical carpentry kit might include a No. 4 or No. 5 hand plane, six chisels, a 12-inch combination square or speed square, marking knife, pencils, tape measure, screwdrivers, and a small sharpening stone. That combination is heavier and more awkward than it looks. A metal-bodied No. 5 plane can weigh about 5 to 6 pounds, while a chisel roll and layout tools add another 3 to 5 pounds.
Measure your plane before buying. A No. 4 is usually about 9 inches long, while a No. 5 is commonly close to 14 inches long. You want at least 2 inches of spare length inside the main compartment, plus enough opening width that you do not have to force the plane through the zipper. For a No. 5, a bag with an interior length around 16 inches is a sensible minimum.
The best bag types for this kit
| Bag type | Best for | Advantages | Drawbacks |
|---|---|---|---|
| Wide open-top tote | Workshop-to-jobsite transport | Fast access, fits a plane easily, good visibility | Less protection from dust and rain; tools can pile together |
| Structured tool bag | Mixed hand-tool kit | Separate pockets, stable base, better organization | Can be heavy before tools are added |
| Tool backpack | Walking between locations | Leaves both hands free and carries weight comfortably | Often too narrow for a No. 5 plane; poor visibility while loading |
| Canvas tool roll plus tote | Chisels and delicate marking tools | Protects edges and prevents rattling | Requires two pieces and slower access |
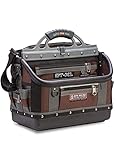
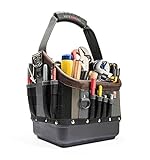
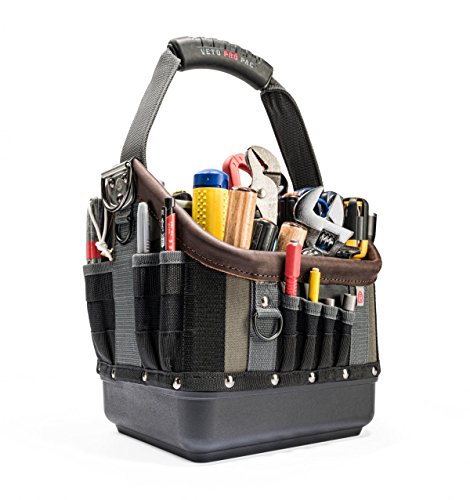
For most carpenters, a wide, structured tote is the practical choice. Look for a reinforced base, a broad central compartment, and vertical side pockets. A soft-sided bag is lighter, but its walls collapse onto sharp tools and make loading a plane awkward. A hard-bottom bag costs more and weighs more, yet it stays upright in a truck and keeps the plane from landing on its sole.
If you regularly carry a longer plane, shop for a large structured tool tote with an interior length of at least 16 inches. Avoid choosing by outside dimensions alone; thick padding and exterior pockets can reduce usable space by several inches.
Protecting the hand plane
The plane is usually the failure point in a general-purpose bag. Its iron can nick other tools, and the sole can be scratched by screws, nails, or loose metal hardware. Do not put a plane loose in a bag with chisels. Even a small amount of movement can damage a sharpened edge or leave burrs on the plane sole.
Use a simple plane sock, leather cover, or folded canvas wrap. The cover should protect the blade opening and the toe, but it must not trap wet sawdust against a steel sole. If the plane has a projecting iron, set it back before transport. A loose iron protruding 1/16 inch is enough to cut a bag lining or your hand while reaching inside.
For a wooden jointer plane or other tool longer than 20 inches, a standard tote is usually the wrong purchase. Use a dedicated plane case, long tool box, or padded sleeve instead. Trying to angle a long plane into a short bag puts pressure on the tote handles and can tear the stitching.
Carrying a chisel set safely
Chisels should have their own roll, rack, or narrow compartment. A six-piece set with blades from 1/4 to 1 inch covers most general carpentry work. Wider 1 1/4- and 1 1/2-inch chisels are useful for joinery but take more room and are more likely to hit neighboring tools.
A canvas chisel roll is fine for transport, provided each blade has a separate pocket and the roll closes securely. Leather lasts longer but is heavier and can hold moisture if stored damp. Plastic blade guards are cheap insurance, especially if the chisels share a compartment with a tape measure or fasteners. Buy a chisel roll with blade guards if your current set has exposed edges.
Do not put chisels point-down in deep open pockets. When the bag is set on the floor, the blade can strike the base or a hidden screw. Point-up storage is safer, but only when the cutting edges are covered and the bag cannot tip over.
Making room for layout squares
A layout square needs a flat pocket, not a narrow elastic loop. A 12-inch combination square is easy to bend or knock out of adjustment if it is wedged beside a hammer. A speed square can tolerate rougher treatment, but its edges still need protection from metal tools.
Choose a bag with at least one exterior sleeve measuring roughly 12 by 6 inches, or use a separate slim pouch. Keep the square’s rule or body facing away from the bag opening so it does not catch on other tools. A dedicated layout tool pouch is worthwhile if you carry a combination square, sliding bevel, marking gauge, and knife together.
Cheap bags often have elastic loops that stretch within a year. That is not a serious problem for pencils, but it is a failure mode for squares: the tool falls to the bottom, gets buried, and is eventually damaged by a hammer or drill. A stitched sleeve or rigid pocket is preferable.
Features worth paying for
A waterproof bottom is useful, but “water-resistant” fabric does not make a bag waterproof. Look for a molded plastic or rubberized base that rises at least 2 inches up the sides. This protects tools when the bag sits on wet concrete, though it will not protect them from rain entering through an open top.
Padded handles and a removable shoulder strap matter once the loaded bag passes 15 pounds. A shoulder strap is convenient for short walks, but a wide tote handle is more stable when carrying a plane. Metal handle connectors are stronger than sewn webbing alone, but they can scratch a finished plane, so check that they are covered or positioned outside the main compartment.
For a compact kit, a cheaper open tote is fine if you already own a chisel roll and plane cover. Spend the extra money on organization only when you carry the tools daily, work outdoors, or need to walk more than a few minutes between the vehicle and the job. A sensible setup is a structured tote for the plane and general tools, a protected chisel roll inside it, and a flat exterior sleeve for the layout square.
A practical buying setup
Start with the longest tool, not the total pocket count. For a No. 4 plane and a six-piece chisel set, a 12- to 16-inch structured tote is usually enough. For a No. 5, choose the larger size and confirm the interior dimensions. Add a padded plane cover, chisel guards, and a flat square sleeve before buying extra organizers.
Keep the heaviest items low and close to the center. Put the plane sole-down on a protected surface, place the chisel roll along one side, and reserve the exterior pockets for pencils, knives, tape, and gauges. This arrangement reduces shifting, protects cutting edges, and makes the tools you use for layout available without unloading the bag.