What's inside
As an Amazon Associate I earn from qualifying purchases. This post may contain affiliate links at no extra cost to you.
Sections
Our Top Picks
 IRWIN Tools Marples High-Impact Chisel Set3 Piece12.63 x 5.75 x 1.3 inches2.05 poundsCheck on Amazon
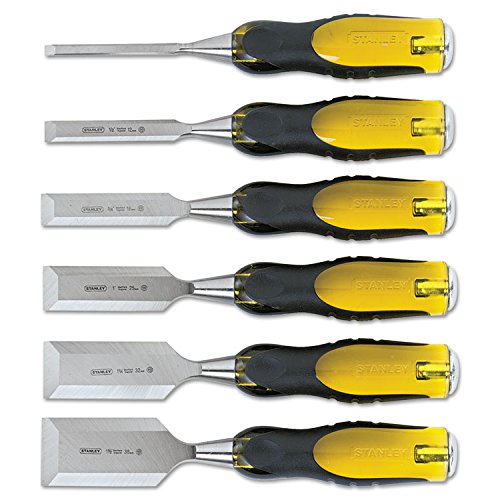


Choosing a chisel for pipe notches
Cutting a clean notch around a pipe is mostly a layout and waste-removal job, not a test of how hard you can hit a chisel. The best setup depends on the timber thickness, notch shape and how visible the finished work will be. A sharp bevel-edge bench chisel is enough for occasional shallow notches in framing timber. For deeper cuts, hardwood, or repeated work, a firmer chisel and a mallet give you better control and take more abuse.
Before buying, check the width you actually need. A 12 mm (1/2-inch) chisel handles narrow shoulders and detail work; a 19 mm (3/4-inch) size is a useful general-purpose choice. A wide 25 mm (1-inch) chisel clears waste faster but may be awkward around a tight curve. If you can buy only one, a 19 mm chisel is usually the most versatile starting point.
As an Amazon Associate we earn from qualifying purchases at no extra cost to you.


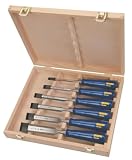
Which type makes sense?
Bevel-edge bench chisels have tapered sides that can reach into corners and work neatly against a marked line. They suit most pipe notches in ordinary softwood. Their thinner edges are easier to damage if used to pry out a large, wedged chip, so clear waste in small bites rather than twisting the blade.
Firmer chisels have squarer, more substantial sides and are a better fit for rougher work or frequent mallet use. The trade-off is access: their thicker sides are less convenient in tight corners. A mortise chisel is generally unnecessary for a pipe notch. It is built for chopping deep, narrow mortises, and its thickness can make it clumsy for trimming a curved profile.
For a small job, a bevel-edge bench chisel set offers useful width choices. A cheaper set is fine for occasional work if the blades can be sharpened and the handles stand up to light mallet blows. For regular site use, prioritize sound steel, secure handles and a blade that arrives straight over a large collection of sizes.
Quick comparison
| Option | Best use | Main trade-off |
|---|---|---|
| Bevel-edge bench chisel, 12–25 mm | Clean shoulders, corners and general notch shaping | Thin edges can chip if twisted or struck carelessly |
| Firmer chisel, around 19–25 mm | Repeated chopping and tougher timber | Less nimble in tight corners |
| Basic single chisel | One-off work in softwood | Limited width; may need more cleanup passes |
| Rasp or half-round file | Final fitting around a curved pipe profile | Removes material more slowly than chopping |
A practical buying list
If you already own a sharp chisel, do not buy a specialist tool just for one notch. Add a wooden or plastic-faced mallet only if the handle is designed for striking; a steel hammer can split an ordinary bench-chisel handle. A woodworking mallet is useful for controlled cuts, but hand pressure alone often gives more control for the final paring passes.
For repeat work or harder timber, a quality bevel-edge chisel in the width closest to the notch shoulders is a sound upgrade. Keep a file or rasp for fitting, and use a pencil, square and ruler to mark the cut. Do not spend extra on a large set if you will use only one or two sizes.
Cutting the notch cleanly
First confirm the pipe’s outside diameter and position, then check whether the timber needs clearance for movement or installation. Do not size the notch by eye. Mark the centerline and the notch boundary on the face and edges. For a round pipe, a hole saw or Forstner bit close to the pipe diameter can remove most of the waste when access allows; the chisel is then used to open the shape to the edge of the timber. If drilling is not practical, mark the curve with a template or a piece of pipe and cut in stages.
Score the boundary with a sharp knife where a crisp visible edge matters. This severs surface fibers and helps prevent splintering beyond the line. Chop from the waste side toward the scored line, with the bevel facing the waste, and take cuts roughly 3–6 mm deep rather than trying to remove the full depth at once. Stop often to check the profile. Deep, forceful blows can split timber past the notch, especially in softwood with straight grain.
Work from both faces if the notch passes through a thick board. Cutting all the way through from one side can tear out fibers on the far face. Leave the final millimeter or two for controlled paring, then test the pipe fit. A tight fit can bind during installation; a gap is hard to hide and may reduce support where the timber bears against the pipe.
Sharpness, safety and common failures
A dull edge crushes fibers, wanders off the line and needs more force. Before starting, hone the bevel and flatten enough of the back near the edge to remove the wire burr. A typical working bevel is around 25 degrees, though the exact angle matters less than a clean, keen edge. Use a honing guide if freehand sharpening is inconsistent. Never test sharpness with a thumb across the edge; shave a thin curl from scrap instead.
Clamp the timber securely and keep your free hand behind the cutting edge. Chisels can slip suddenly when they meet a knot or change in grain direction. If the blade starts to veer, stop and reset rather than levering it back with a twist. Pry-bar pressure can chip a fine edge or split the notch wall. For stubborn waste, make another relief cut or remove material with a drill, rasp or saw.
After fitting, ease sharp inside corners slightly if the timber is likely to split under load, but do not enlarge the notch without checking the required support. The right buy is usually a sharp, mid-width bevel-edge chisel you can control—not the heaviest tool on the rack.