What's inside
As an Amazon Associate I earn from qualifying purchases. This post may contain affiliate links at no extra cost to you.
Scribing is the process of transferring the shape of an uneven wall onto a timber board so the board can be cut to fit. It is more accurate than measuring several points, and it is usually faster once the right marking tool is set up. The best tool depends on the gap, the timber’s width, and whether the finished edge will be painted, stained, or left visible.
As an Amazon Associate we earn from qualifying purchases at no extra cost to you.



Sections
Our Top Picks


The best marking tools for the job
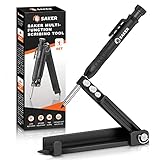
For most wall-to-board fitting, an adjustable scribing tool is the best all-round choice. It has a fence that rides against the wall and a pencil, knife, or metal point that follows the wall’s outline onto the timber. Keep the fence flat against the wall and the mark stays a consistent distance from it.
A compass works in much the same way, but its pointed leg can catch on rough plaster or masonry. A dedicated scribing tool with a broad fence is easier to control, especially on a long skirting board or worktop. For occasional work, a compass is perfectly adequate if the wall is reasonably smooth.
For fine, visible joinery, use a woodworking marking knife instead of a pencil. A knife leaves a narrow cut that does not become wider as you cut. It is particularly useful when scribing a benchtop, stair trim, or hardwood casing that will be finished clear.
Scribing tool comparison
| Tool | Best use | Typical accuracy | Main drawback |
|---|---|---|---|
| Adjustable scribing tool | Skirting, worktops, shelving and wide boards | About 1–2 mm with care | Cheap versions can flex or loosen |
| Compass | Small gaps and curved or irregular walls | About 1–2 mm | Point can dig into rough surfaces |
| Marking knife and spacer block | Visible hardwood joinery | Better than 1 mm | Slower and less forgiving |
| Pencil and spacer block | Painted softwood and general repairs | About 2–3 mm | Thick line can hide the true cut line |
What to look for when buying
The fence is more important than the brand name. Look for a fence at least 40 mm wide, with a flat face and enough length to resist tipping. A thin, pointed fence will follow small bumps rather than bridge them, producing a wavy line. The adjustment should lock firmly without needing excessive force.
If you are fitting skirting or a shelf, choose a tool with at least 25 mm of adjustment. A 10 mm gap is common in an old house, but walls can vary by 20 mm or more over a two-metre run. A scribing tool that only adjusts a few millimetres will be frustrating.
A pencil holder is convenient for rough work. A knife holder or replaceable blade is preferable for accurate work. If the tool accepts both, keep a sharp pencil for initial marking and switch to a knife once the fit is close.
Do not assume the most expensive tool will solve a badly prepared job. A basic compass and a small wooden spacer block are fine for painted softwood, particularly if the joint will be caulked. Spend more on a rigid tool when the board is expensive, the wall is badly uneven, or the edge will be exposed.
How to scribe uneven timber against a wall
First, check whether the board can be moved closer to the wall. Remove loose plaster, adhesive, or lumps of old paint. A scribe removes material; it should not be used to compensate for a board that is twisted, too short, or held away from the wall by debris.
Set the timber in its final position. Use wedges or temporary brads to hold it level and prevent it moving while you mark. If the board is a shelf or worktop, support it at the correct height. Scribing while holding a long board one-handed usually produces a line that changes width.
Set the scribing tool by placing its fence against the wall and its pencil or knife against the board’s waste edge. Add a small allowance if necessary. For a painted joint, leave roughly 1 mm for final fitting. For a clear-finished edge, aim to leave no more than 0.5 mm and plan to test-fit several times.
Run the tool along the wall with steady pressure. Keep the fence in contact, but do not force it into hollows. On a wall with a deep dip, the tool will mark the actual profile; the timber may then have a large amount removed from one section. Mark the waste side clearly with a cross.
For a pencil line, cut just on the waste side. Pencil marks can be 1 mm wide or more, so cutting down the centre can make the finished board undersize. With a knife, make a light first pass, then deepen the line with a second pass. Do not press hard on the first stroke, as the blade can follow the grain and wander.
Cutting the scribe accurately
For softwood, a jigsaw with a fine blade can remove most of the waste, but leave 1–2 mm outside the line. Follow with a low-angle block plane or a sharp rasp. A jigsaw cut made directly on the line often shows breakout and small steering errors.
A block plane is excellent for long, straight sections, but it will not reproduce a hollow or tight inside curve. For those areas, use a coping saw, fine rasp, or sharp chisel. A fine wood rasp removes material quickly without the grain tear that a plane can cause near end grain.
Test the board frequently. Hold it in place and look for daylight along the joint. A small gap at one point is often easier to correct by removing material locally than by repeating the entire scribe. If the gap is more than about 2 mm over a short section, check that the wall and board are both clean and that the board has not bowed.
Common failures and practical fixes
A wandering line usually means the fence was not kept flat or the tool was tilted. Widen the fence with a temporary strip of plywood, or use a tool with a broader base. A line that is consistently too tight means the board moved during marking; clamp it or use wedges before trying again.
If the pencil line disappears into a dark timber, use a sharp white pencil or knife line. If the wall is dusty, wipe the contact area first. On rough masonry, a spacer block can bridge sharp grit better than a compass point, though it will not follow every hollow.
Keep chisels sharp when cleaning corners. A dull chisel crushes fibres and can make a neat scribe look ragged. Pare with the bevel facing the waste, take shallow cuts, and stop as soon as the board seats without force. For most painted trim, a cheap scribing tool, pencil, and block plane are enough; accuracy comes more from stable setup and repeated test-fitting than from buying specialist equipment.