What's inside
As an Amazon Associate I earn from qualifying purchases. This post may contain affiliate links at no extra cost to you.
Cutting a clean notch in softwood framing is less about owning the sharpest premium chisel and more about using the right width, bevel, and technique. Pine, spruce, and fir are forgiving, but they also crush easily around the cut, especially when the grain changes or a knot sits near the shoulder. A suitable framing chisel should take a firm mallet strike, hold a useful edge, and be cheap enough that you do not hesitate to use it on rough construction timber.
As an Amazon Associate we earn from qualifying purchases at no extra cost to you.


Sections
Our Top Picks
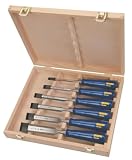
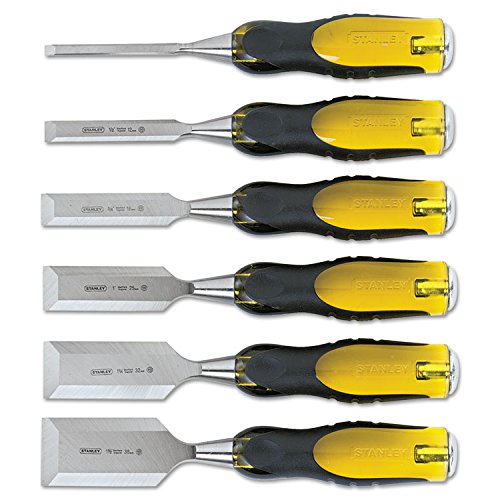
 IRWIN Tools Marples High-Impact Chisel Set3 Piece12.63 x 5.75 x 1.3 inches2.05 poundsCheck on Amazon


What makes a good framing chisel
For notching studs, trimming joists, and cleaning housings, look for a chisel with a full-length or substantial steel blade, a comfortable handle, and a back that can be flattened without excessive work. A metal striking cap or reinforced handle is useful if you regularly chop rather than pare.
Blade width matters. A 1-inch chisel is the best general-purpose size for most framing notches. A 3/4-inch blade fits tighter corners and removes waste efficiently, while a 1-1/2-inch chisel cleans broad areas faster but is less convenient for narrow shoulders. A 1/2-inch chisel is useful for detail work, but it is too small to be the only chisel in a framing kit.
Do not choose an extra-thin paring chisel for this job. Its long, delicate blade is designed for controlled hand pressure, not repeated mallet blows. It can work for final trimming, but a standard bench or framing chisel is the safer primary tool.
Best chisel types for softwood framing
| Chisel type | Best use | Main advantage | Limitation |
|---|---|---|---|
| Standard bench chisel | General notches and cleanup | Good balance of strength and control | Handle may not tolerate constant heavy striking |
| Framing or heavy-duty chisel | Deep notches and rough construction work | Built for mallet use and abuse | Heavier and less precise for small cuts |
| Bevel-edge chisel | Cleaning corners and shoulders | Thin sides reach into tight spaces | Can be damaged by twisting or prying |
| Mortise chisel | Deep, straight-sided waste removal | Very resistant to levering and hard blows | Usually unnecessary for ordinary stud notches |
For most people, a set of bevel-edge wood chisels from 1/4 to 1 inch covers normal framing work. If the job involves repeated deep notches, a dedicated heavy-duty framing chisel is a better choice than risking a lighter bench chisel.
Recommended sizes for common notches
A 1-inch chisel is the most useful single purchase. It removes enough material with each blow without making it difficult to establish a clean edge. Pair it with a 1/2-inch or 3/4-inch chisel for corners and narrow cuts.
For a notch about 1 inch wide, score both shoulders with a knife or sharp marking gauge, then make a series of cuts inside the waste area. Do not try to remove the full depth in one blow. For a 1/2-inch-deep notch, remove material in roughly 1/8- to 1/4-inch lifts. Deeper cuts increase the chance of splitting the remaining shoulder.
A 1-1/4- or 1-1/2-inch chisel is worthwhile when you regularly notch wide joists or plates. It saves time on broad waste areas, but it is not automatically better. Large blades require more force, and their corners can bruise the edges of a narrow notch.
How to cut a clean notch
Start by marking the two shoulders clearly. Use a sharp pencil for rough framing, but a knife line gives a cleaner boundary. Mark the depth on the side of the timber as well as the face; this prevents overcutting when the waste starts to disappear.
First, make shallow vertical cuts directly on the shoulder lines. Hold the bevel toward the waste when establishing the boundary. This creates a controlled edge and reduces the chance that fibers outside the notch will tear away.
Next, chop across the waste with the bevel facing down or toward the waste, depending on the direction of travel. Work from both ends toward the middle rather than driving straight through from one side. Once the waste is close to depth, pare the bottom with the bevel flat against the surface. Use hand pressure for the last few passes instead of striking the chisel.
For a particularly clean result, leave the waste about 1/16 inch proud, then take a final shaving cut. Softwood compresses under a mallet, so a notch that appears deep enough while compressed may spring back unevenly.
Edge retention and maintenance
A framing chisel does not need a mirror polish, but it does need a consistent bevel and a flat back near the cutting edge. A bevel around 25 degrees is a practical general-purpose angle. If you strike hard or occasionally contact screws and nails, a 30-degree secondary bevel gives the edge more durability at the cost of slightly less easy paring.
Keep a small chisel sharpening stone set or diamond plate in the tool kit. A few minutes of honing is often enough to restore a usable edge. Do not keep hammering with a rolled or chipped edge; it makes the notch rougher and forces you to remove more wood later.
Inspect the timber before cutting. A hidden nail can ruin an edge immediately. If old framing or reclaimed wood is involved, use a metal detector or probe for fasteners first. Never use the chisel as a pry bar. Twisting is a common cause of chipped corners, bent blades, and split shoulders.
Is a cheap chisel good enough?
Often, yes. A budget set is fine for occasional work on clean, new pine or spruce, provided the blades can be sharpened and the handles are not cracked. For one or two notches, spending more will not magically prevent tear-out; careful marking and shallow cuts matter more.
Pay more for a better chisel when you are cutting dozens of notches, working in hardwood or dense Douglas fir, or relying on the tool for years of site use. Better steel usually holds its edge longer, and a reinforced handle survives repeated mallet strikes. The trade-off is cost and the risk of treating an expensive precision chisel as disposable construction equipment.
For a compact site kit, buy a 1-inch heavy-duty chisel and a 1/2-inch bevel-edge chisel first. Add a 3/4-inch or 1-1/2-inch size only when the work demands it. A chisel roll for tool storage is also useful: it protects sharpened edges from contact with screwdrivers, saws, and loose hardware.