What's inside
As an Amazon Associate I earn from qualifying purchases. This post may contain affiliate links at no extra cost to you.
Small timber notches are among the jobs where a good chisel earns its place in a site kit. You may be trimming a birdsmouth, opening a housing joint, cleaning a tenon shoulder, or removing a shallow notch for a pipe or cable. The work is usually repetitive, partly awkward, and close to finished surfaces. A chisel that holds an edge and can take controlled blows is more useful here than a large demolition tool.
As an Amazon Associate we earn from qualifying purchases at no extra cost to you.


Sections
Our Top Picks
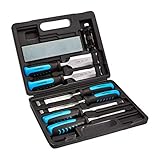
 HURRICANE 4 Piece Wood Chisel Set for Woodworking.Regular Grip7.87 x 4.72 x 1.38 inchesCheck on Amazon
 Amazon Basics 8-Piece Wood Chisel Set for Woodworking1/4" - 1-1/2"11.4 x 9.25 x 2.8 inches5.4 poundsCheck on Amazon


What Makes a Good Notching Chisel
For most site carpentry, a 1/2-inch chisel is the best starting size. It is narrow enough for small housings and shoulders but wide enough to remove waste efficiently. Add a 3/4-inch or 1-inch chisel when you regularly cut wider notches. A 1/4-inch chisel is useful for corners and narrow slots, but it is easier to damage by twisting.
Choose a bevel-edge pattern for general joinery. The sloped sides reach into square corners better than a thick bench chisel. For rough framing, a firmer chisel with thicker sides is more tolerant of knots, nails and accidental levering. It will not pare a tight corner as neatly, but it is less likely to chip when struck hard.
The handle matters on site. A wood handle feels comfortable and can be replaced, but the end may mushroom or split if you hit it with a steel hammer. A plastic or composite handle with a striking cap is usually the safer choice for repeated mallet work. Avoid using a fine cabinet chisel as a cold chisel; its thin edge is not designed for prying or chopping dirty timber.
Best Chisel Types for Small Notches
| Chisel type | Best use | Main advantage | Limitation |
|---|---|---|---|
| Bevel-edge bench chisel | Clean housings, shoulders and small joinery | Accurate cuts and good corner access | Thin edges dislike twisting and dirty timber |
| Firmer chisel | General framing and deeper notches | Strong blade and useful for striking | Less access in tight corners |
| Heavy-duty framing chisel | Fast waste removal and rough site work | Takes harder blows and abuse | Too bulky for fine fitting |
| Paring chisel | Final trimming by hand pressure | Excellent control and clean surfaces | Not intended for hammering or chopping |
For one-tool buyers, look for a 1/2-inch bevel-edge bench chisel with a striking-cap handle. If your work is mostly rough framing, a 1/2-inch framing chisel is the more sensible choice. Do not pay for a premium presentation set if the chisels will be carried loose in a tool bag and used on construction lumber.
Steel, Edge and Handle Quality
Brand names and steel labels are less important than edge geometry and heat treatment. A useful site chisel should arrive with a reasonably flat back and a bevel around 25 degrees. The first sharpening may need to correct a slightly hollow or uneven back, but it should not require an hour of grinding.
For chopping softwood, a 25-degree primary bevel works well. If the edge chips in hard knots or hardwood, add a small 30-degree micro-bevel. This sacrifices a little ease of cutting but gives the edge more support. Keep the cutting edge keen: a dull chisel needs heavier blows, which increases the chance of splitting the timber or slipping past your layout line.
Check that the blade is firmly seated in the handle and that the striking end is protected. A metal hoop or cap is useful when the chisel is regularly hit with a mallet. A wooden mallet is gentler and gives better feedback, while a steel claw hammer is acceptable for a robust striking chisel but can quickly damage an unprotected handle.
How to Cut a Small Timber Notch
Mark the notch on all visible faces. For a notch 12 mm deep, scribe the depth line clearly and mark the waste with a pencil cross. If the notch affects a structural member, follow the plans and local code; do not deepen it simply because the chisel makes removal easy.
First, score the shoulder lines with the chisel held bevel-side toward the waste. Make several light taps rather than one heavy blow. Then make relief cuts inside the waste, spaced about 6 to 10 mm apart. Stop 1 to 2 mm above the final depth. These cuts break the waste into short sections and prevent the grain from tearing below the line.
Remove the waste by chopping from the end or open side toward the relief cuts. Keep both hands behind the cutting edge and never push toward your supporting hand. Once most of the material is gone, pare to the lines with light pressure. A wooden carpenter’s mallet is worth carrying if you do this work all day.
Common Failures and Buying Mistakes
The most common failure is twisting the chisel to lever out a chip. This rolls the edge, bends a thin blade, or leaves a crushed corner in the notch. Use a wider chisel, more relief cuts, or a pry bar for the final waste instead.
Another mistake is buying a complete inexpensive set when only one or two sizes are needed. Cheap sets can be perfectly adequate for occasional softwood notches, especially if you are willing to sharpen them. Their usual weaknesses are poor factory edges, handles that split under hammering, and blades that lose their edge quickly in knots.
A sensible starter kit is a 1/4-inch, 1/2-inch and 3/4-inch striking chisel, plus a sharpening stone or diamond plate. A wood chisel set with striking caps is fine for a new site kit if the sizes match your work. Spend more on a single frequently used 1/2-inch chisel only when you notice edge retention, comfort or durability becoming a daily problem.
Carrying and Maintaining Chisels on Site
Keep the cutting edges covered in a tool bag. A simple plastic edge guard prevents the blade from damaging other tools and prevents a hand injury when reaching into the bag. Wipe resin and damp sawdust from the steel at the end of the day; a light coat of tool oil helps prevent rust.
Touch up the edge as soon as it stops shaving cleanly. Ten minutes of sharpening is cheaper than forcing the chisel through a notch and damaging the timber. Inspect the edge for chips after hitting a knot or hidden nail. If there is a visible nick, grind it out before returning to fine paring work.