What's inside
As an Amazon Associate I earn from qualifying purchases. This post may contain affiliate links at no extra cost to you.
Measuring a door opening alone is awkward because the tape’s hook has to stay put while you move to the other side to read it. The right tape helps, but technique matters just as much: a long, stiff blade is easier to extend across a jamb, while a compact tape may be easier to carry and more than adequate for short measurements.
As an Amazon Associate we earn from qualifying purchases at no extra cost to you.


Sections
Our Top Picks



Measure the opening, not the door
For a replacement door or a new jamb, measure the rough opening—the framed space between the studs—not just the visible gap inside the existing jamb. Take width measurements near the top, middle, and bottom, and height measurements at both sides. Record the smallest width and height; framing is rarely perfectly square, and the smallest reading is usually the one that limits what will fit.
For an existing door, measure the actual opening where the door will pass, and note whether you need the slab, the jamb, or the rough-opening dimensions. These are different measurements. A door slab is typically smaller than its frame opening, and the required clearance depends on the installation and flooring.
What matters in a tape measure
Blade standout is how far the blade can extend before it buckles. A blade with good standout is easier to hold across a doorway without walking to the far end to support it. Manufacturers’ claims are not always directly comparable, so treat the number as a rough guide rather than a guarantee. For door work, a blade that remains usable at 8 feet is more helpful than one that folds before reaching across a typical opening.
Blade width and readability affect control. Blades around 1 inch wide are generally stiffer than narrow blades of similar construction, but can be heavier and bulkier. Clear, high-contrast graduations help when you are reading from the side or in dim rooms. If you routinely work in metric, buy a metric or dual-scale tape you can read confidently; converting fractions while balancing a blade is an avoidable source of error.
Hook movement is intentional. A loose end hook slides to account for its own thickness when measuring inside versus outside. Don’t assume a moving hook is broken, but check that it moves freely and returns without sticking. A bent hook or loose rivets can throw off readings.
Which type fits the job?
| Type | Solo door-opening work | Trade-off |
|---|---|---|
| Compact 16- to 25-foot tape | Good for most interior openings and general carpentry | Smaller case is easy to carry; shorter or more flexible blades may be harder to span unsupported |
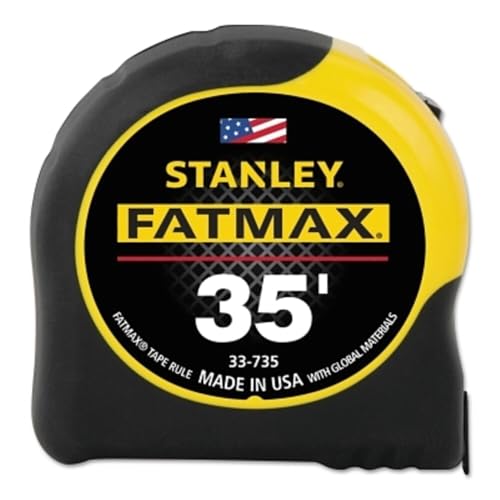
| Wide-blade 25-foot tape | Best all-around choice when you want a steadier reach across a doorway | Typically heavier and bulkier than a compact tape |
| Long 30- to 35-foot tape | Useful for occasional long runs or large layouts | More weight and blade to manage; unnecessary for most single-door measurements |
| Self-centering or specialized tape | Can help with repeated layout tasks | Extra features add cost and do not replace checking both sides of an opening |
For a general-purpose choice, look at a wide-blade 25-foot tape measure. It offers a useful balance of reach, stiffness, and manageable size. A basic 16-foot tape is fine if you only measure interior openings and already know how to keep the blade supported. There is little reason to pay extra for a long tape if your regular work is limited to doors and cabinets.
How to measure an opening by yourself
Start by checking that the hook is undamaged and the blade retracts smoothly. For a width, catch the hook on one jamb and extend the tape across to the other. Keep the blade straight and level; a sagging or bowed blade can give a misleading reading. If the tape’s blade is too flexible to span the opening reliably, support it at the midpoint or use a different method rather than trusting a buckled reading.
When the hook cannot grip the far edge, use the tape’s body against one side and measure to the other, then add the case length. The case length is often printed on the case, but verify it with a ruler before relying on it. For example, if the case is 3 inches long and the blade reads 29 1/2 inches at the far jamb, the total is 32 1/2 inches. This method can be awkward in a tight corner, so note clearly whether the case length was included.
For an inside measurement, some tapes have a case designed for measuring between two surfaces. Hold the case square against one jamb, extend the blade to the opposite jamb, and add the printed case dimension if the scale requires it. Read the instructions for that particular tape; case geometry and markings differ. Do not press the case at an angle, which changes the effective measurement.
Record each reading immediately, label it, and write fractions clearly. A note such as “width—top, 32 3/8 in.” is safer than a row of unlabeled numbers. Measure each position twice if the readings differ or the fit is tight. A difference of 1/8 inch can matter when ordering a close-fitting unit.
Features worth paying for—and those you can skip
A strong belt clip and a case that is comfortable to hold are useful on site. A magnetic hook can stick to steel framing, but it offers little advantage on wood jambs and can collect metal filings. A finger-brake or lock can help control the blade, though a lock does not prevent a weak blade from buckling. For simple door work, prioritize a readable scale, a reliable hook, and enough blade stiffness.
If your measurements regularly exceed the comfortable reach of your tape, a laser distance measure for interior work can reduce the need to hold a long blade across a room. It is less useful when measuring a short, irregular rough opening: the tool needs a clear target, and it may measure diagonally if not held square. For a doorway, confirm the result with a tape when fit is critical.
A low-cost tape is perfectly serviceable for occasional household measuring if its hook is sound, its markings are readable, and it retracts properly. Replace it if the blade kinks, the hook shifts sideways, the lock slips, or the first inches have worn markings. Those faults can make a tape look usable while quietly spoiling measurements. For frequent work, spend more for a stiffer blade and better handling—not features you will not use.