Our Top Picks


What's inside
As an Amazon Associate I earn from qualifying purchases. This post may contain affiliate links at no extra cost to you.
Most new saw owners buy accessories in the wrong order. The tempting purchases are the visible ones: a fancy miter gauge, a dial indicator, a stack dado set. The purchases that actually change your results are duller. A push block, a zero-clearance insert, a blade that matches the material, and something flat and long enough to hold stock against the fence. The right list of table saw accessories for beginners is short, and it is ordered by risk reduction first, cut quality second, convenience last.
The separating criterion for this whole category: does the accessory keep your hands out of the blade path, or does it keep the workpiece from moving where it should not? Anything that does neither is a nice-to-have. Kickback and blade contact are the two failure modes on a table saw, and nearly every worthwhile accessory addresses one of them. Below is the buying order I would give someone at the counter, with the reasoning for each step.
As an Amazon Associate we earn from qualifying purchases at no extra cost to you.



| Accessory | What it actually fixes | Buy it when | Typical spend band |
|---|
| Accessory | What it actually fixes | Buy it when | Typical spend band |
|---|---|---|---|
| Push block or push shoe | Hands near the blade on narrow rips | Day one, before first cut | Low |
| Riving knife / splitter | Board pinching the blade, kickback | Day one if the saw lacks one | Low to mid |
| Combination blade (40-50T) | Burn marks, tearout, slow feed | First week | Mid |
| Zero-clearance insert | Bottom-face tearout, offcut drop | First month | Low (shop-made) to mid |
| Featherboard | Board drifting off the fence | First month | Low |
| Crosscut sled | Repeatable square crosscuts | Once rips feel routine | Low (shop-made) to mid |
| Outfeed support | Long boards tipping mid-cut | When you rip sheet goods | Low to mid |
| Dado stack | Grooves and joinery | Only after joinery projects start | Mid to high |
Sections
Safety first: the table saw accessories for beginners that are non-negotiable
The criterion here is simple. If an accessory is the only thing between your fingers and a spinning blade, it is not optional. In the US, table saws sold new are covered by UL 987 for stationary and fixed electric tools, and modern saws ship with a blade guard, an anti-kickback pawl assembly, and either a splitter or a riving knife. The riving knife is the meaningful one because it rises and falls with the blade and stays close behind it, so it keeps working on non-through cuts where a tall splitter has to come off. If your saw came with those parts in a bag, install them rather than storing them. Most guard-related injuries happen on saws where the guard was removed years earlier and never went back on.
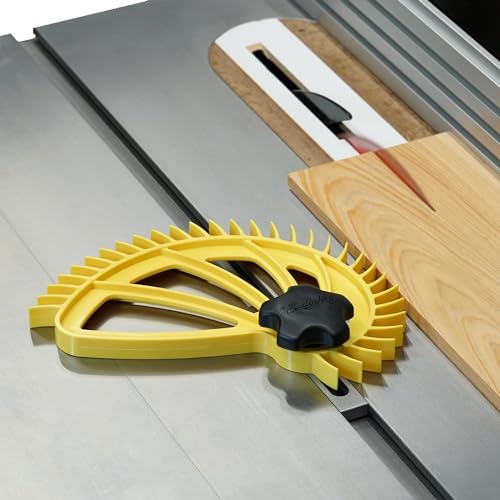
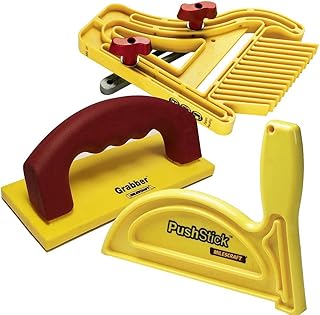
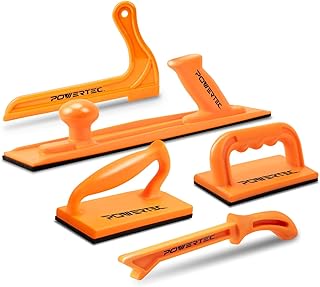
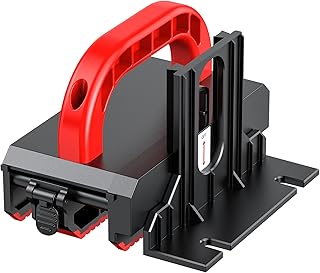
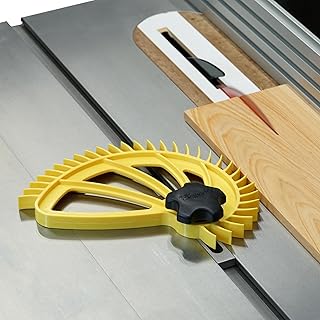
Beyond the factory parts, buy a push shoe with a heel that hooks the back of the board, not just a flat handled paddle. The heel is what lets you drive the stock forward and down at the same time. A pair of them is better than one. Add a magnetic or clamp-on featherboard for the fence-side pressure, and you have covered the two things you cannot do with your hands safely: narrow rips and consistent side pressure.
Eye and ear protection belong in this same tier. Look for eyewear marked ANSI Z87.1 and hearing protection with a published NRR. A contractor saw under load sits in the range where sustained exposure is a real concern, so the muffs are not decoration.
Push Blocks and Featherboards for Table Saws
The honest advice is to spend as little as possible here and buy two of everything. Push shoes are consumables. You will eventually nick one on the blade, and that is the accessory doing its job. Prioritize a non-slip pad and a rear heel over clever adjustability, and check that any featherboard you buy matches your saw’s miter slot profile, since T-slot and plain 3/4-inch slots are not interchangeable.
The blade matters more than the saw
The criterion for blade selection is tooth count versus material thickness, not brand. A 24-tooth flat-top rip blade clears sawdust fast in thick solid stock and leaves a rougher edge. An 80-tooth blade gives a clean crosscut in plywood and melamine but will burn and bog if you feed 2x material through it. For a beginner running one blade for everything, a 40 to 50 tooth ATB combination blade in a 10-inch diameter is the correct compromise, and it will outperform the blade that came in the box on almost any saw under a thousand dollars.
Two specs to check before buying. First, the arbor size, which is 5/8 inch on standard US 10-inch saws. Second, the plate and kerf: thin-kerf blades around 3/32 inch reduce load on lower-horsepower saws, which is most benchtop and contractor saws running on a 15-amp 120V circuit. Full-kerf blades track straighter but want more power. If your saw is a jobsite model, thin kerf is the safer match.
Look for a blade marked with an ANSI-compliant maximum RPM rating above your saw’s no-load speed, and treat any blade without a stamped max RPM as suspect. Carbide grade and grind quality are where the money goes, and it is money well spent, because a good blade lowers feed force, and lower feed force means less reason to push your hand toward the blade.
Accuracy accessories: inserts, sleds, and the flatness problem
The criterion that separates a useful accuracy accessory from a gimmick is whether it removes a variable. A zero-clearance insert removes the gap the blade cuts through, which supports the wood fibers on the underside and stops thin offcuts from dropping into the throat and getting flung. You can buy blanks matched to your saw model or make them from 1/2-inch MDF or Baltic birch, and shop-made is genuinely fine here because the only tolerance that matters is that it sits flush with or a hair below the table.
A crosscut sled removes two variables at once: the miter gauge’s slop and the board’s tendency to creep during the cut. A sled with a fence squared using the five-cut method will hold tighter tolerance than most bolt-on miter gauges in this price range. If you would rather buy than build, look for a miter gauge with an adjustable bar that expands to eliminate slot slop and positive detents you can override.
For fence and blade alignment, a combination square and a cheap dial indicator on a miter-slot base cover the job. The target most manufacturers publish is blade-to-slot parallelism within a few thousandths of an inch across the front and back of the blade, with the fence set parallel or with a whisper of toe-out at the back to reduce pinching.
Zero-Clearance Inserts and Crosscut Sled Hardware
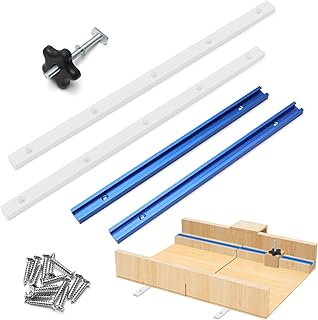
Buy the hardware, build the jig. T-track, adjustable runners, and a good toggle clamp cost a fraction of a finished sled and let you size the sled to your actual saw and shop space. Verify your saw’s throat plate dimensions before ordering pre-cut insert blanks, since even saws in the same product family sometimes change plate geometry between generations.
Support, dust, and the accessories that can wait
The criterion for support accessories is whether the workpiece is ever unsupported during the cut. If the answer is yes, the accessory is not optional either, because an unsupported board tips, binds, and kicks back. Outfeed support behind the blade is the highest-value item here: a folding roller stand, a bolt-on outfeed table, or a plywood surface on sawhorses set a hair below the table height. For sheet goods, a pair of stands plus a breakdown pass with a circular saw and a straightedge is safer than wrestling a full 4×8 sheet across a benchtop saw.
Dust collection is a health item rather than a convenience one. Wood dust is classified as a carcinogen by IARC, and the fine fraction is what stays airborne. A cabinet saw with a 4-inch port and a dust collector is the ideal, but a shop vacuum on the 2.5-inch port plus an over-arm hood catches a meaningful share. If you use a shop vac, add a HEPA-rated filter or a cyclone separator so you are not exhausting the fines back into the room.
- ✔ Push blocks and featherboards eliminate the two most common hand-in-blade situations
- ✔ A 40-50 tooth combination blade improves cut quality on every material immediately
- ✔ Zero-clearance inserts and shop-built sleds cost little and remove real error
- ✔ Outfeed support prevents the tipping that causes most kickback on long stock
- ✘ Dado stacks and specialty jigs sit unused until your projects need joinery
- ✘ Digital angle and fence readouts add cost without fixing alignment problems
- ✘ Aftermarket fences rarely make sense on benchtop saws worth less than the fence
- ✘ Universal accessories often do not fit your saw’s slot or throat plate, so measure first
Frequently asked questions
Do I need a riving knife if my saw already has a splitter? Not necessarily, but understand the difference. A splitter is fixed at full height, so it has to come off for grooves, dadoes, and other non-through cuts, and it often stays off afterward. A riving knife moves with the blade and stays installed for more operations, which is why it is now standard on most newer saws. If your saw predates riving knives and the splitter is inconvenient, an aftermarket thin-plate splitter that mounts in the throat plate is a reasonable middle ground.
Is a stacked dado set worth it for a beginner? It is a mid-tier joinery purchase, not a starter one. A dado stack requires that your saw’s arbor be long enough to accept the full width, and many benchtop and jobsite saws cannot take one at all because the arbor is short and the throat plate is not designed for it. Check your manual first. Until then, you can cut grooves with multiple passes of your standard blade, which is slower but perfectly accurate.
Should I buy a better fence or a better blade first? Blade, without exception. A blade change is immediate, universal, and cheap relative to a fence upgrade, and a sharp well-matched blade reduces the feed pressure that makes a mediocre fence feel worse. Most fence complaints on entry-level saws come down to alignment and locking repeatability, both of which you can improve with a square and ten minutes of adjustment before spending anything.
The buying order, condensed
Start with the factory guard, riving knife, and pawls installed, then two push shoes and a featherboard. Add a 40 to 50 tooth combination blade sized to your arbor and matched in kerf to your saw’s power. Make or buy a zero-clearance insert. Set up outfeed support before you cut anything longer than about three feet. Build a crosscut sled once ripping feels routine. Everything after that, including dado stacks, tenoning jigs, and aftermarket fences, should be triggered by a project that needs it rather than by a sale.
Check prices on Amazon →