What's inside
As an Amazon Associate I earn from qualifying purchases. This post may contain affiliate links at no extra cost to you.
Fine timber fitting often comes down to removing less wood than you think. A door hinge, housing joint, drawer, or mortise may need only a few controlled shavings to fit properly. That is where chisel choice matters. A paring chisel is designed for controlled slicing by hand, while a bevel-edge chisel is a more general-purpose tool that can also chop and take light blows.
Neither is automatically better. The right choice depends on how much wood must be removed, whether the cut is with or across the grain, and whether you need the chisel for rougher work later.
As an Amazon Associate we earn from qualifying purchases at no extra cost to you.



Sections
Our Top Picks
 Narex Richter Paring Chisel With Long HandleOne Size Fits All0 x 0 x 0.1 inches0.4 poundsCheck on Amazon
 Narex Czech Steel Premium Woodworking Cabinetmakers Paring Chisel1.00"0 x 0 x 0.1 inches0.8 PoundsCheck on Amazon
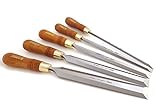
 Narex Premium 5 Piece Set Paring Chisels w/Hornbeam1/4", 1/2", 3/4", 1", 1 1/4"6.37 x 13.5 x 1.5 inches1.63 PoundsCheck on Amazon
What a paring chisel is for
A paring chisel usually has a long, relatively thin blade and a handle intended for pushing by hand. It is commonly used with the bevel facing down when trimming a flat surface, or bevel up when you need to control the cutting angle and avoid digging into the work.
The long blade gives your hand more reach and control. It also lets you register the tool against the timber or work inside a joint without placing your knuckles directly on the surface. Typical sizes run from about 6 mm to 25 mm (1/4 to 1 inch), with narrower blades useful for hinge recesses and wider blades useful for trimming shoulders and broad surfaces.
A good paring chisel excels at:
- Fitting a door or drawer by removing thin shavings.
- Trimming tenon shoulders and cheeks.
- Cleaning the bottom and sides of a housing or dado.
- Paring end grain after most waste has already been removed.
- Fine adjustments where a single shaving makes the difference between a loose and tight joint.
Its limitation is leverage and strength. The thin blade can bend or chip if you twist it in a knot, lever out a large waste section, or strike the handle. If you regularly need to remove substantial waste, a paring chisel is the wrong first tool.
What a bevel-edge chisel is for
A bevel-edge chisel has bevels ground along both sides of the blade. Those bevels reduce the width of the blade near the cutting edge, allowing it to enter dovetails, narrow mortises, and other confined joints more easily than a thick-sided bench chisel.
Most bevel-edge chisels have a sturdier blade and handle than paring chisels. They are designed to be pushed by hand but can usually accept light mallet taps. This makes them useful for chopping a hinge recess, cutting a mortise, removing glue squeeze-out, and then making the final fitting cuts.
For fine timber fitting, the important advantage is versatility. One set can handle layout corrections, joint cleanup, and moderate chopping. The disadvantage is that the shorter blade and more compact handle provide less reach and less delicate control. A bevel-edge chisel can do paring work, but it may feel clumsy when you are trimming a surface flush over a long distance.
Paring chisel vs bevel-edge chisel
| Feature | Paring chisel | Bevel-edge chisel |
|---|---|---|
| Primary use | Controlled hand paring and final fitting | General joinery, light chopping, and fitting |
| Blade | Long, thin, and usually lighter | Shorter and more robust |
| Mallet use | Usually not recommended | Suitable for light to moderate taps |
| Control | Excellent for thin, accurate shavings | Good, but less refined in extended paring cuts |
| Strength | More vulnerable to bending and twisting | Better for chopping and stubborn fibres |
| Best first purchase | Specialist addition for fine work | More useful as an all-round set |
Which chisel should you buy?
If you are building a first hand-tool kit, buy a set of bevel-edge chisels before buying paring chisels. A practical range is 6, 12, 18, 25, and 32 mm (1/4, 1/2, 3/4, 1, and 1 1/4 inches). You can use the smaller sizes for hinge and lock work, the middle sizes for general joinery, and the wider sizes for cleaning broad shoulders.
Look for a set with reasonably thick blades, comfortable handles, and backs that can be flattened without removing excessive metal. A plastic or composite handle is often sensible on site because it tolerates occasional mallet work and knocks. If you want a general-purpose set, compare bevel-edge wood chisel sets.
A paring chisel becomes worthwhile when your work includes frequent cabinetmaking, fine furniture, fitted interiors, or repeated joint adjustment. You do not need a complete set immediately. A 12 mm or 19 mm (1/2 or 3/4 inch) chisel covers many trimming jobs, while a 25 mm (1 inch) blade is useful for broad shoulders and surface fitting. See paring chisels for woodworking if you are adding one to an existing set.
The cheaper option is fine when the chisel will mainly trim doors, clean up ordinary joints, or work on construction timber. You will gain more from learning to sharpen it properly than from paying for a specialist paring chisel. A premium paring chisel is easier to control and may hold an edge well, but it cannot compensate for poor marking, a blunt edge, or trying to remove too much wood in one cut.
How to use either chisel for fitting
Mark the waste clearly with a sharp knife or marking gauge. Remove the bulk with a saw, router, or heavier chisel, leaving roughly 0.5 to 1 mm (1/64 to 1/32 inch) for final fitting. Trying to pare away 3 or 4 mm in one pass encourages the edge to dive below the line or follow a weak grain run.
Take light cuts and check the fit often. On a hinge recess, cut the perimeter first, chop shallow chips inside the boundary, then pare the floor level. On a tenon, remove high spots rather than reducing the entire surface blindly. Keep the bevel in the position that gives the best control, and support the work close to the cut to prevent vibration and breakout.
When paring end grain, start from both edges toward the centre if the cut risks breaking out. When cutting across grain, score the shoulder deeply before removing waste. A backing board or sacrificial block is cheap insurance at the exit side.
Sharpening and maintenance
For fitting work, a usable edge is more important than a particular sharpening system. A primary bevel around 25 degrees with a small secondary bevel around 30 degrees is a practical general-purpose setup. Hone whenever the chisel stops making clean, continuous shavings; do not wait until it feels completely blunt.
Flatten only the first 25 to 40 mm (1 to 1 1/2 inches) of the back to a consistent surface. Keep the edge protected in a rack or roll, and never leave a chisel loose in a tool bag where it can strike a tape measure or hammer. A bevel-edge chisel will tolerate more abuse, but both types cut poorly after a single visible nick.
For most carpenters, the sensible combination is a dependable bevel-edge set for everyday work and one good paring chisel for the final, high-control cuts. That covers both the heavy removal and the last fraction of a millimetre without forcing either tool outside its strengths.