What's inside
As an Amazon Associate I earn from qualifying purchases. This post may contain affiliate links at no extra cost to you.
Chopping chisels and paring chisels may have the same bevel-and-edge shape, but they are built for different kinds of work. A chopping chisel removes waste under mallet blows. A paring chisel takes controlled shavings, usually pushed by hand. For fitting a timber joint, the useful choice is rarely one or the other: a chopping chisel gets the joint close, and a paring chisel brings the fit in carefully.
As an Amazon Associate we earn from qualifying purchases at no extra cost to you.



Sections
Our Top Picks
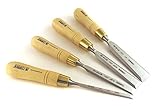
 Narex Czech Steel Premium 4 pc Set True1/4", 1/2", 3/4", 1"6.38 x 13.5 x 1.5 inches1.63 poundsCheck on Amazon


What the names mean
A chopping chisel is meant to withstand impact. It typically has a sturdy blade and a handle designed to take a wooden or plastic mallet. It is used to remove waste from a mortise, deepen a housing, or pare a rough shoulder after chopping. A bench chisel is often the practical all-rounder in this category.
A paring chisel is designed for fine, hand-powered cuts. Its longer, slimmer blade gives control when trimming a tenon cheek, easing a tight joint, or shaving a shoulder to a line. Do not strike one with a mallet unless its maker specifically says it is suitable; the handle or blade can be damaged, and the extra force makes a delicate cut harder to control.
At a glance
| Feature | Chopping chisel | Paring chisel |
|---|---|---|
| Power source | Mallet blows, with hand pressure for light cuts | Hand pressure |
| Typical build | Shorter, sturdier blade and impact-ready handle | Longer, slimmer blade for reach and control |
| Best joint tasks | Removing mortise or housing waste; trimming rough shoulders | Fine-tuning cheeks, shoulders, and joint fit |
| Main risk | Overcutting past the layout line | Taking too heavy a cut or damaging the tool with a mallet |
Which tool for the joint
For a mortise-and-tenon joint, chop the mortise waste with a chisel narrow enough to work inside the layout lines. Take shallow cuts, commonly about 3–5 mm at a time, rather than trying to drive the blade through the full depth. Leave a small margin at the ends and clean up to the knife lines in controlled cuts. A 12 mm or 19 mm chisel covers many furniture and general carpentry jobs, but choose a width that suits the joint rather than forcing a wide blade into a narrow mortise.
Use a paring chisel when the tenon is nearly right and needs a thin shaving removed from its cheek or shoulder. Work from the high spot toward the line, checking the fit often. If the tenon jams halfway into the mortise, do not hammer it home: the joint may split, or the tenon may get stuck. Mark the contact points with pencil, remove the tenon, and pare only where it is rubbing.
For a housing or rebate joint, a chopping chisel clears most of the waste. A paring cut can then level the bottom or refine the wall. On large framing joints, a broad chisel may be useful, but a hand plane or router plane can produce a flatter surface more efficiently when there is enough room to use one.
Buying the right size
If you are starting with one set, buy ordinary bench chisels rather than a specialist long paring chisel. A bench chisel set gives you impact-capable tools that can also be pushed by hand for moderate paring. A useful spread is 6, 12, 19, and 25 mm (¼, ½, ¾, and 1 inch). A smaller 3 mm chisel is handy for narrow details, but it is not essential for most timber joints.
A dedicated paring chisel makes sense if you regularly fit fine joinery, need extra reach, or want a tool reserved for clean finishing cuts. For occasional door repairs, framing, or rough site work, a good bench chisel is usually better value. Spend some of the budget on sharpening supplies: a blunt expensive chisel is less useful than a sharp, modestly priced one.
Technique and common failures
Register the bevel against the waste when you need to control depth, and keep the cutting edge just inside the marked boundary. With a mallet, use firm, measured taps and clear waste in layers. A single heavy blow can split the timber at the end of a mortise or bruise the surface beyond the joint. Knife lines help define a crisp shoulder; pencil lines are easier to see but less resistant to tear-out.
When paring, keep both hands behind the edge and use short, controlled pushes. A paring chisel is not a pry bar. Twisting it to lever out a chip can chip the edge or bend a thin blade. Remove bulk waste with a chopping chisel, drill, or saw first, then pare the remaining high spots. For cross-grain cuts, work toward the middle from both ends where possible; cutting straight through from one end can break out the far edge.
Check sharpness on scrap of the same timber. If the edge crushes fibres instead of slicing them, hone it before fitting the joint. A basic bevel angle around 25–30 degrees suits many general-purpose chisels; a steeper secondary bevel can add durability for harder use, though it takes slightly more effort to push by hand. Keep the back flat near the edge and avoid changing the bevel angle randomly during honing.
Care and tool choice
Protect the cutting edge between jobs, wipe the blade dry after use, and do not leave a chisel loose in a tool belt where it can strike other steel. A simple edge guard matters more than a premium handle finish on a site tool. If the work involves frequent mallet use, check that the handle and ferrule are intended for impact; an attractive paring handle may not be.
For one-off joint fitting, use the sharpest suitable chisel you already own and remove material gradually. Buy a dedicated paring chisel only when the control and reach solve a recurring problem. The best-fitting joint comes from accurate layout, sharp edges, and repeated test fits—not from forcing either style of chisel to do the other’s job.