What's inside
As an Amazon Associate I earn from qualifying purchases. This post may contain affiliate links at no extra cost to you.
Sections
Our Top Picks
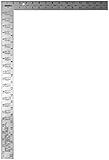
 Johnson Level & Tool CS9 Steel Framing Square16" x 24"24 x 19 x 0.06 inches1.4 poundsCheck on Amazon


Choosing the Right Square for Timber Steps
For laying out timber steps, a framing square is usually the better primary tool. Its large 24-by-16-inch body reaches across common stair boards, makes the rise-and-run layout easy to see, and accepts stair gauges that repeat the same dimensions on every tread and riser.
A combination square is smaller and more versatile. It is excellent for checking 90- and 45-degree cuts, marking short crosscuts, setting a consistent line from an edge, and checking the depth of a housed joint. It can lay out a small step or help with detail work, but its short blade makes full stringer layout slower and more prone to cumulative error.
As an Amazon Associate we earn from qualifying purchases at no extra cost to you.



The sensible approach is not necessarily to buy both at once. If you are building a normal straight flight with cut stringers, buy a solid framing square with stair gauges first. Add a combination square if you do regular joinery or need a compact marking tool for general carpentry.
What Each Square Does Best
A framing square has a long blade and shorter tongue joined at a right angle. On a stair stringer, the long blade commonly represents the run and the tongue represents the rise. Stair gauges clamp to both legs, allowing you to slide the square along the board and mark repeated notches.
For example, if the finished stair design calls for a 7-inch rise and a 10-inch run, set one gauge at 7 inches and the other at 10 inches. Place the square against the stringer edge, mark both lines, then move it to the next position. The gauges preserve the setting, so you are not measuring each step independently.
A combination square normally has a 12-inch rule mounted in a sliding head. The head can be locked at a chosen distance, and many versions include a small level and a scriber. It excels at marking a line 2 or 3 inches from an edge, checking whether a cut end is square, and transferring a measurement to a narrow component.
Its limitation is reach. A 7-inch rise and 10-inch run will fit within a combination square’s rule, but the head and rule are less stable when spanning a wide stringer. You also have to reset or carefully relocate the tool for every step. A small error of 1/16 inch repeated across ten steps can produce a visibly poor fit at the top.
Framing Square vs Combination Square
| Feature | Framing square | Combination square |
|---|---|---|
| Best stair use | Repeated rise-and-run layout on stringers | Short marks, checks, and detail work |
| Typical size | About 24 by 16 inches | Usually a 6- or 12-inch rule |
| Repeatability | Excellent with stair gauges | Good, but requires careful repositioning |
| Portability | Bulky in a tool belt | Easy to carry and use one-handed |
| Other useful jobs | Rafter layout, sheet goods, large framing cuts | Crosscuts, mortises, shelves, cabinet and furniture work |
| Common failure | Out-of-square frame or damaged edge | Short reach and accidental setting changes |
Laying Out Stringers with a Framing Square
Start by calculating the actual rise and run rather than copying a convenient internet example. Measure the total finished height from the lower finished surface to the upper finished surface. Divide that height into a practical number of risers, then check that the resulting rise and run comply with local building rules. The first and last risers are affected by flooring and tread thickness, so do not ignore those layers.
Use a straight, stable stringer blank. A nominal 2-by-12 is only about 1 1/2 inches thick and 11 1/4 inches wide, which may not leave enough material below deep notches. Mark the starting point with the correct allowance for the landing and tread overhang. Set the stair gauges firmly, with the rise on the tongue and the run on the blade, then keep the same orientation throughout the board.
Hold both square legs tight to the stringer edge. Mark the first tread and riser lines with a sharp pencil or knife. Slide the square until the next run line meets the previous riser line, then mark again. Before cutting, use a stair stringer layout tool only as an aid, not as a substitute for checking the arithmetic and finished dimensions.
Do not cut through the inside corners of the notches with a circular saw. Stop short and finish the corners with a handsaw or sharp chisel. Overcutting weakens the stringer, and a shallow overcut can become a crack under load. After cutting one stringer, use it as a pattern for the others, then compare all of them before installation.
Where a Combination Square Helps
A combination square is useful after the main layout is complete. Set it to the tread thickness and mark the offset on the stringer if you need to account for nosing or a separate tread. It can also check that each riser cut is square across the board and that the ends of the stringers are cut to sit flat on the landing.
It is particularly handy for closed-stringer work, where you are marking housings, cheek lines, or small blocks rather than open notches. A 12-inch rule is more useful than a 6-inch version for stair work, although the longer rule is easier to knock out of position.
Choose a model with a head that locks without wobble and a rule with clear, etched graduations. Cheap combination squares can be fine for rough layout, but test one before trusting it: draw a line along the head, flip the square, and draw back against the same edge. If the lines diverge, the square is not reliable enough for precision work.
Which One Should You Buy?
Buy a framing square if the job involves full-size stair stringers, roof work, or repeated layout on wide stock. A basic stamped-steel square is often sufficient; you do not need an expensive stainless model for one staircase. Stair gauges are inexpensive, but they must clamp tightly and stay perpendicular to the square legs.
Choose a combination square if the steps are small, the layout is mostly repair work, or you already own a reliable framing square. It is also the better everyday tool for a carpenter who does more cabinet, shelving, and joinery work than stair building. Either way, verify the square against a known straight edge before laying out expensive timber.