What's inside
As an Amazon Associate I earn from qualifying purchases. This post may contain affiliate links at no extra cost to you.
Sections
Best Craftsman Table Saw Fence Upgrades: Fit and Installation
The best Craftsman table saw fence upgrade for most owners is a universal T-square fence system sized to the saw’s actual table and rail layout—but it is only a good fit if you can mount its rails securely and keep them clear of the motor, wings, and stand. If you want less modification, first look for a compatible fence made for your saw’s model family; if you need only better everyday accuracy, repairing and aligning the existing fence may be the simplest upgrade.
“Craftsman table saw” covers many machines, including older belt-drive contractor saws and compact benchtop models. Their rails and mounting holes are not interchangeable by brand name alone. Before buying a replacement fence for a Craftsman table saw, find the model number, measure the table and rail spacing, and check how the fence locks. A model-specific fit is more dependable than assuming a fence will bolt on because both products say Craftsman.
As an Amazon Associate we earn from qualifying purchases at no extra cost to you.
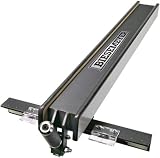

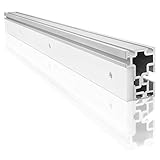
Compare the upgrade routes
The figures below are practical sizing examples, not guaranteed specifications for every saw or fence. Check the manufacturer’s current drawing before ordering: advertised maximum rip capacity is not proof that the rails fit your machine.
| Upgrade route | Typical rail span | Potential rip capacity | Alignment potential | Installation effort | Modification risk |
|---|---|---|---|---|---|
| Repair and tune the original fence | Uses existing rails | Unchanged; commonly limited by the saw’s original layout | Good if the fence body and locking parts are sound | Low; about 30–90 minutes | Low |
| Model-specific replacement fence | Set by the matched kit | Often retains the saw’s original capacity | Good when rails and fence are designed for the exact saw family | Low to medium; about 1–3 hours | Low to medium |
| Universal T-square system | Common kits use roughly 30–50 in. rails | Often marketed for 24–36 in. cuts to the right, depending on kit and table | High when rails are straight, securely mounted, and calibrated | Medium to high; about 3–6 hours | Medium to high |
| Custom rail and fence setup | Cut to the saw and shop layout | Limited by rail length, support, and available space | Varies with fabrication and setup quality | High; several hours or more | High |
For a reference point, Delta’s commonly sold Biesemeyer-style T-square fences use a front-rail-and-fence arrangement designed for cabinet-style saws. That makes a Delta table saw fence upgrade a possible route for a Craftsman cabinet saw, but not an automatic bolt-on solution for a compact or older Craftsman. Confirm rail dimensions, mounting-hole locations, fence travel, and clearance before committing.
Choose by saw and workload
- Compact benchtop saw, occasional DIY: Keep the factory rail system if it is straight and secure. Tune the fence and add a measuring scale or suitable auxiliary face rather than installing long rails that overhang a small stand.
- Older contractor saw, frequent sheet-goods work: Consider a universal T-square kit if the table can support its rails. The longer front rail can improve repeatability and expand right-side capacity, but wide cuts may require a stable outfeed support.
- Cabinet saw with compatible mounting points: A matched replacement or established T-square system is usually the cleaner route. Verify the rail kit is intended for the table width and extension-wing arrangement.
- Limited budget or uncertain compatibility: Measure and tune first. A fence that locks inconsistently may need cleaning, adjustment, or replacement wear parts; spending on rails will not fix a damaged table edge or unstable saw base.
- Newer saw sold under another brand: Treat a Skil table saw fence upgrade or Bosch table saw fence upgrade the same way: identify the exact model and rail interface. Brand-family similarity is not enough to establish fit.
As a rough market guide, simple replacement or repair parts can cost from a few tens of dollars to around $150, while complete universal fence-and-rail systems are often several hundred dollars. Model-specific availability varies, especially for discontinued saws. Include shipping, fasteners, a measuring scale, and any needed support in your budget.
Check fit before ordering
- Record the model and table size. Look for the model label on the saw cabinet or frame. Measure the tabletop from front to back and across its working width; note any extension wings.
- Map the current rails. Measure the front and rear rail positions, hole spacing, rail height, and how far the fence must travel. Check whether the rear rail is structural or merely a guide.
- Check clearances. Move the blade through its full height and bevel range. Confirm the proposed rails will not interfere with the handwheels, motor, belt cover, switch, mobile base, or fence storage.
- Calculate useful capacity. The usable rip width is the distance from the blade’s intended cutting line to the fence face at its farthest stable position—not the rail’s advertised length. Also check whether the fence remains supported and locks reliably at that position.
- Confirm the mounting method. Prefer existing holes or manufacturer-approved brackets. If drilling is necessary, make sure the table or rail material can safely accept it; do not drill through a casting or into hidden mechanisms without confirming clearance and suitability.
A longer rail can be a poor upgrade in a crowded shop. For instance, moving from a 24-inch to a 30-inch usable cut adds 6 inches of capacity, but may require roughly 6 inches more rail projection and room for a wider workpiece. If that space is rarely available, the extra capacity may be less valuable than a fence that is easier to align and store.
Installation: prioritize straightness over speed
- Unplug the saw and remove the blade or lower it fully. Clear the table and support the saw so it cannot shift while you work.
- Install the front rail loosely. Use the specified hardware, then align the rail parallel to the table’s front edge. Shim only where appropriate for the system; do not force a bowed rail flat by overtightening.
- Fit the rear rail and check coplanarity. A straightedge can reveal a rail that twists or sits high enough to catch stock. Adjust before tightening.
- Set the fence to the blade. Check alignment at the front and rear of the blade using a reliable measuring tool or dial indicator. Follow the saw and fence manuals for the appropriate reference points and tolerances.
- Check the lock and scale. The fence should clamp consistently without being pushed into alignment by hand. Set the scale only after the fence is aligned; confirm it with a test measurement from blade to fence face.
- Make a safe test cut. With guards and riving knife installed where applicable, use scrap stock and a push stick. Verify the cut width and inspect for binding before using the full capacity.
Do not use a fence that drifts, lifts, or fails to lock at both ends. A fence that is slightly out of parallel can pinch stock against the blade; a calibration problem is not something to work around by changing feed technique.
What wears, and how to keep the upgrade accurate
On older fences, common trouble spots include a worn locking cam, loose handle, damaged contact pads, and a bent or dented rail. Dust and resin can make a fence feel sticky or prevent repeatable clamping. Clean the rail and sliding surfaces with a dry cloth, and use only a lubricant approved by the fence maker; oily residue can collect sawdust and transfer to workpieces.
Check alignment after moving the saw, changing rail hardware, or removing an extension wing. Also recheck it if the fence begins to lock differently at opposite ends. Avoid lifting or dragging the fence by its lock handle, and don’t use the fence as a workpiece clamp. These habits help preserve calibration and reduce wear.
Bottom line: For a Craftsman saw with sound rails and modest needs, tuning the original fence is the least disruptive upgrade. For regular, accurate ripping, a model-matched replacement is preferable when available; a universal T-square system makes sense when measurements confirm the rails can be mounted and supported. Buy by model, dimensions, and installation plan—not by brand label or advertised capacity alone.