What's inside
As an Amazon Associate I earn from qualifying purchases. This post may contain affiliate links at no extra cost to you.
For accurate paring, the important difference is not simply whether a chisel looks thin or has a polished back. It is which surface you can register against the work, and how much control the bevel gives you when removing the last few fibres.
A flat-back chisel has one broad, flat reference face and a bevel on the opposite face. A bevel-back chisel has bevels on both sides, or a noticeable bevel on the back edge as well as the cutting-side bevel. That small change affects access, stability, and the kind of joint work the chisel suits.
As an Amazon Associate we earn from qualifying purchases at no extra cost to you.


Sections
Our Top Picks
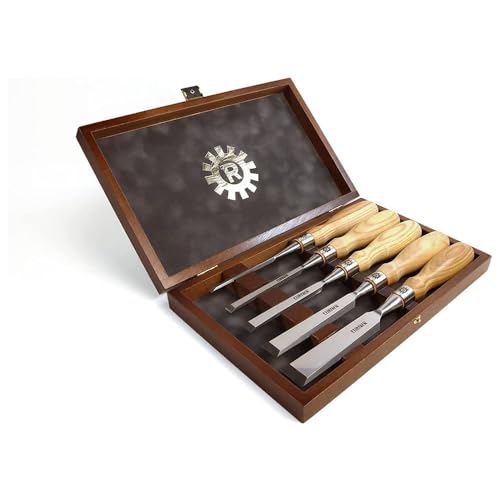


The Basic Difference
With a flat-back chisel, the back can be held against a shoulder, wall, or layout line. Push the chisel forward with the flat face down and the cutting edge removes material at a predictable angle. This is the easiest arrangement for chopping a flat-bottomed recess and for paring to a marked line.
A bevel-back chisel has less metal behind the cutting edge. The rear bevel lets the chisel enter tight corners, especially in dovetail sockets and narrow hinge gains. It also reduces friction when the tool is tilted slightly. The trade-off is that the back is no longer a broad, dependable reference surface.
Terminology varies between manufacturers. Some sellers call a chisel with a lightly relieved back a “bevel-back” chisel, while others reserve the term for a chisel bevelled on both faces. Inspect the tool rather than relying on the name. For accurate paring, the shape of the back near the edge matters more than the label.
How Each Type Behaves While Paring
A flat-back chisel is generally the safer choice when the job requires a straight wall or a shoulder that must remain square. Place the back against the surface, keep the handle low, and take thin cuts. The flat face resists rocking, so a beginner can maintain a more consistent line.
The main failure mode is using the chisel as a lever. Even a strong bench chisel can bruise the reference surface or twist the edge if you pry sideways. Pare in cuts of roughly 0.5 to 1 mm when approaching a finished line. If the tool starts cutting below the mark, stop and check the angle rather than forcing it.
A bevel-back chisel is more manoeuvrable. Tilting it changes the cutting depth quickly, which is useful for easing the corner of a dovetail or cleaning glue from a cramped joint. It can also make a controlled skew cut because the bevels slide over the work rather than presenting a large flat area.
That manoeuvrability makes it less forgiving. A slight roll of the handle changes the edge position, and the back bevel can cause the chisel to ride away from a shoulder. On a 10 mm-wide chisel, a few degrees of tilt can shift the cutting point by roughly 1 mm—enough to spoil a visible joint.
Bevel-Back vs Flat-Back Chisels
| Feature | Flat-back chisel | Bevel-back chisel |
|---|---|---|
| Best reference surface | Broad, flat back | Limited by the rear bevel |
| Paring to a straight shoulder | Excellent and predictable | Good with practice, but easier to undercut |
| Access into dovetail corners | Restricted by square sides | Very good, especially with narrow blades |
| Resistance to rocking | High | Lower |
| Typical edge thickness | Often more robust | Often slimmer and more delicate |
| Best buyer | General furniture and site work | Dovetails, fine joinery, and restricted access |
Which Type Should You Buy?
For a first set, choose flat-back bench chisels in useful sizes such as 6, 10, 12, 19, and 25 mm. This covers small housing joints, hinge recesses, mortises, and general fitting. A 19 mm chisel is a practical all-rounder; a 6 mm blade is useful for narrow corners but is easier to bend or damage.
A bevel-back set is worth considering if you regularly cut dovetails or pare inside tight corners. Look for bevel-edge woodworking chisels with sides that are genuinely narrow enough to enter the work. Decorative side bevels are not a substitute for a thin profile.
The cheaper option is fine when you are doing construction carpentry, fitting doors, or chopping utility mortises. A modest flat-back chisel with a sound edge will do accurate work if you sharpen it properly. Paying more usually buys better steel, flatter backs, cleaner side grinding, and improved handle durability—not automatic accuracy.
Setup Matters More Than the Label
Before judging either style, flatten the back immediately behind the edge. You do not need to polish the entire back. A flat, polished strip 10 to 20 mm wide is normally enough for a paring chisel, provided it remains flat across the blade.
Set a primary bevel around 25 degrees and add a small 30-degree honing bevel if the steel supports it. For delicate paring, a 25-degree edge cuts easily but can crumble in hard oak. A 30-degree honing bevel is a sensible compromise. Hone whenever the chisel stops producing a clean shaving; repeated heavy grinding wastes more metal and changes the geometry.
Check the edge under good light. A bright line along the cutting edge means it is still rounded or dull. Remove that line with a few controlled strokes, then strop lightly if desired. Do not over-round the edge: a curved tip makes it difficult to start exactly on a knife line.
Technique for Accurate Results
Mark the waste side with a knife, not just a pencil. Start 1 to 2 mm away from the line with the bevel facing the waste, then work toward the mark with progressively lighter cuts. For a flat-back chisel, use the back as your registration face only after the waste is removed; forcing it into untouched material can lever fibres out.
With a bevel-back chisel, keep one hand on the blade or ferrule and use the other to steer the handle. Make short paring strokes rather than long pushes. Test the fit frequently. If a joint is tight at one end, remove only the high spot instead of widening the whole recess.
In practical terms, buy flat-back chisels for predictable general-purpose paring and bevel-back chisels as a specialist addition when access and corner clearance matter. A sharp, well-supported edge in the right size will outperform an expensive chisel used with the wrong reference face.