What's inside
As an Amazon Associate I earn from qualifying purchases. This post may contain affiliate links at no extra cost to you.
Timber window and door repairs call for control more than brute force. You may need to lift paint from a hinge recess, pare a rotten edge back to sound wood, or clean up a mortise without widening it. A suitable chisel set should hold an edge, feel manageable in confined work, and include the widths you will actually use. A large set is not automatically a better buy.
As an Amazon Associate we earn from qualifying purchases at no extra cost to you.


Sections
Our Top Picks
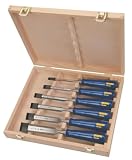
 IRWIN Tools Marples High-Impact Chisel Set3 Piece12.63 x 5.75 x 1.3 inches2.05 poundsCheck on Amazon


What a repair set needs
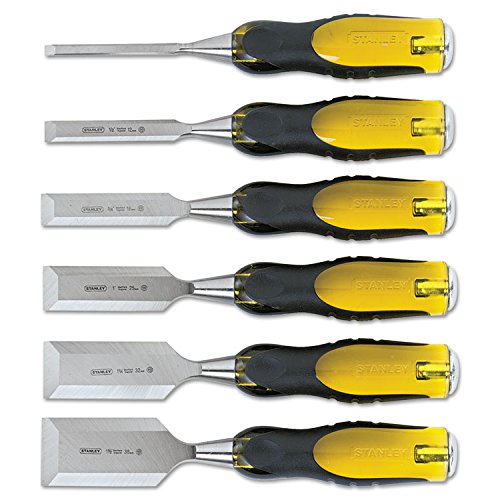
For most household repairs, a set covering roughly 6, 12, 19 and 25 mm (¼, ½, ¾ and 1 in) is a useful starting point. The narrow chisel reaches hinge corners and small mortises; the wider ones remove material and pare shoulders. A 32 mm chisel can help with broad, flat work, but it is less essential for typical window and door repairs.
Look for straight, even bevels, a blade that sits securely in its handle, and a comfortable grip. A bevel-edge chisel is versatile for getting into corners. A firmer, thicker-bladed chisel tolerates heavier work, but is less nimble for fine fitting. Handles should suit the way you work: a wooden handle is pleasant for controlled mallet taps, while many plastic or composite handles take rougher site use well. Check the maker’s guidance before striking any handle with a mallet.
Which type makes sense?
| Type | Best use | Trade-off | Good fit for |
|---|---|---|---|
| Entry-level bevel-edge set | Occasional fitting and light repairs | May need more frequent sharpening; edge retention varies | Homeowners doing a few jobs a year |
| Mid-range bevel-edge set | Regular trimming, hinge work and joinery repairs | Costs more, but usually offers more consistent grinding and handles | Frequent DIY and general carpentry |
| Individual higher-quality chisels | Precise paring and repeated use | Higher cost per tool; you must choose widths separately | Repair work where a dependable edge matters |
| Heavy-duty firmer set | Removing sound wood or cleaning robust mortises | Bulkier and less suited to fine corner work | Rough carpentry, not delicate paint-line work |
What to buy for your workload
If you are repairing one sash or rehanging a door, a modest four-piece set is usually enough. A budget bevel-edge wood chisel set is fine when the work is light and you are willing to sharpen it before use. Many chisels arrive with an edge that is adequate for rough trimming but not clean paring. Hone the bevel and flatten at least the first part of the back before trusting it on a visible surface.
For regular work, a better-ground set can save time and frustration. Consider a mid-range bevel-edge chisel set if you expect to use the tools weekly. You are paying for more consistent steel, fit and finish—not immunity from sharpening or careless use. If you already own a useful set, buying one good 12 mm or 19 mm chisel individually may be better value than replacing everything.
For heavy mortise work, choose a firmer chisel set only if you genuinely need the thicker blades. For a window bead, hinge recess or small repair, a bulky chisel can be harder to steer and more likely to bruise adjacent timber.
Use the chisel without enlarging the damage
Before cutting, remove loose paint and identify the edge of sound wood. Old paint may contain lead; test or follow local safe-work guidance before sanding or scraping it. Clamp the work where possible, and protect glass with a rigid shield rather than relying on care alone. Keep your free hand behind the cutting edge, never in its path.
On a hinge recess, make shallow cuts across the grain at the boundary first, then pare toward the waste in thin layers. A 12 or 19 mm chisel often gives better control than a wide blade. If the hinge sits proud by 1 mm, do not try to remove that depth in one hit. Take several controlled cuts and test the fit; an oversized recess can leave the hinge loose and the door poorly supported.
For local rot, cut back to firm timber rather than chasing a neat shape through soft fibres. A sharp edge should slice cleanly; if it crushes fibres or needs force, stop and hone it. Avoid levering sideways with the blade, which can chip the edge or split sound wood. Use a screwdriver or a small pry tool for lifting hardware, not the chisel tip.
Sharpening and storage
A basic sharpening setup is enough: a coarse method for repairing a damaged edge, a medium stone or abrasive, and a fine stone or strop for finishing. Keep the bevel angle consistent—many general-purpose chisels are around 25 degrees, though the maker’s specification should take priority. A tiny secondary bevel can make honing quicker, but an overly steep edge is less effective for paring.
Wipe blades dry after work, especially when using water-based sharpening stones, and store them so edges cannot knock together. A roll or fitted case is useful on site; loose chisels rattling in a tool bag lose their edge and can cut into other kit. Replace a badly mushroomed striking cap if the maker permits it, and do not strike a handle that is cracked or loose. Spending a little time on maintenance is usually a better upgrade than buying extra widths you rarely use.