What's inside
As an Amazon Associate I earn from qualifying purchases. This post may contain affiliate links at no extra cost to you.
Rails and stiles reward a controlled hand plane. Their long, narrow faces show every hollow, cross-grain scrape, and over-aggressive shaving, especially after glue-up or machining. The best plane is not necessarily the most expensive one. It is the plane you can set for a fine cut, hold flat on a relatively small workpiece, and sharpen without hesitation.
As an Amazon Associate we earn from qualifying purchases at no extra cost to you.



Sections
Our Top Picks
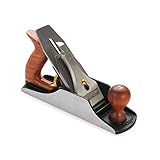
 Stanley 1-12-204 Smooth Plane Handyman No. 4250mm10.43 x 2.56 x 5.91 inches3.7 PoundsCheck on Amazon


What to look for in a rail-and-stile smoothing plane
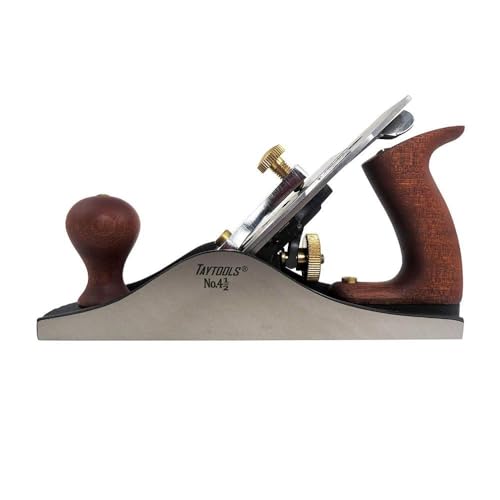
For most hardwood door, cabinet, and furniture work, a No. 4-size smoothing plane is the best starting point. Its roughly 2-inch-wide iron covers common rail and stile faces without feeling unwieldy. A standard-angle plane with a 45-degree bed handles most straight-grained hardwoods and is easier to use as an all-purpose tool than a specialized low-angle plane.
Pay attention to the mouth opening and adjustment system. A tight mouth helps prevent thin shavings from diving into reversing grain, although it does not cure severe tear-out by itself. You want an iron that can project just a few thousandths of an inch for a finishing cut. If the plane only takes thick shavings even when the adjustment is backed off, it will be frustrating on narrow parts.
The sole should be flat enough for the job, but absolute perfection is unnecessary. A plane used for final smoothing needs a reliable sole around the toe, mouth, and heel. Small areas of daylight elsewhere matter less than a sole that rocks or a mouth with a damaged edge. A comfortable tote and front knob also matter because smoothing involves many light, repeated passes.
Best plane types for smoothing hardwood
| Plane type | Best use | Main advantage | Limitation |
|---|---|---|---|
| No. 4 smoother | General smoothing of rails and stiles | Balanced size and fine-cut control | Can tear out in difficult grain at standard pitch |
| Low-angle smoother | Hard, figured, or reversing grain | Lower cutting angle and often easier mouth adjustment | Still may need a higher-angle setup for very difficult grain |
| Block plane | End grain, shoulders, and small touch-ups | Compact and easy to hold one-handed | Too narrow and short for efficient face smoothing |
| Jack plane | Removing noticeable stock before final smoothing | Works faster when parts are proud or uneven | Usually too aggressive for the final surface |
A quality No. 4 hand plane is the sensible purchase for one-plane users. A good vintage plane can be excellent, but budget time for flattening the sole, cleaning the frog, replacing missing hardware, and fitting or sharpening the iron. A new premium plane costs more but usually saves setup time.
Choosing for hardwood and difficult grain
Hardness alone does not determine difficulty. Straight-grained maple can plane cleanly, while a softer piece of figured cherry can tear badly. Inspect the surface and plane in the direction that produces continuous shavings. On a rail, grain direction can change near a joint or cathedral figure; do not assume the best direction is the same along the entire piece.
For reversing or interlocked grain, a low-angle plane with a sharp iron is often the easiest option. A low-angle block plane works for localized trouble and end grain, but its short sole can follow dips instead of removing them. For broad faces, choose a low-angle bench plane or a standard plane fitted with a higher-angle frog or specialized iron.
Set the iron for a shaving around 0.002 to 0.005 inch thick when finishing. If tear-out appears, reduce the projection, close the mouth if possible, skew the plane slightly, and take a diagonal or cross-grain pass only when you can remove the resulting marks. A high cutting angle can help, but it also increases pushing effort. On dense hardwood, that trade-off is real.
When a cheaper plane is good enough
A budget plane is fine for occasional projects if the casting is stable, the iron clamps securely, and you are willing to tune it. Avoid buying solely by weight or a shiny finish. Check that the sole does not rock on a known-flat surface and that the iron can be sharpened without grinding away excessive metal.
For a first plane, spending more on sharpening equipment may produce a larger improvement than moving from a mid-priced plane to a premium one. You need a reliable way to create a flat bevel and a small secondary bevel. A 1000-grit stone or diamond plate for shaping and a 4000- to 8000-grit finishing surface are sufficient; a leather strop is useful but not mandatory.
A vintage Stanley-style smoother can be a particularly good value when the sole is sound and the frog is not damaged. Replacement irons are available, but the total cost can approach that of a new plane. Calculate the price of the plane, iron, chipbreaker, and your setup time before calling it a bargain.
Setup for clean rails and stiles
Flatten the back of the iron near the cutting edge, then hone a consistent bevel. The edge should reflect light evenly without a wire edge remaining. Set the chipbreaker close to the edge—about 0.5 to 1 millimeter for difficult grain, and farther back for easier wood. Make sure the chipbreaker sits tight; a gap can clog the mouth and worsen tear-out.
Support narrow rails close to the work area and keep them from flexing. Wax the sole lightly, but do not use so much that the plane slips sideways. Start with the plane slightly skewed, use both hands, and let the tool’s weight do most of the work. Check the surface with a straightedge and raking light rather than relying only on touch.
Plane until the machining marks disappear, then stop. Over-smoothing can round the edges, dish the center, or change a carefully fitted joint. Protect crisp arrises with a few deliberate passes and avoid letting the plane run off the end unsupported. For end grain at a stile shoulder, use a sharp block plane or a shooting setup rather than forcing a bench plane across unsupported fibers.
A practical buying choice
Buy a standard No. 4 smoother if you want one plane for most rails and stiles. Add a low-angle bench plane when your projects regularly include figured maple, curly cherry, or difficult grain. Add a block plane with an adjustable mouth for end grain and small corrections. That three-plane combination covers far more work than buying a large collection of specialized planes, and each tool has a clear job.