What's inside
As an Amazon Associate I earn from qualifying purchases. This post may contain affiliate links at no extra cost to you.
Sections
Our Top Picks
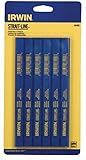
 Irwin Tools IRWIN Carpenter Pencil6 Count (Pack of 1)10.75 x 4.25 x 0.5 inches0.18 poundsCheck on Amazon
 Swanson Tool CP700B Carpenter Pencil 72 Pack1 Count (Pack of 72)9.53 x 1.57 x 0.8 inches0.03 poundsCheck on Amazon
 DIXON Industrial Carpenter Pencils6 Count (Pack of 1)7 x 0.75 x 0.35 inches0.2 PoundsCheck on Amazon

What a carpenter’s pencil is good for
A carpenter’s pencil earns its place on site because its broad lead makes a mark that is easier to see on rough, dusty timber than a fine pencil line. The flat body also resists rolling off a joist or workbench. It is not automatically the right choice for every cut: a thick mark can obscure a tight measurement, and a blunt lead can leave a wide, fuzzy line that is hard to follow accurately.
For framing, setting out cuts on sawn lumber, and marking boards that will be trimmed, a standard flat pencil is usually the best-value option. For cabinet parts, fine joinery, or any cut where a millimetre matters, use a sharp carpenter’s pencil or switch to a mechanical marking tool. The pencil should suit the tolerance of the job, not just the timber.
As an Amazon Associate we earn from qualifying purchases at no extra cost to you.
![IRWIN Carpenter Pencils [Set of 12] Style: Lead Grade:Medium, Qty:12 per Box](https://m.media-amazon.com/images/I/31wwN17VSmL._SL160_.jpg)


Pencil types compared
| Type | Best use | Advantages | Trade-offs |
|---|---|---|---|
| Standard flat carpenter’s pencil | Framing and general site marking | Cheap, durable, broad lead; usually will not roll | Needs a knife or suitable sharpener; line can be wide |
| Mechanical carpenter’s pencil | Repeated marking and cleaner, more consistent lines | Lead advances without sharpening; often clips to a pocket | Costs more; lead can break or jam if handled roughly |
| Fine-point mechanical pencil | Cabinetmaking and precise layout | Narrow line and quick resharpening by advancing lead | Fine lead is fragile and less visible on rough, dirty stock |
| Marker or lumber crayon | Very rough, wet, or dark surfaces | Can show up where pencil lead struggles | May bleed, smear, or be difficult to remove |
Most standard carpenter’s pencils use graphite, but hardness varies. Softer lead tends to leave a darker mark on rough wood, while harder lead can stay sharper longer and make a cleaner line. A very soft lead may wear down quickly; a hard one can be faint on textured or dusty stock. If you are unsure, start with a general-purpose pencil and test it on the actual timber.
Choosing the right pencil
For everyday framing, buy a basic flat pencil with a body that feels comfortable between your fingers and lead that can be exposed without splitting the casing. A multi-pack is sensible: pencils get misplaced, broken, or left in a tool belt. The inexpensive flat graphite carpenter’s pencils are fine for most rough construction work. Paying extra for a premium pencil is hard to justify if you mainly mark studs and cutoffs.
A mechanical pencil is worth considering if you mark all day, dislike sharpening, or need repeatable line width. Look for a robust clip, a comfortable grip, and lead that is easy to replace. Check that the lead diameter and refills are available before buying; a tool that takes an uncommon refill is a poor site choice. Some models have a sharpener built into the cap, which helps maintain a neat point, but it is one more small part to lose. A mechanical carpenter’s pencil costs more upfront, so it makes most sense for frequent use rather than occasional DIY.
Choose a fine-point pencil for accurate layout on smooth, planed timber, but do not expect a fine lead to survive careless handling. A 0.5 mm lead is particularly easy to snap when pushed sideways or dragged over a knot. Larger leads tolerate site use better, though they still need a sharp point for precise marking. If the timber is wet, very rough, or dark, test visibility first. A graphite mark can disappear in the grain or smear under a wet hand; a marker may show better, but could leave a permanent stain.
Getting a clear, accurate mark
Sharpen the lead to match the work. For a rough cut on framing lumber, a chisel-like flat point makes a bold mark that is easy to find. For a fitted component, shape the lead to a narrow point and keep the pencil perpendicular to the measuring surface. A knife can shape a flat pencil quickly, but cut away from your hand and keep the blade controlled; a slip can cause a serious cut. A purpose-made flat pencil sharpener is convenient, though not essential if you are comfortable using a knife.
When marking a length, hold the tape hook firmly against the board and place the pencil point at the measurement, not the side of the lead. On a rough edge, a thick mark can add a millimetre or more of uncertainty. Decide whether the near edge, centre, or far edge of the line is your cut reference, then use that convention consistently. For a square cut, carry the mark around the board with a square rather than trusting a short pencil tick.
Common failures are simple: a blunt point makes the measurement ambiguous; soft lead smears when the timber is handled; and a narrow mechanical lead snaps if forced across a splinter. Brush dust away before marking, especially when drawing a fine line. If the mark must remain visible after handling, make a second light pass rather than pressing hard enough to gouge the surface.
What to buy for your work
For framing, decking, and general site work, start with a pack of flat pencils and a reliable way to sharpen them. That combination is cheap, easy to replace, and forgiving of rough treatment. If you regularly make fine marks or spend time sharpening, add a sturdy mechanical pencil and keep spare lead in your tool kit. For cabinetry, use a fine-point option only where its narrow line improves accuracy, and keep a broader pencil nearby for rough stock.
There is no single best carpenter’s pencil for every surface. The useful choice is the one that leaves a visible line of the right width, stays sharp long enough for the job, and does not create more maintenance than it saves. Test a new pencil on a scrap from the same batch of timber before relying on it for a final cut.