What's inside
As an Amazon Associate I earn from qualifying purchases. This post may contain affiliate links at no extra cost to you.
On rough sawn timber, any soft carpenter’s pencil will do. On planed timber – especially planed softwood like pine or poplar, or closed-grain hardwoods like maple – a standard soft, blunt carpenter’s pencil leaves a 1.5mm smudged line that is useless for dovetails, hinge recesses, or accurate crosscuts. If your line has thickness, your cut has doubt. For fine work you need a harder lead, a finer point, and a way to keep it there.
As an Amazon Associate we earn from qualifying purchases at no extra cost to you.


Sections
Our Top Picks
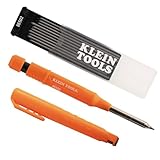
 KLEIN TOOLS 80188 Skribes 2.8 mm Mechanical Carpenter1 Count (Pack of 1)16.25 x 7.5 x 5.5 inches0.13 poundsCheck on Amazon
 THORVALD New 3-in-1 Carpenter Pencils with Finger Grip1 Count (Pack of 1)5.7 x 0.47 x 0.47 inches0.11 poundsCheck on Amazon


Why Standard Pencils Fail on Planed Timber
Most bulk packs of carpenter’s pencils come with HB or softer leads, often closer to 2B. On a rough surface that soft lead is an advantage because it deposits graphite in the grain valleys without pressure. On a planed surface it works against you. The lead crumbles slightly, the wide rectangular tip drags, and the graphite sits on top of the burnished surface instead of biting in. The result is a line that measures 1.2 to 1.8mm wide, easily smudged by a hand or a try square, and hard to split with a chisel or see under a marking gauge.
The other failure is point geometry. A factory-fresh carpenter’s pencil has a chisel tip about 6-7mm wide. Even when freshly sharpened with a site knife, most people leave a blunt wedge that is 1mm thick at the edge. That is fine for marking stud work from two feet away. It is not fine enough to mark a 0.5mm shoulder line on a planed stile. You also lose accuracy to parallax; a thick line forces you to guess whether you cut to the left, right, or middle of it.
Lead Hardness and Point Geometry Matter More Than Brand
For planed timber, look for H, 2H, or 4H leads. Harder leads hold a 0.5 to 0.8mm edge without crumbling and leave a hairline that does not smear when you slide a combination square over it. The trade-off is visibility and pressure. A 4H line on pale maple or birch ply is faint and requires more pressure, which can dent soft pine if you press too hard. On darker timbers like walnut or sapele, a hard lead is also harder to see. For most planed softwoods and light hardwoods, 2H is the sweet spot.
Hard leads also last longer between sharpenings. A soft HB flat lead will blunt to over 1mm after 10 to 15 linear feet of marking on planed pine. A 2H lead will hold a fine edge for roughly twice that distance before it needs a touch-up. The downside is brittleness – if you leave a long, unsupported fine point and then press sideways, a hard lead will snap cleanly rather than just dull.
Tip shape matters just as much. For fine work you want to sharpen to a long bevel (15-20mm of exposed lead) and then bring the very tip to a chisel point about 0.5mm thick or a conical needle point. The long bevel supports the lead so it does not snap, while the thin edge gives you the fine line. A short, stubby sharpening like you use for framing will not hold that edge.
Oval vs. Rectangular vs. Round
Traditional flat rectangular pencils exist so they do not roll off a roof pitch. On the bench, that flat shape dictates how you sharpen. You can only really produce a chisel point, which is good for fine straight lines with a square but poor for freehand curves or marking in tight spots.
Oval-section pencils are a compromise. They still resist rolling but are easier to rotate while sharpening to get a conical point. Many joiners prefer them for planed work for that reason.
Round pencils – often sold as joiner’s or cabinetmaker’s pencils – are the easiest to sharpen to a needle point with a standard sharpener, and they feel like a normal writing pencil. They will roll, so you will lose a few off the bench. If you work mostly at a bench rather than on site, the trade is worth it. A round 2H pencil sharpened in a good carpenter pencil sharpener will consistently give you the finest line of any wooden pencil.
Comparison: Fine Marking Pencils for Planed Timber
| Type | Typical Lead | Line Width (Freshly Sharpened) | Sharpening Method | Failure Mode on Planed Timber |
|---|---|---|---|---|
| Bulk Flat Carpenter’s Pencil (soft) | HB – 2B, 7mm flat | 1.2 – 1.8mm | Knife or site sharpener, short bevel | Smudges, crumbles, line too wide to split |
| Hard-Lead Flat / Oval Carpenter’s Pencil | H – 4H, 7mm flat/oval | 0.6 – 0.9mm (chisel point) | Knife to long bevel, sandpaper to hone | Can be faint on dark wood, snaps if point too long |
| Round Joiner’s Pencil (hard) | 2H – 4H, 3-4mm round | 0.5 – 0.7mm (conical point) | Standard enclosed sharpener | Rolls off bench, needs frequent sharpening |
| Mechanical Carpenter Pencil 2.8mm | 2H – 4H, 2.8mm round lead | 0.8 – 1.0mm | No sharpening, twist advance | Lead wobble if tip worn, line thicker than needle point |
| Fine Mechanical 0.9mm / 1.3mm | 2H, 0.9 or 1.3mm | 0.4 – 0.6mm | No sharpening | Fragile lead, clogs with dust, not for rough work |
How to Sharpen for a Fine Line
The best hard-lead pencil will still mark poorly if you sharpen it like a framing pencil. For fine marks, expose 15 to 20mm of lead with a sharp chisel or block plane, not just the tip. Keep the knife flat to the pencil and take thin shavings. Then lay the wide face of the lead flat on 180 or 240 grit sandpaper and draw it back to create a long chisel bevel. For a needle point, rotate the pencil as you sand.
You want the wood cone to be long and smooth, not stepped, so the lead is supported right up to the tip. Finish by polishing the very edge on the same sandpaper with one or two light strokes. You should be able to make a line under 0.7mm that you can barely feel with a fingernail. If you can feel a ridge, the line is too soft or too thick. On site, carry a small sanding block or the abrasive strip many site sharpeners include – it is faster and more consistent than whittling with a blunt utility knife.
One practical tip: sharpen two pencils at once and keep the second in your apron. On planed work you will touch up every 15 to 20 marks, and swapping is faster than stopping to sharpen mid-layout.
Mechanical Options Worth Considering
Wooden pencils are cheap and reliable, but mechanical pencils solve the constant sharpening problem. A 2.8mm mechanical carpenter pencil uses the same hard leads as a wooden flat pencil (available in HB through 4H) but never needs a knife. The line stays at 0.8 to 1.0mm without variation. For planed timber that is a big step up from a blunt bulk pencil, though not quite as fine as a perfectly honed round 2H needle point.
The finer 0.9mm and 1.3mm mechanical pencils – often sold for metal marking – give the very finest graphite line you can get, around 0.4mm. On planed hardwood they are excellent for dovetail baselines or marking around a template. The downsides are real on a woodworking site: thin leads snap if you use them to mark across grain with pressure, the clutch packs with fine dust, and you cannot use the side of the lead to shade a fitting line. Treat them as a complement to, not a replacement for, a wooden pencil.
If you go mechanical, buy H or 2H refills specifically. The HB refills that ship with most holders will give you the same smudgy wide line you are trying to escape.
What to Buy for Your Kit
You do not need to spend much to get fine lines. For most people working with planed timber at the bench, a dozen oval or round 2H pencils and a quality enclosed sharpener is the best value. You will get lines under 0.7mm, the pencils cost cents each, and you already know how to sharpen them. Search for hard lead carpenter pencils 2H rather than generic bulk packs – the lead grade is usually printed on the pencil itself, and that is what you are paying for.
If you do a lot of second-fix, kitchens, or site joinery where you move between rough and planed material, one 2.8mm mechanical holder with a pack of 2H leads is worth adding. It lives in your tool belt, never needs a knife on a ladder, and gives a consistent fine line for scribing architraves and marking hinge positions. Keep the wooden 2H pencils at the bench for the really critical layout.
Avoid paying a premium for “professional” flat pencils sold without a stated lead grade. Without an H rating they are almost always soft HB. The cheaper option is fine if all you do is framing and rough marking – save the hard leads for your bench kit where line width actually affects the fit.