What's inside
As an Amazon Associate I earn from qualifying purchases. This post may contain affiliate links at no extra cost to you.
A pencil gauge and a knife gauge both mark lines parallel to an edge, but they leave different marks. A pencil line is quick to see and easy to erase; a knife line is finer and gives a chisel or saw a physical edge to register against. The better choice depends on the timber, the operation and how much accuracy the joint actually needs.
As an Amazon Associate we earn from qualifying purchases at no extra cost to you.


Sections
Our Top Picks
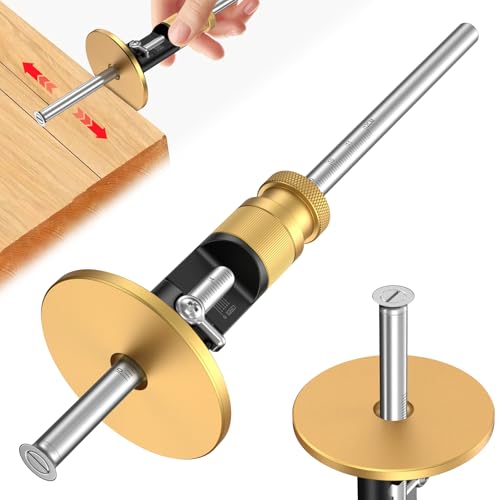 Wheel Marking Gauge Knife Woodworking1 Count (Pack of 1)7.8 x 1.8 x 1.8 Inches0.4 PoundsCheck on Amazon
 ADOEIAK Wheel Marking Gauge with Micro-Adjustment1 Count (Pack of 1)9.52 x 2 x 2 Inches0.2 poundsCheck on Amazon


What each gauge does
A pencil gauge carries a lead point in a fence that slides along the work. The fence rides against a reference edge while the point marks a parallel line. Some models use a wheel or a replaceable pencil; others accept a standard carpenter’s pencil. The line is visible on most timber, but its width depends on the lead and how firmly you press.
A knife gauge uses a sharpened blade instead. It scores the fibres as the fence travels along the edge. A traditional marking gauge has a fixed pin or blade, while a cutting gauge is designed to sever fibres more deeply. The distinction between models varies, so check whether the cutter is intended for light layout or cutting across the grain.
Both tools rely on the same thing: a clean, straight reference edge. If the edge is bowed, rough or covered in bark, the fence can wander and the line will faithfully copy that problem.
Pencil gauge vs knife gauge
| Factor | Pencil gauge | Knife gauge |
|---|---|---|
| Mark visibility | Usually easy to see, especially with dark lead on pale wood | Can be hard to see on dark or busy-grained timber |
| Line width | Wider; fine lead helps, but pressure can broaden the mark | Very fine when the blade is sharp and held consistently |
| Cutting accuracy | Useful for rough cuts and general layout | Good registration point for chisels and saws |
| Risk on rough timber | Lead may skip, break or snag on splinters | Blade may follow grain or catch on torn fibres |
| Maintenance | Sharpen or replace lead; little risk of a dangerously sharp edge | Needs careful sharpening and safe handling |
| Best fit | Site work, rough sizing and visible layout | Fine joinery, shoulder lines and paring to a mark |
On rough or construction timber
For framing, rough stock and jobs where the mark is only a guide for a circular saw or handsaw, a pencil gauge is usually the practical choice. A line 0.5–1 mm wide is often adequate when the cut will be made on the waste side and the piece will be planed or trimmed afterward. It is quick to read from a standing position, and there is no exposed blade to catch while the tool is being carried with other site kit.
Rough faces bring their own trouble. A fence can ride over a knot, splinter or saw ridge and shift the line. Clean the reference edge first, then take a light pass. If the lead jumps, do not press harder: that can make a broad, wandering mark. Use a sharper pencil or flatten a small section of the edge so the fence has a stable bearing surface.
A knife gauge can work on rough timber, but it is less forgiving. A blade may snag in torn grain, and a narrow score can disappear among dirt and strong grain. Use it only where the reference edge is sound and you can control the fence. For rough marking, a pencil marking gauge is an inexpensive, sensible starting point; a plain pencil and a straightedge may be enough if you rarely need parallel lines.
On finished timber and joinery
For furniture parts, door work and hand-cut joints, the knife gauge earns its place. A fine score marks a shoulder line without leaving a wide graphite stripe, and a chisel can be placed against the wall of the cut. That reduces the chance of cutting into the show face when paring a tenon shoulder or trimming a housing. It is especially useful when parts need to fit closely and the waste side is narrow.
Technique matters. Keep the fence pressed firmly against the edge and take two or three light passes rather than forcing the blade through in one heavy stroke. A deep cut can tear fibres, especially across the grain, and may leave a ragged edge instead of a clean reference. Mark the waste side clearly, then pare toward the line. On pale wood, a pencil line may still be easier to see; on dark timber, use raking light or a contrasting pencil rather than assuming the knife mark will be obvious.
A knife marking gauge is worth considering if you regularly make precise joints. If your work is mostly shelves, basic repairs or cut-to-length stock, a pencil gauge will usually cover the need for less money and less upkeep.
Setting the gauge and avoiding errors
Set the fence from a ruler or, better, from the actual workpiece or a story stick. For example, when marking a 10 mm shoulder, measure the fence-to-point distance and test it on scrap. A small setting error repeats along the whole batch. Lock the adjustment firmly; a fence that slips by even 1 mm can spoil a joint before the cut begins.
Make a short test line, check it with a rule or square, then mark the work. Hold the fence against the same reference edge throughout. If you turn the stock around halfway through, differences in edge straightness can shift the line. On paired parts, mark from matching faces and edges so small variations do not accumulate.
Keep a knife gauge sharp enough to cut cleanly without heavy pressure. A blunt or burred blade tends to skate, crush fibres or pull off line. Store it with the cutter retracted or covered, and never leave it loose in a pocket. A pencil gauge is safer and faster to maintain, but inspect its point: a chipped or blunt lead makes a broad mark that can mislead a careful cut.
What to buy
Choose based on the cuts you make, not on the assumption that one tool replaces every other marking method. A pencil gauge suits rough layout, visible marks and general site work. A knife gauge suits fine joinery where a clean, narrow registration line helps control a chisel or saw. If you only buy one and most of your work is rough timber, start with pencil; if you routinely pare to gauge lines, choose a knife gauge and learn to set and sharpen it properly.
For regular woodworking, a simple adjustable marking gauge with a secure fence is more useful than extra features that do not hold their setting. Some woodworkers keep both: pencil for fast, visible layout and knife for final joinery. That is a reasonable setup, but not a requirement. On many jobs, a pencil, square and careful cut are entirely adequate.