Our Top Picks
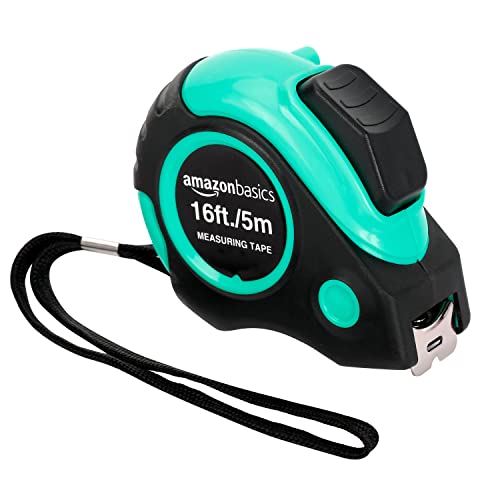 Amazon Basics Retractable Tape Measure with Metric and4.9 m3.25 x 2.87 x 1.54 inches0.4 poundsCheck on Amazon
 CRAFTSMAN 25-Ft Tape Measure with Fraction Marketing7.6 m5.7 x 3.5 x 0.1 inches1.06 poundsCheck on Amazon


What's inside
As an Amazon Associate I earn from qualifying purchases. This post may contain affiliate links at no extra cost to you.
Most people buy a tape measure by grabbing the cheapest one at the register, then spend years fighting a blade that folds at 6 feet, a hook that rattles loose, and printing that wears off the first 12 inches. The frustrating part is that a good tape and a bad tape often look identical on the peg hook. This tape measure comparison sorts the differences that actually change your work: certified accuracy class, standout, blade coating, hook geometry, and case durability.
Tape measures are a category where spending more genuinely buys more, but only up to a point. Somewhere in the mid range you get a Class II accuracy stamp, a nylon or polymer blade coating, and a 9 to 13 foot standout. Past that you are mostly buying case armor and specialty features. Here is where the money goes and who should spend it.
As an Amazon Associate we earn from qualifying purchases at no extra cost to you.


| Tape Type | Typical Length | Best For | What You Give Up |
|---|---|---|---|
| Wide-blade framing tape | 25-35 ft | Layout, framing, long solo measurements | Bulk, weight, awkward in a nail apron |
| Standard 1-inch tape | 16-25 ft | General carpentry, remodeling, all-purpose | Standout at full extension |
| Compact pocket tape | 12-16 ft | Trim, cabinets, punch-list work | Reach on long spans |
| Double-sided print tape | 25 ft | Overhead work, reading upside down | Slightly higher cost |
| Long tape (open reel) | 50-100 ft | Site layout, foundations, fencing | No standout, needs two people |
Sections
Accuracy Class Is the One Spec That Is Actually Regulated
The criterion that separates a measuring tool from a novelty is a printed accuracy class. In the US and Canada, tapes sold for commerce fall under NIST Handbook 44 and the EC Class system used internationally. Look for a stamp reading Class I or Class II on the blade near the case.
Class I is the tighter tolerance and is what surveyors and precision layout people want. Class II allows roughly double the deviation and is what most quality construction tapes carry. Both are fine for framing. Where it matters is when you use two different tapes on the same job: one Class II tape running long and another running short can stack into a visible gap in a cabinet run. An unmarked tape carries no tolerance guarantee at all, which is why bargain-bin tapes should never be mixed with your primary tape on the same project.
Practical rule: own one tape you trust as your reference, verify every other tape against it, and mark the ones that disagree. Never measure one end of a piece with one tape and the other end with a different one.
Wide-Blade Framing Tape (25-30 ft)
If you spend your day pulling long measurements alone, a 1-1/4 inch or wider blade is the upgrade you will feel immediately. The stiffer profile is what produces long standout, so you can reach across a subfloor without a helper. The tradeoff is real: these cases are bulky and heavy in a tool belt all day. Buy one for layout and keep a compact tape for detail work rather than trying to make one tape do both.
Standout Separates Solo Work From Two-Person Work
Standout is how far the blade extends horizontally before it buckles. It is a function of blade width, thickness, and the depth of the concave curve. Manufacturers advertise numbers in the 9 to 13 foot range for wide-blade tapes and 6 to 8 feet for standard 1-inch tapes.
Treat advertised standout as a laboratory number. It is measured in still air with a fresh blade, and real standout drops as the blade develops kinks and loses its curl. A tape rated at 11 feet realistically gives you comfortable single-handed reach out to 7 or 8 feet after a season of use, which is still plenty for stud layout and cabinet spans.
The corollary that nobody mentions: high standout comes from a stiff blade, and stiff blades are worse in tight spaces. They fight you inside a cabinet carcass, they will not follow a curve, and they take a permanent crease if you fold them into a corner. If most of your measuring happens inside boxes and around openings, a narrower and more flexible blade is the better tool even though its spec sheet looks worse.
Blade Coating, Print Method and Hook Design
The first 12 inches of any tape take the most abuse because that is the span you drag across lumber, concrete and sheet goods. The criterion here is how the markings are protected. From least to most durable: bare printed ink, clear lacquer overcoat, polyester film, and nylon or polymer bonded coatings. Premium tapes commonly add a separate reinforcement layer over the first several inches specifically because that is where blades die.
Hook design matters just as much. The end hook is intentionally loose, and that play is not a defect. It slides by exactly the thickness of the hook so the tape reads correctly whether you push against an inside edge or pull from an outside edge. That is called a true zero hook. If you ever bend the hook back into place tight, you have just introduced a permanent error into every measurement. Replace a wobbly rivet, do not crush it flat.
Features worth paying for on a hook: a wide multi-catch design that grabs edges from the top and side, a magnetic tip if you work with steel studs or metal framing, and a serrated notch for scribing a mark when you have no pencil. Features not worth paying for: elaborate ergonomic hooks that will not fit into a 1/8 inch reveal.
- ✔ Class I or II accuracy stamp printed on the blade
- ✔ Nylon or polymer coating over the first 12 inches
- ✔ True zero sliding hook with a solid double rivet
- ✔ Sturdy thumb lock that holds under blade tension
- ✔ Replaceable belt clip and impact-resistant case
- ✘ Unmarked blades with no stated accuracy class
- ✘ Blades that show bare metal within weeks of use
- ✘ Overly stiff wide blades used exclusively for interior finish work
- ✘ Gimmick features that add bulk without solving a real problem
- ✘ Mixing multiple unverified tapes on the same project
Matching the Tape to the Trade
The mistake most buyers make is treating tape measures as a single product category. They are not. Framing, finish carpentry and site layout each reward a different tool.
Framing and remodeling: a 25 or 30 foot wide-blade tape with aggressive standout, clear 16 inch and 19.2 inch on-center stud markings, and a case that survives being dropped from a ladder. Weight is acceptable here because the tape spends most of its time in your hand.
Finish and cabinet work: a compact 12 or 16 foot tape with a narrow flexible blade, fine fractional graduations down to 1/16 inch or 1/32 inch on the first foot, and a slim case that fits an apron pocket. Look for a low-profile hook that will actually seat in a shallow rabbet.
Site layout and concrete: an open-reel long tape in 100 foot length, ideally fiberglass or coated steel. Steel is more accurate but conducts electricity and rusts. Fiberglass stretches slightly under tension, which is why survey-grade work specifies steel with a stated pull force.
Metal studs and steel work: a magnetic-tip tape. It is a small upgrade that eliminates an entire class of dropped-tape frustration.
Compact Pocket Tape (12-16 ft)
A short compact tape is the most underrated tool in a finish carpenter’s apron. Fine graduations, a slim body and a flexible blade beat a bulky framing tape any time you are working inside a cabinet or fitting casing. Pick one with clear 1/16 inch markings and a hook small enough to catch a shallow edge, then keep it as your dedicated detail tape.
Tape Measure Comparison: What to Verify Before You Trust a New Tape
Any new tape earns its place by passing three checks. First, lay it beside your reference tape and compare at 1 foot, 8 feet and full extension. Small disagreements at the far end are normal; a disagreement at 1 foot means the hook or the blade printing is wrong and the tape should go back.
Second, check the hook travel. Push the hook against a flat surface and pull it against an edge. The blade should read the same measurement both ways. If it does not, the rivets are bent or the slot is worn.
Third, test the lock under load. Extend 10 feet, engage the lock, and give the blade a firm tug. A lock that slips is worse than no lock because you will trust it once and cut wrong.
One more habit worth building: retract the blade slowly rather than letting it snap home. The impact of the hook against the case is the single most common cause of blade damage and broken return springs.
Double-Sided Print Tape (25 ft)
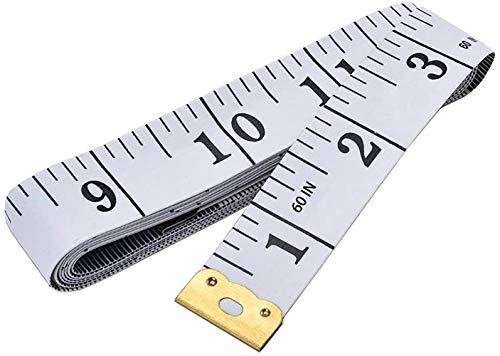
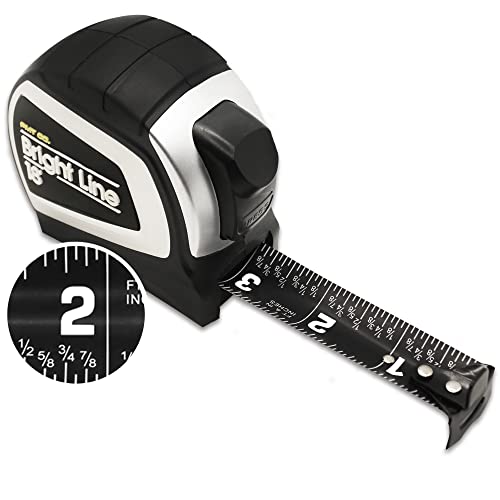
Printing on both sides of the blade sounds like a minor convenience until you spend a day measuring joists, soffits or ceiling grid. Being able to read the tape from underneath without twisting your wrist saves genuine time and reduces misreads. Worth the modest premium if any part of your work happens above shoulder height.
Frequently Asked Questions
Why is the hook on my tape measure loose? That movement is designed in. The hook slides by exactly its own thickness so the tape reads correctly for both inside push measurements and outside pull measurements. If you tighten it, every measurement becomes wrong by roughly 1/16 inch. Only replace a hook when a rivet has actually failed or the slot has worn oversize.
What do the black diamonds past 16 inches mean? Those are engineered spacing marks at 19.2 inch intervals, which divide an 8 foot sheet into five equal bays instead of six. They are used for truss and engineered joist layout where the code-approved spacing allows fewer members. The red numbers, by contrast, mark standard 16 inch on-center stud spacing.
How accurate does my tape need to be for woodworking? For rough carpentry, a Class II tape is more than adequate. For joinery and cabinets, the accuracy class matters less than consistency: use one tape for the entire project, or better, use story sticks and relative measurement so absolute accuracy never enters the equation. Cutting two parts to match each other beats cutting both to a number.
Buy for the work you actually do most. A single 25 foot tape with a real accuracy stamp, a coated blade and a solid lock handles the majority of jobs, and a compact tape for detail work is the best second purchase you can make. Skip the unmarked bargain tapes entirely; the money saved shows up later as a gap in your trim.
Check prices on Amazon →