What's inside
As an Amazon Associate I earn from qualifying purchases. This post may contain affiliate links at no extra cost to you.
Sections
Best setup for sharpening hand plane blades
For most bench-plane blades, grind a 25-degree primary bevel, then hone a 30-degree micro-bevel with a rigid honing guide and a flat diamond plate or waterstone. That two-angle setup limits the amount of steel you need to sharpen while giving the cutting edge a practical bevel for general-purpose work.
Choose diamond plates if you want low-maintenance sharpening and do not want to flatten stones; choose waterstones if you prefer their feel and are willing to soak or splash them and maintain their surfaces. The best guide is one that fits your blade securely, rolls smoothly, and places the bevel at a repeatable angle—not necessarily the most elaborate one.
As an Amazon Associate we earn from qualifying purchases at no extra cost to you.


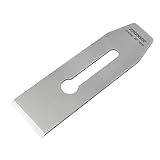

Which stones and guides fit your situation?
| Situation | Good starting choice | Why it fits | Ownership trade-off |
|---|---|---|---|
| Small shop, occasional sharpening | Two-sided diamond plate, about 250/1,000 grit, plus a 3,000–6,000-grit finishing stone | Compact progression handles repair and routine honing without a large stone collection. | Diamond plates need little setup, but their abrasive surface eventually wears and cannot be refreshed like a waterstone. |
| Frequent sharpening, comfortable with stone care | Waterstones around 1,000, 4,000 and 8,000 grit, with a flattening plate or lapping surface | Separate grits make it easy to move from edge repair to a polished working edge. | Waterstones dish with use and need flattening; some require soaking, while splash-and-go types need only water on the surface. |
| New to hand sharpening | Veritas Mk.II honing guide or a compatible Eclipse-style side-clamping guide | A guide controls the blade’s projection and keeps the edge square more reliably than freehand honing. | Check the guide’s stated blade-width capacity and whether it grips narrow blades before buying. |
| Very wide blades or repeatable production work | Wide-capacity guide, such as the Lie-Nielsen honing guide, paired with a broad, flat stone | More support helps keep a wide plane iron level across the stroke. | A wider guide and stone take more bench space and cost more than a basic setup. |
Commonly available options include DMT diamond plates, Shapton waterstones, the Veritas Mk.II Honing Guide, and Lie-Nielsen’s honing guide. Confirm current dimensions and compatibility with the maker: model details and availability can change. As a general market guide, basic guides and single stones often cost tens of dollars; premium guides, multiple stones, and flattening equipment can bring a complete setup into the low hundreds.
What the 25- and 30-degree angles mean
The primary bevel is the larger bevel ground into the blade, usually at 25 degrees for a standard bench-plane iron. The micro-bevel is a narrow secondary bevel at the cutting edge, commonly honed at 30 degrees. The five-degree increase creates a small working facet, so later sharpening removes less steel than regrinding the entire primary bevel.
These are starting points, not universal rules. A lower angle can make a blade easier to push in some work, while a higher angle can support a more durable edge in demanding material. Plane geometry matters too: a bevel-up plane uses the bevel as part of its effective cutting angle, so changing the bevel angle changes the cutting geometry. Keep the blade maker’s guidance and the plane’s intended use in view.
How to sharpen a hand plane blade
-
Check the blade and the stones. Remove the iron from the plane, clean off pitch or residue, and inspect the edge for chips. Flatten a dished waterstone before sharpening; an uneven surface makes it harder to keep the bevel consistent. Diamond plates should be clean and free of embedded swarf.
-
Establish the primary bevel only when needed. If the edge is chipped, badly rounded, or at the wrong angle, grind it to about 25 degrees using a grinder or coarse abrasive. Keep the blade cool if using a powered grinder; overheating can damage the steel’s temper. For routine maintenance, skip this step and hone the existing edge.
-
Set the honing guide for 30 degrees. Clamp the blade square to the guide and adjust its projection using the guide’s angle setting or a projection chart. Test the setup on the stone: the blade should contact the surface on the narrow cutting-edge bevel, not rock between that bevel and the back.
-
Hone in a controlled progression. Start with a medium stone, such as 1,000 grit, if the edge needs work. Use a finer stone—roughly 4,000 to 8,000 grit—for the final edge. Work the full width of the blade, using light, even pressure. A thin, continuous line of abrasion at the edge shows the micro-bevel is being formed.
-
Remove the burr and check the edge. A burr, or wire edge, forms on the back as the bevel is honed. Lay the back flat on a fine stone and use a few light strokes to remove it, keeping the back flat rather than lifting the edge. Check that the edge is straight and square, then take a light shaving from scrap wood.
For sharpening a hand plane blade, guide setup is often the difference between a repeatable result and repeatedly correcting a skewed edge. Marking the bevel with a permanent marker before honing is a useful check: a few strokes should remove ink evenly across the intended micro-bevel. If ink disappears only at one corner, re-square the blade in the guide.
Diamond plates versus waterstones
Diamond plates are convenient for a compact shop: they are ready to use with water, stay flat longer than typical waterstones, and can handle coarse work efficiently. Their surface is not everlasting. Heavy pressure, dirty swarf, and using a plate for tasks it was not designed for can shorten its useful life. Clean it as directed by the manufacturer and avoid assuming that every plate can be resurfaced.
Waterstones offer a broad range of grits and are easy to refresh by flattening, but that maintenance is part of ownership. A hollow stone transfers its shape to the bevel and can make consistent honing difficult. Keep a flattening surface available, use the stone’s recommended soaking method, and rinse away slurry and metal particles between grits to avoid coarse scratches on a fine finish.
You do not need a long grit ladder for ordinary plane work. A coarse stone is for damaged edges or significant reshaping; a medium stone restores the bevel; a fine stone refines it. If the blade is merely dull, starting with a fine stone saves time and steel.
Block-plane blades and replacement irons
Sharpening a block plane blade follows the same basic method, but first confirm the blade’s bevel angle and the plane’s design. Many block planes are bevel-up, and their blade angle contributes directly to the effective cutting angle. Do not automatically apply a 25-degree primary bevel and 30-degree micro-bevel if the manufacturer specifies a different geometry.
Narrow block-plane irons can be awkward in wide side-clamping guides. Check the guide’s minimum blade width, or use a jig designed for narrow blades. If an iron is cracked, badly pitted at the edge, or too short to clamp securely, replacement may be the safer and more practical choice. When comparing hand plane replacement blades, verify the exact plane model, blade width, thickness, and bevel orientation; similar-looking irons are not necessarily interchangeable.
Keep the setup accurate
Most inconsistency comes from a few fixable problems: a blade clamped out of square, changing its projection between sharpening sessions, pressing hard enough to rock the guide, or using a dished stone. Record the projection that produces 30 degrees for your guide, clean the stones after use, and flatten waterstones before they become noticeably hollow. With those habits, a 25-degree primary bevel and 30-degree micro-bevel make sharpening hand plane blades repeatable without removing unnecessary steel.