What's inside
As an Amazon Associate I earn from qualifying purchases. This post may contain affiliate links at no extra cost to you.
Sections
Best Sawzall Blades for Wood, Metal, and Demolition
The best sawzall blades are matched to the material and cut: use a long, coarse-tooth blade for fast wood cuts, a short fine-tooth blade for metal, and a bi-metal demolition blade when you expect nails or mixed materials.
“Sawzall” is Milwaukee’s name for a reciprocating saw, but the blade guidance below applies to compatible reciprocating saws from other brands too. Before buying, check that the blade’s universal shank fits your saw and choose its length, tooth count, and construction for the work—not just the lowest price per blade.
As an Amazon Associate we earn from qualifying purchases at no extra cost to you.
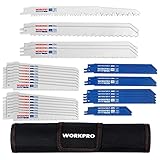

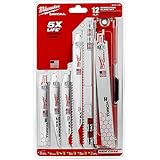

Quick picks by cutting situation
- Clean wood and pruning: A 9–12-inch blade with roughly 5–6 teeth per inch (TPI) clears chips quickly. For live branches, choose a pruning blade with widely spaced, aggressive teeth.
- Wood with nails or demolition: A 6–9-inch bi-metal blade around 6–10 TPI is a useful general-purpose choice. For unpredictable jobs, a thicker demolition blade resists bending better than a thin, fast-cutting blade.
- Thin sheet metal, conduit, or small pipe: A 4–6-inch blade with about 18–24 TPI makes a more controlled cut and reduces tooth snagging.
- Thick metal: Use a blade sized for the workpiece and typically 10–14 TPI. Clamp the material and use steady pressure rather than forcing the saw.
- Plastic or mixed materials: A medium-pitch bi-metal blade—often around 8–14 TPI—is a practical starting point. If the material mix is unknown, expect slower cuts and more wear than with a blade selected for one material.
Blade specs that matter
| Job | Useful blade length | Typical tooth pitch | Blade type to look for | Why this combination works |
|---|---|---|---|---|
| Framing lumber, clean wood | 6–9 in. | 5–6 TPI | Carbon steel or bi-metal | Coarse teeth remove wood quickly; shorter blades are easier to control. |
| Wood with embedded nails | 6–9 in. | 6–10 TPI | Bi-metal demolition | Bi-metal teeth tolerate occasional nail contact better than basic carbon-steel teeth. |
| Thin metal, conduit | 4–6 in. | 18–24 TPI | Bi-metal | More teeth stay engaged in thin stock, helping limit snagging and rough cuts. |
| Thick metal or pipe | 6–9 in. | 10–14 TPI | Bi-metal or carbide-tipped | A coarser pitch clears thicker material; carbide can be worthwhile for demanding, repetitive cuts. |
| Branches and green wood | 9–12 in. | About 5–6 TPI | Pruning blade, usually carbon steel | Long reach and deep gullets clear fibrous chips, but the blade needs room to move. |
| Mixed-material demolition | 6–9 in. | 6–10 TPI | Thick bi-metal demolition | A sturdier blade is less prone to bending when the cut encounters hidden fasteners. |
These are starting ranges, not hard limits; manufacturers may offer different lengths and tooth pitches. TPI means teeth per inch. For thin material, aim to keep at least three teeth engaged in the work where possible. Too few teeth can catch and chip; too many can crowd the cut with chips, heat the blade, and slow progress.
Blade length is not the same as cutting capacity. Leave enough exposed blade to pass fully through the material throughout the saw’s stroke, but avoid unnecessary overhang: a long blade is easier to flex or whip. For a tight or flush cut, a shorter blade gives better control if it still clears the workpiece.
Choose by material and job frequency
Wood: prioritize chip clearance
For clean lumber, a coarse-tooth blade is generally faster than a fine-tooth metal blade. A wood-cutting blade may have larger gullets, which help carry sawdust out of the kerf. If the lumber may contain nails, choose bi-metal rather than a basic wood-only blade. A blade advertised for demolition is a better bet for rough cuts than one optimized for smooth, fast wood cutting.
Metal: let tooth pitch match thickness
Thin sheet and tubing need a finer pitch than thick pipe. If the blade chatters or catches, first check that the workpiece is clamped and supported close to the cut. A scrap wood backing can support thin sheet metal and reduce vibration. Keep the shoe against the work when practical, use a controlled pace, and let the blade do the cutting; heavy pressure raises heat and can dull or break teeth.
Pruning: reach is useful, but control comes first
A 9- or 12-inch pruning blade can reach into a branch crotch and clear wet chips, but its extra length magnifies movement at the tip. Use a shorter blade for smaller branches or restricted spaces. Support the branch so it cannot pinch the blade, and make sure the branch is stable before cutting. A reciprocating saw is not a substitute for secure footing or safe handling of overhead limbs.
Frequent work versus occasional repairs
For a homeowner making a few mixed cuts, a small assortment of bi-metal blades in coarse and fine pitches often offers better value than a large pack of one pitch. For repeated cutting through abrasive material, thicker demolition blades or carbide-tipped options can last longer, though they generally cost more. For clean wood-only work, less expensive carbon-steel blades may be adequate, but they are a poor choice when nails are likely.
How to get more life from each blade
- Start with the right blade. Using a fine metal blade on thick wood, or a coarse wood blade on thin sheet, can create heat, snagging, and premature wear.
- Secure the work. Vibration makes teeth strike unevenly and can fatigue the blade. Clamp the piece where possible, and support both sides of the cut without pinching the kerf.
- Use controlled pressure. Let the reciprocating motion cut. Forcing the saw increases friction and bends the blade, especially near the end of a long cut.
- Keep the shoe supported. A stable shoe helps control the saw and limits blade flex. Adjust the angle carefully for flush cuts rather than twisting the blade sideways.
- Clear debris and inspect after use. Brush off pitch, resin, and metal chips; dry the blade before storage. Retire it if teeth are missing, the blade is visibly bent or cracked, or it no longer cuts effectively with reasonable pressure.
Blade life varies widely with material, cutting technique, and hidden fasteners. A blade cutting clean lumber may outlast one used on nailed demolition debris by a large margin. A sudden slowdown, burning smell, repeated wandering, or excessive vibration can indicate a dull or damaged blade—or a workpiece that needs better support. Stop and inspect rather than pushing harder.
Common buying mistakes
- Buying by length alone: A long blade may reach farther, but it is harder to control and can flex more.
- Ignoring material thickness: Tooth pitch should suit the work; “more TPI” is not automatically better.
- Choosing carbon steel for nail-filled wood: It may cut clean wood well but can lose teeth quickly on fasteners.
- Expecting one blade to excel at everything: A general-purpose bi-metal blade is convenient, but a dedicated wood, metal, or pruning blade usually cuts its intended material more effectively.
- Keeping a blade past its useful life: A worn blade wastes time, encourages excess pressure, and is more likely to wander or overheat.
For most mixed home repair and demolition, start with 6–9-inch bi-metal blades in a coarse pitch for wood and a fine pitch for metal. Add a long pruning blade for branches or a thicker demolition blade for frequent nail-filled cuts. That small, situation-matched selection is more useful than relying on one “all-purpose” blade for every job.