What's inside
As an Amazon Associate I earn from qualifying purchases. This post may contain affiliate links at no extra cost to you.
Softwood is easy to mark, but that does not mean every marking gauge works equally well. Pine, spruce, fir, cedar, and similar woods compress readily around a blunt pin. They also tend to tear along earlywood bands and leave fuzzy edges around cross-grain marks. The choice between a pin marking gauge and a cutting gauge comes down to how clean the line must be, how the gauge will be used, and whether you need one tool for several materials.
As an Amazon Associate we earn from qualifying purchases at no extra cost to you.


Sections
Our Top Picks


What the Two Gauges Do
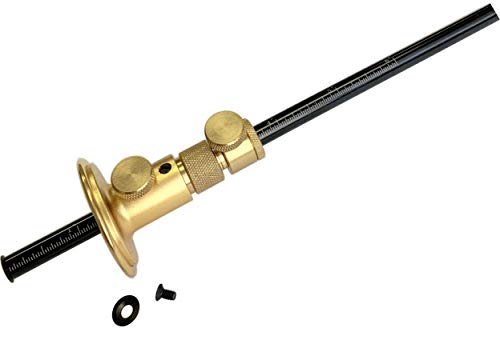
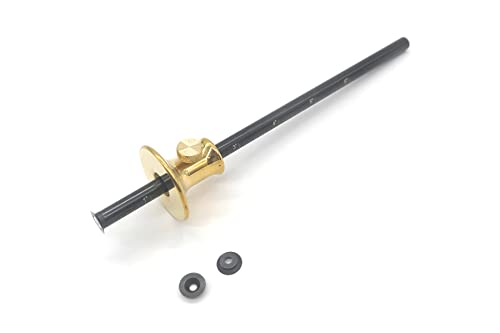
A pin marking gauge uses a pointed metal spur to scratch a line parallel to a reference edge. The spur is usually round or tapered and is often sharpened to a simple point. It is quick to set and works well for marking tenon shoulders, housing joints, hinge positions, and lines that will be hidden by a joint.
A cutting gauge uses a small knife-like blade instead of a pointed spur. The blade severs wood fibres as it travels, producing a narrow cut rather than a ragged scratch. This matters when marking across the grain, where a pin can follow the grain or pull fibres out on the waste side.
Both tools have a stock that rides against the edge of the workpiece and a fence or beam that positions the marker. On a traditional gauge, the beam is locked with a wedge, screw, or thumbscrew. A good lock is important: a beam that shifts by even 1 mm can spoil a joint.
How Softwood Changes the Choice
In straight-grained, close-grained hardwood, either gauge can make a dependable line. Softwood is less consistent. The hard latewood bands resist the spur, while the softer earlywood compresses. This can make a pin gauge feel as if it is skipping or wandering even when the fence is held firmly against the edge.
The problem is most obvious when marking across the grain. A blunt pin can crush a shallow depression instead of cutting a clear line. A sharp pin performs better, but it still tends to push fibres before penetrating them. A knife blade starts the cut cleanly and gives a chisel or saw a defined entry point.
For ordinary dimensioning and concealed joinery, a pin gauge is normally adequate. For visible joinery, stopped housings, half-laps, and layout that must remain precise after handling, a cutting gauge is the safer choice. It is particularly useful on softwoods with pronounced grain, such as construction spruce and knotty pine.
Pin Gauge vs Cutting Gauge
| Feature | Pin marking gauge | Cutting gauge |
|---|---|---|
| Line quality in softwood | Good with the grain; variable across it | Clean across and with the grain |
| Best uses | Tenon shoulders, repeated utility work, rough layout | Fine joinery, knife walls, visible layout |
| Risk of crushed fibres | Moderate, especially with a dull spur | Low if the blade is sharp |
| Maintenance | Occasional spur sharpening | Frequent blade honing and careful adjustment |
| Learning curve | Low | Moderate; blade direction and depth matter |
| Typical cost | Usually lower | Usually higher |
When a Pin Gauge Is the Better Buy
Choose a pin marking gauge if most of your work involves basic furniture parts, framing details, or joints where the mark will be removed during sawing and chopping. It is also a sensible first gauge for a beginner because the spur is less vulnerable to accidental damage than a fine knife edge.
A pin gauge is cheap enough that buying a better version is often worthwhile. Look for a stock that stays square to the beam, a fence with a broad bearing face, and a locking mechanism that does not loosen when the tool is pushed. A 100 to 150 mm beam is sufficient for many cabinet parts; a longer beam helps when marking wide boards but is more awkward in confined spaces.
Do not assume a sharp-looking point is sharp enough. The spur should enter the wood without excessive force. If it tears the surface, polish or lightly file it, then test on scrap. Keep the gauge moving in the same direction as the grain where possible. For cross-grain work, make a shallow first pass rather than trying to reach full depth in one stroke.
When a Cutting Gauge Earns Its Cost
Buy a cutting gauge when clean layout lines are a regular part of your work. It is the better tool for marking the ends of tenons, dovetail baselines, hinge recesses, and shoulders that must resist tear-out during chiseling.
The blade must be sharp enough to shave a fine curl from the end grain of a test block. A dull blade creates more problems than a pin: it can skid, dive too deeply, or lever fibres out of the surface. Set the blade to project only about 0.5 to 1 mm below the stock for normal layout. A deeper setting increases the chance of wandering and makes the gauge harder to control.
Many cutting gauges use a skewed blade. The bevel and cutting direction matter, so check the maker’s instructions and test on scrap. Hold the fence tight to the reference edge, use light pressure, and make two or three progressively deeper passes. This is slower than dragging a pin once, but the resulting knife wall gives a saw or chisel a much more reliable starting point.
Can One Gauge Do Both Jobs?
Some gauges accept interchangeable cutters, letting one tool use either a spur or a knife. This is a practical compromise for a small workshop, especially if storage space and budget are limited. Check how securely the cutter is held; a tiny blade that twists in its carrier will erase the precision advantage.
A dedicated cutting gauge is preferable for frequent fine joinery, while a pin gauge remains convenient for fast repetitive work. If you already own a pin gauge, buying a separate cutter may not improve every job. Spend the money first on sharpening equipment and a stable workholding setup if your marks are failing because the workpiece moves.
Using Either Gauge Accurately
Reference every mark from the same face and edge. Plane or joint that edge first; a rough edge can make the fence rock and introduce errors of 1 to 2 mm over a board. Lock the beam while holding the stock square, then check the setting against a rule or a test piece before marking the actual work.
Mark waste clearly with a pencil or small cross-hatch. A perfect gauge line is useless if you cut on the wrong side. For softwood, avoid pressing hard enough to bruise the reference edge. Make a light locating pass, then deepen the line only if it will be exposed to handling or needs to guide a chisel.
For most softwood site and workshop work, the sensible answer is not “cutting gauges are always better.” A sound pin gauge is cheaper, faster, and entirely adequate for hidden joinery. Choose a cutting gauge when fibre damage, cross-grain layout, or visible accuracy matters enough to justify sharper maintenance and a slightly higher price.