What's inside
As an Amazon Associate I earn from qualifying purchases. This post may contain affiliate links at no extra cost to you.
Sections
Our Top Picks
 IRWIN Tools Marples High-Impact Chisel Set3 Piece12.63 x 5.75 x 1.3 inches2.05 poundsCheck on Amazon

The short answer
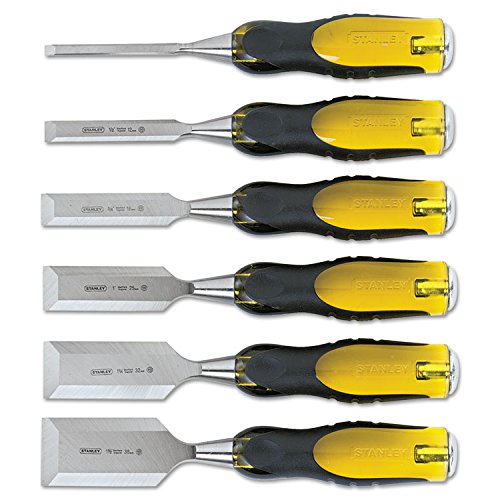
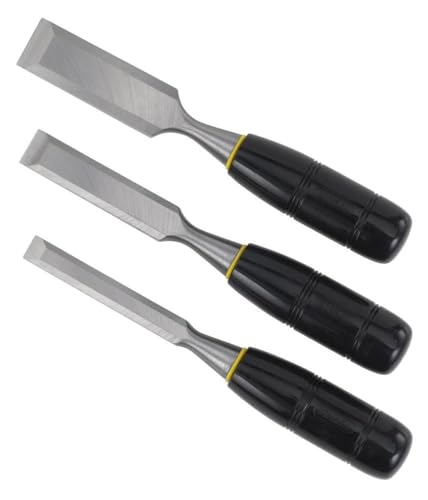
For most door-hardware recesses, a narrow chisel is better for corners and small adjustments; a wider chisel is faster for paring broad, shallow areas. If you are buying one chisel for occasional hinge or latch work, a sharp 12 mm (1/2 in.) chisel is a useful starting point. If you fit hinges regularly, a 6 mm (1/4 in.) and a 25 mm (1 in.) chisel make a more capable pair.
Neither width makes a clean recess by itself. Marking accurately, chopping in controlled stages and keeping the cutting edge sharp matter more than owning a large set. A chisel that is too wide can overrun a corner; one that is too narrow can leave ridges and make a broad pocket slow to level.
As an Amazon Associate we earn from qualifying purchases at no extra cost to you.


Match width to the cut
Door hinges and strike plates usually need a shallow, flat mortise with crisp corners. A narrow chisel helps define those corners and clear small amounts of waste. A wider one lets you pare across more of the recess in each pass. For a typical 75–100 mm (3–4 in.) hinge leaf, a 6–12 mm chisel is handy for trimming and corner work, while a 19–25 mm chisel is more efficient for cleaning the middle.
Use a chisel narrower than the recess when making short, controlled cuts close to its ends. Use one close to the recess width when paring the base. Do not assume the wider blade should match the plate exactly: a little clearance makes it easier to work without catching the marked edges.
| Chisel width | Where it helps | Main trade-off |
|---|---|---|
| 6 mm (1/4 in.) | Small corners, latch details and narrow corrections | Slow over a broad mortise; easy to leave parallel grooves |
| 12 mm (1/2 in.) | General hinge and strike-plate work | May feel small for leveling a wide recess |
| 19–25 mm (3/4–1 in.) | Paring the floor of a broad mortise | Can damage the shoulder if pushed past the layout line |
A practical set without overspending
For a one-off job, a sound, sharp 12 mm chisel may be enough, especially if the recess is small and you work patiently. A basic 1/2-inch wood chisel is a reasonable low-cost choice for occasional door work. Check that the blade is straight, the cutting edge is not chipped and the handle is secure. A budget chisel still needs sharpening before use; a dull edge is not a time saver.
If you cut hardware recesses often, add a narrow chisel for corners and a wider one for paring. Buying a small chisel set with narrow and wide sizes can cost less than buying each width separately, but avoid paying for sizes you will rarely use. A long lineup is not a substitute for flat backs and sharp edges. For regular site use, a tougher bevel-edge chisel with a robust handle is worth considering; delicate bench chisels are less suited to repeated mallet blows.
Cut the recess in controlled stages
First mark the hardware outline with a sharp knife or fine pencil, then score the edges with the chisel held bevel toward the waste. A depth gauge or a strip of tape on the blade can help you track the target, but check the actual plate thickness: hinge leaves and strike plates are not all the same. Set the depth a fraction shallow initially; you can remove more, but a recess cut too deep may leave the fitting sunk below the surface.
Make a series of short cuts across the waste, stopping just short of the scored boundary. Keep the chisel close to vertical for chopping, and take thin layers rather than trying to remove the full depth in one blow. For a shallow hinge mortise, the required depth is often only about 2–3 mm, but measure the leaf rather than relying on that typical range. Once the waste is broken up, pare toward the layout line and level the floor with the wider chisel, bevel up for a controlled shaving cut.
Test-fit the hardware before the final pass. The plate should sit flat and flush, with no rocking and no visible gap at the outline. If one end is high, remove material there in thin shavings. Do not lever out a large chip from under an edge: that can tear beyond the scored line and leave a gap the plate will not cover.
Mistakes that cause poor fits
A common failure is using a wide chisel to chop right up to a corner. The blade can cross the scored line, leaving a ragged shoulder or a corner that shows beside the hinge. Use the narrow chisel to establish and clean the ends, then work the middle with a wider blade. Another is chopping too deeply near the perimeter. If the outer wall breaks below the intended floor, the hardware may still fit, but the damaged edge can remain visible.
Watch grain direction, particularly near the ends of a door. Wood can split ahead of the blade, even when the cut looks aligned. Take lighter cuts, support the work and stop if the grain starts lifting beyond the mark. Keep fingers behind the cutting edge and secure the door so it cannot shift under mallet blows.
Finally, do not confuse force with progress. A dull edge crushes fibres, slips more readily and makes a clean shoulder harder to achieve. If the chisel needs heavy pressure to pare a thin shaving, sharpen it before continuing. A basic sharpening stone is adequate for maintaining a work-ready edge; a bench sharpening stone for chisels is often a more useful purchase than another rarely used blade width.
What to buy for your job
For occasional hinge fitting, start with a decent 12 mm chisel and spend time getting it sharp. Add a 6 mm blade if the hardware has tight corners or you need to repair small details. For frequent work, pair a narrow chisel with a 19–25 mm bevel-edge chisel so you can separate accurate edge work from quick floor cleanup. Choose widths around the hardware you fit most, rather than buying the widest set you can find.
If the recess is unusually wide, a wide chisel saves time only when you can control it and the grain behaves. If it is narrow, awkward or close to a finished edge, the smaller blade is safer. The best choice is the one that removes waste cleanly without forcing you to repair the door afterward.