What's inside
As an Amazon Associate I earn from qualifying purchases. This post may contain affiliate links at no extra cost to you.
Starting a joinery line is a small operation, but it controls everything that follows. A line that wanders by 1 mm can leave a shoulder showing, make a tenon loose, or force you to remove more material than planned. The two common tools for this job are a marking awl and a marking knife. Both can mark accurately, but they do not mark in the same way.
For general layout and occasional joinery, an awl is the cheaper, more versatile choice. For repeated, fine work—especially dovetails, shoulders, and knife-wall joinery—a marking knife gives a cleaner reference. The right choice depends less on which tool is “best” and more on whether you need a visible dot or a precise cut line.
As an Amazon Associate we earn from qualifying purchases at no extra cost to you.


Sections
Our Top Picks


What a marking awl does
A marking awl has a pointed steel shaft, usually with a small handle. You press or twist the point into the wood to make a hole or a series of small indentations. Those marks are easy to see and give a saw or drill bit somewhere to start.
An awl works well for marking screw locations, hinge holes, dowel centers, shelf-pin positions, and rough cut lines. It is also useful when working from a tape measure or combination square, because you can place the point directly at the measurement without needing to drag a line across the surface.
On softwood, the mark is quick and obvious. On hardwood, however, an awl can crush fibers around the point rather than cutting them cleanly. If you mark a shoulder this way, the indentation does not create a reliable wall for a chisel. It tells you where the line is, but does not help the waste break away cleanly.
A sharp awl can also penetrate surprisingly far. A light push is enough for layout. Leaning into it can make a hole 1/16 inch (about 1.5 mm) deep, which is excessive for a fine joinery line and can remain visible after the joint is assembled.
What a marking knife does
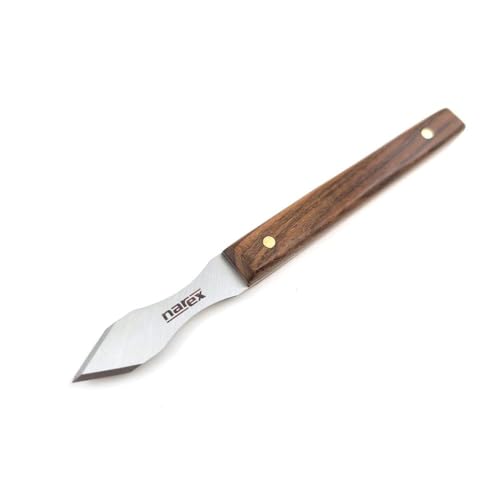
A marking knife cuts the surface fibers instead of simply pushing them aside. Its blade may be double-beveled, or it may have a single bevel designed to register tightly against a rule or square. The cut line is narrow, crisp, and easy to follow with a chisel or backsaw.
For accurate work, hold the knife against a square or gauge, then make two or three light passes rather than one hard pass. The first pass establishes the route. Later passes deepen it without allowing the blade to skate across the surface. A useful depth is roughly 0.5 to 1 mm—deep enough to see and feel, but not so deep that it becomes a damaging groove.
The knife line is particularly valuable when chopping a mortise or paring to a shoulder. Place the chisel in the knife cut and lean the bevel or back as appropriate. The cut fibers give the chisel a defined boundary, reducing breakout at the edge.
A marking knife does require more care. A dull blade tears fibers and can be harder to control than a sharp awl. The point is also easy to damage if it is dropped onto a concrete floor or left loose in a tool belt. Keep it capped or in a sheath, and hone it before the edge starts skating.
Marking awl vs. marking knife
| Feature | Marking awl | Marking knife |
|---|---|---|
| Typical mark | Point indentation | Fine cut line |
| Best uses | Screw holes, centers, rough layout, site work | Shoulders, dovetails, mortises, fine joinery |
| Speed | Very fast for individual points | Fast once set up, slower for scattered points |
| Risk | Crushed fibers or an oversized hole | Skating, accidental cuts, damaged edge |
| Cost and upkeep | Usually inexpensive and low maintenance | Costs more and needs regular sharpening |
| Best first purchase | General carpentry and site kit | Furniture and repeat joinery |
When an awl is enough
Buy an awl if most of your work involves construction timber, cabinets assembled with screws, hardware installation, or one-off repairs. For these jobs, the important question is often “where does the drill start?” rather than “where does the chisel stop?” An awl answers that question quickly and leaves a smaller mark than a pencil.
An awl is also fine for rough dovetail layout when the final cuts are guided by a separate square line or marking gauge. It is a sensible choice for a compact woodworking marking awl kept in a tool belt. Choose a straight, rigid point with a handle that gives you control; avoid a needle-like shaft that flexes when pushed.
The limitation appears when you need to register a chisel against the mark. An indentation has a rounded bottom and does not provide a clean vertical wall. If you use it for a visible shoulder, expect to spend extra time paring and checking the fit.
When a knife is worth buying
A knife is worth the extra cost when you make dovetails, mortise-and-tenon joints, half-laps, stopped dados, or other joints where a crisp boundary matters. It is also useful when transferring dimensions directly from one component to another. The cut line can act as both a visual reference and a shallow registration groove.
For a first dedicated tool, a simple woodworking marking knife is enough. You do not need an elaborate Japanese or dual-blade design to start. A comfortable handle, a blade that can be sharpened, and a tip that reaches into corners matter more than decorative materials.
Single-bevel knives can be excellent against a straightedge, but the bevel direction matters. Keep the flat side against the reference edge when that is how the knife is designed to register. A double-bevel knife is less directional and often easier for general-purpose work, though its wider cut can be slightly less precise in tight corners.
Using both tools together
Many woodworkers do not need to choose only one. Use the knife for lines that define the joinery, then use the awl for points that will be drilled or pinned. For example, knife the edges of a mortise, then prick the center of a hinge screw hole with the awl.
A marking gauge can cover much of the knife’s work on parallel lines. A good woodworking marking gauge cuts a consistent shoulder line quickly, while the knife handles cross-grain layout and transferred measurements. If your budget allows only one upgrade after a square and ruler, choose according to your work: an awl for general carpentry, or a knife for hand-cut joinery.
The practical buying choice
Choose an awl when low cost, speed, and all-around usefulness matter most. Choose a marking knife when the line itself will guide a chisel or saw and a visible error of 1 mm matters. If you are unsure, start with the awl; it is cheap, useful in nearly every tool kit, and unlikely to sit unused. Add a knife when your projects begin demanding clean shoulders and repeatable joinery rather than simple layout points.