What's inside
As an Amazon Associate I earn from qualifying purchases. This post may contain affiliate links at no extra cost to you.
Squaring a routed or drilled recess in a door frame is one of those jobs where an ordinary bevel-edge chisel can work, but a dedicated corner chisel makes the result faster and more repeatable. The tool is designed to cut the rounded corners left by a router or mortiser, producing the square internal corners needed for a mortise lock, strike plate, hinge recess, or flush-mounted latch plate.
The best choice depends on how many recesses you need to cut, the timber you are working in, and whether you value speed over versatility. A corner chisel is not a replacement for a normal chisel: it removes a small, precise plug of waste rather than paring across a surface.
As an Amazon Associate we earn from qualifying purchases at no extra cost to you.


Sections
Our Top Picks
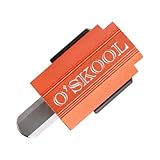
 O'SKOOL Corner Chisel Squaring Tool with Spring-Loaded HSS1.2" x 0.4" x 2.8"2.8 x 0.4 x 0 inchesCheck on Amazon


What a corner chisel does
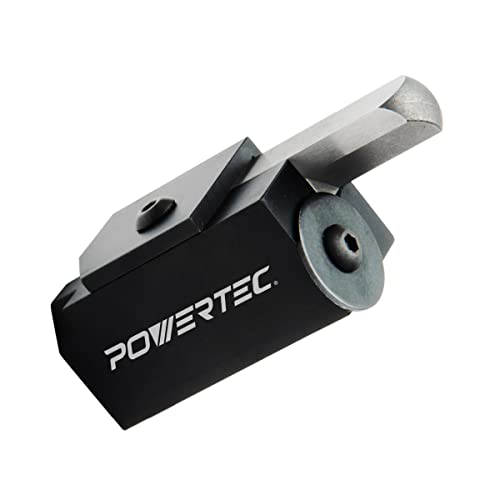
A corner chisel has a square or rectangular cutting head with two perpendicular cutting edges. You position it in the rounded corner of a routed recess and strike the end with a mallet. One or more blows shear out the curved waste, leaving a clean 90-degree corner.
Most versions are available in common sizes such as 1/4 inch, 3/8 inch, and 1/2 inch. The size refers to the width of the cut, so it should match the radius and corner detail you need to remove. For a typical door-hinge recess, a 1/2-inch corner chisel is often useful, while smaller sizes suit narrow latch plates and compact hardware.
The tool works best after the recess has already been routed or chopped close to depth. It is not intended to excavate an entire mortise. Trying to use one that way can damage the cutting edges, split the frame, or leave the chisel stuck in the timber.
Best types to buy
| Type | Best for | Advantages | Limitations |
|---|---|---|---|
| Dedicated corner chisel | Repeated hinge, strike, and latch recesses | Fast, consistent square corners; easy to align | Limited to one cutting size and shape |
| Interchangeable-size corner chisel set | Mixed door hardware and site work | Several sizes in one kit; good coverage | More expensive and more parts to lose |
| Standard bevel-edge chisel | Occasional repairs and one-off jobs | Versatile; useful for many other tasks | Slower and harder to keep corners square |
| Heavy-duty mortising-style corner chisel | Hardwood frames and frequent production work | More robust head and handle; tolerates repeated blows | Heavier and less convenient for delicate trim |
For occasional DIY work, a basic woodworking corner chisel is usually enough. A cheaper tool is fine when you are cutting softwood, making only a few recesses, and willing to check the result with a square. Spend more when the tool will be used daily, when the frame is hardwood, or when replacing a damaged cutting head would cost more in lost time than the original price difference.
Choose the size and fit carefully
Measure the rounded corner before buying. If the router bit left a 1/4-inch radius, a corner chisel with a cutting width around 1/2 inch may remove the complete corner in one operation. For narrow plates, a smaller tool gives better control. Do not assume that a “1/2-inch” corner chisel will suit every 1/2-inch hinge: manufacturers measure these tools differently, and the actual outside dimensions can vary.
Check the tool against the hardware template or plate. The chisel should remove only the rounded material outside the marked square corner. If its head is wider than the recess, it can bruise the side walls. If it is too narrow, you may need multiple cuts and a final paring pass with a standard chisel.
A set such as a multi-size corner chisel set makes sense for installers who work with several lock and hinge sizes. For a homeowner fitting one lock, buying one correctly sized tool is normally cheaper and less cluttered.
Features that matter in use
Cutting geometry: The inside corner should be sharp and accurately ground. A blunt or poorly aligned head may compress the fibers instead of cutting them, especially in dense hardwood. Look for a clearly defined 90-degree cutting edge and a flat seating face.
Strikeable handle: Choose a handle designed for a wooden or nylon mallet. Avoid using a metal hammer unless the manufacturer specifically allows it. Repeated steel-hammer blows can mushroom the striking end and loosen a composite handle.
Depth control: Some corner chisels have a shoulder or depth stop. This helps when cutting hinge recesses to a consistent depth, but it can also prevent the tool from reaching a deep corner. A stop is useful for repetitive installation work; a plain head is more flexible for repairs.
Replaceable parts: On a busy site, a replaceable blade or head can be worthwhile. It also makes sharpening less complicated. However, inexpensive sets with loose inserts can introduce play, so check that the head locks firmly before striking.
How to use a corner chisel cleanly
Mark the recess with a sharp knife rather than relying only on pencil. Score all four edges, then rout or chop the waste to within roughly 1/16 inch of the final lines. Leave the bottom slightly shallow until the corners are finished; this keeps the tool from bottoming out too early.
Place the corner chisel exactly in the corner, with its outside faces against the scored walls. Hold it vertical and give it a controlled tap with a mallet. Start lightly. If the head is correctly positioned, the fibers should shear cleanly. Increase the force only as needed, then lift the tool and clear the small plug of waste.
Cutting directly into an unscored edge is a common cause of breakout. On softwood, make a shallow first cut at each corner. On hardwood, several light blows are safer than one heavy strike. Keep the tool square to the frame; leaning it even a few degrees can widen one wall and leave a sloping corner.
After the four corners are cut, test the plate or hinge. Use a normal bevel-edge chisel set to pare high spots and clean the sides. A corner chisel rarely leaves a finished recess by itself, particularly where the router depth was inconsistent.
Common failures and maintenance
If the corner splinters, the timber probably was not knife-scored, the chisel was dull, or the cut was made against unsupported end grain. If the tool binds, stop striking and lever it out gently by hand; driving it deeper can wedge the head and split a narrow door stile.
After use, brush out resin and wood chips and wipe the steel dry. Protect the cutting head with a cover or wrap rather than tossing it loose in a tool bag. Light honing on a fine stone can restore a slightly dull edge, but major damage to the 90-degree corner is difficult to correct without grinding equipment. Keep the tool reserved for wood: hitting nails or screws will quickly ruin the cutting edges.
The practical buying choice
Buy a single, correctly sized dedicated corner chisel if you are fitting one or two doors. Choose a stronger multi-size kit if you install different locks and hinges regularly. If the work is rare and the recess is softwood, a sharp standard chisel remains an acceptable low-cost option. The dedicated tool earns its price through consistency: it makes the last few seconds of each recess predictable, which is usually more valuable than having another general-purpose chisel in the box.