What's inside
- Start with the job, not the feature list
- Choose the laser pattern that matches the layout
- Red or green beam: visibility versus runtime
- Understand accuracy in practical terms
- Working range and the effect of room conditions
- Mounting options determine how easy the tool is to use
- Decision matrix by budget and frequency of use
- Power, durability, and ownership costs
- Setup and maintenance that protect accuracy
- Common buying mistakes
- Bottom line
- Related Guides
- Start with the job, not the feature list
- Choose the laser pattern that matches the layout
- Red or green beam: visibility versus runtime
- Understand accuracy in practical terms
- Working range and the effect of room conditions
- Mounting options determine how easy the tool is to use
- Decision matrix by budget and frequency of use
- Power, durability, and ownership costs
- Setup and maintenance that protect accuracy
- Common buying mistakes
- Bottom line
- Related Guides
As an Amazon Associate I earn from qualifying purchases. This post may contain affiliate links at no extra cost to you.
To choose a laser level, match the laser type and working range to the job first, then compare accuracy, beam visibility, self-leveling behavior, mounting options, and ownership cost.
Sections
- Start with the job, not the feature list
- Choose the laser pattern that matches the layout
- Red or green beam: visibility versus runtime
- Understand accuracy in practical terms
- Working range and the effect of room conditions
- Mounting options determine how easy the tool is to use
- Decision matrix by budget and frequency of use
- Power, durability, and ownership costs
- Setup and maintenance that protect accuracy
- Common buying mistakes
- Bottom line
- Related Guides
Start with the job, not the feature list
A laser level for hanging a few kitchen cabinets does not need the same capabilities as one used to set partitions across a large room. The most useful choice usually falls into one of four categories:
As an Amazon Associate we earn from qualifying purchases at no extra cost to you.


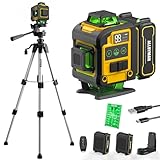
| Typical project | Best laser type | Useful range | Recommended accuracy | Features worth paying for |
|---|---|---|---|---|
| Pictures, shelves, cabinets | Horizontal line or cross-line | 30–50 ft visible indoors | Approximately ±1/8 in at 30 ft or better | Magnetic mount, fine height adjustment |
| Doors, windows, partitions | Cross-line with vertical beam | 50–80 ft indoors | Approximately ±1/8 in at 30 ft | Self-leveling, locking pendulum, tripod thread |
| Flooring, ceilings, tile layout | 360-degree horizontal or multi-line | 40–100 ft, depending on light | Approximately ±1/8 in at 30 ft | Ceiling bracket, fine adjustment, green beam |
| Exterior grading or long layouts | Rotary laser with detector | 500–1,300 ft diameter with detector | Approximately ±1/8–1/4 in at 100 ft | Receiver, sturdy tripod, weather resistance |
These figures are buying targets rather than universal standards. Manufacturers may state accuracy per 30 ft, 50 ft, or 100 ft, so convert the specification before comparing models.
Choose the laser pattern that matches the layout
Horizontal-line lasers
A single horizontal line is simple and efficient for cabinet tops, chair rails, shelves, backsplash edges, and picture groupings. It generally uses less battery power than a multi-line unit and is often less expensive. The limitation is that it cannot show a vertical reference for plumb work.
Cross-line lasers
A cross-line laser projects one horizontal and one vertical line. It is the most versatile choice for general woodworking and renovation: the horizontal line establishes height while the vertical line helps align cabinet sides, door jambs, wall studs, and tile joints. For many homeowners and finish carpenters, this is the best starting point.
Multi-line and 360-degree lasers
A 360-degree horizontal laser projects a level line around the room, so you do not need to reposition the tool for each wall. Some multi-line models add one or two full vertical planes, which can square a room or align opposing walls. They cost more and consume batteries faster, but the time saved becomes significant when laying out a large room, suspended ceiling, flooring grid, or several cabinet runs.
Rotary lasers
A rotary laser spins a beam around the room and is designed for long distances. Indoors, the line may be less convenient to see than a bright cross-line beam. Outdoors, use a compatible detector because sunlight can make the rotating beam difficult or impossible to see. Rotary systems are specialized tools; do not buy one merely because its advertised range is large.
Red or green beam: visibility versus runtime
Red lasers are usually the economical option and work well in dim or moderately lit interiors. Green lasers appear brighter to the human eye, making them easier to see across a sunlit room or on darker materials. The trade-offs are higher purchase cost, greater power consumption, and sometimes a larger housing.
For occasional indoor cabinet or shelving work, a red cross-line laser is normally sufficient. Choose green when you frequently work in bright rooms, install ceilings, lay out long walls, or need to see the line without constantly using a target card. A green beam is not automatically more accurate; visibility and accuracy are separate specifications.
Understand accuracy in practical terms
Accuracy is commonly written as “±1/8 inch at 30 feet.” This means the line can be as much as 1/8 inch above or below the true reference at that distance. The possible error increases with distance. As a rough calculation, a tool rated at ±1/8 inch at 30 feet could have approximately ±1/4 inch of error at 60 feet if the error scales proportionally.
That is adequate for many cabinets, trim projects, and wall fixtures. More demanding work—such as aligning long runs of tile, machinery, or structural layout—benefits from a tighter specification, such as ±1/16 inch at 30 feet. Check whether the published accuracy applies to the horizontal beam, vertical beam, or both.
Do not confuse leveling range with accuracy. A self-leveling range of ±4 degrees tells you how far the tool can correct a tilted setup; it does not tell you how precise the final line will be.
Working range and the effect of room conditions
Manufacturers often list two ranges: visible range and detector range. A small indoor laser may be visible for 30–60 feet, while the same tool may reach several hundred feet with a receiver. Bright windows, glossy surfaces, dust, and dark paint reduce practical visibility.
For a typical 12-by-16-foot room, a 30-foot visible range provides ample coverage. For a 40-foot great room, choose a model rated for at least 50 feet in the expected lighting. If you regularly work outdoors, judge the tool by its detector range and verify that a receiver is included or available; a laser advertised as “up to 1,000 feet” may require a detector to achieve that figure.
Mounting options determine how easy the tool is to use
- Magnetic bracket: Fast on steel studs, metal framing, and cabinet hardware, but not useful on ordinary drywall without another attachment.
- Clamp or ceiling bracket: Useful for suspended ceilings and cabinet installation because it holds the tool above an obstruction and often permits small height adjustments.
- Tripod thread: A 1/4-20 thread fits many camera-style tripods; a 5/8-11 thread is common on professional surveying tripods. Confirm the thread before buying accessories.
- Fine-adjustment base: Worth the cost when you must move the line by a fraction of an inch without shifting the tripod or bracket.
- Wall mount: Helpful for drywall, but check whether it uses a pin, screw, adhesive pad, or clamp. Adhesive mounts can fail on dusty or textured surfaces.
For cabinet installation, a magnetic bracket plus a height-adjustment mechanism is often more useful than an extra laser plane. For room-wide layout, a stable tripod and fine-adjustment base matter more than a compact body.
Decision matrix by budget and frequency of use
| User and workspace | Practical choice | Typical market range | Why |
|---|---|---|---|
| Occasional homeowner, small rooms | Red cross-line laser, 30–50 ft visible range | $40–$100 | Enough for shelves, art, cabinets, and basic trim |
| Frequent DIY user, bright interiors | Green cross-line laser, 50–80 ft range | $90–$200 | Better visibility and more reliable room coverage |
| Finish carpenter or remodeler | 360-degree or three-plane green laser | $180–$450 | Reduces repositioning and speeds repeated layouts |
| Outdoor or trade contractor | Rotary laser with receiver and tripod | $300–$1,000+ | Detector-based range and stable long-distance reference |
Prices vary with included batteries, cases, brackets, detectors, and battery-platform compatibility. A bare tool can look inexpensive but become costly once a receiver, tripod, and mounting bracket are added.
Power, durability, and ownership costs
Disposable AA or AAA batteries are convenient for occasional use. Rechargeable USB or proprietary battery systems make sense for frequent work, particularly with bright green or multi-line lasers that can use power quickly. Typical continuous runtime ranges from about 4–8 hours for bright multi-line operation and 8–20 hours for simpler red-line tools, though cold temperatures and battery age reduce those figures.
Consider a professional using a laser twice per week for 50 weeks: that is roughly 100 uses per year. A $300 tool costs about $3 per use in its first year before batteries and accessories; a $75 tool used four times costs $18.75 per use. The more often you set out the tool, the more valuable faster setup, a durable mount, and a rechargeable system become.
The pendulum mechanism, beam windows, switches, and mounting threads are common wear points. A laser can remain accurate only if it is protected from drops and vibration. Look for a locking pendulum for transport, a rubberized housing, a hard case, and an ingress rating such as IP54 when dusty or damp work is expected. IP ratings do not make a tool waterproof; they indicate limited protection against dust and splashing.
Setup and maintenance that protect accuracy
- Place the laser on a stable surface or firmly secured mount. A soft workbench, loose ladder, or vibrating floor can make the line appear to move.
- Keep the tool within its self-leveling range. If the warning indicator flashes, do not use the beam as a reference.
- Allow the pendulum to settle before marking. Moving the housing while the beam is still oscillating introduces avoidable error.
- Use a target card in bright light rather than increasing the range beyond the tool’s practical visibility.
- Clean the beam windows with a soft, dry lens cloth. Do not scrape sawdust or cured adhesive across the window.
- Check calibration after a hard impact. For a simple field check, project a horizontal line on one wall, rotate the tool 180 degrees from the same position, and compare the two readings. A noticeable mismatch warrants manufacturer calibration or professional service.
Common buying mistakes
Do not choose by maximum range alone, buy a green laser expecting greater accuracy, or assume every tripod uses the same thread. A 360-degree model can also be unnecessary for a single cabinet wall, while a basic horizontal laser will frustrate you when aligning door jambs. Finally, confirm what is included: detector, batteries, charger, bracket, target card, and case can materially change the tool’s usable value.
Bottom line
For most woodworking and home-improvement projects, choose a self-leveling cross-line laser with approximately ±1/8 inch accuracy at 30 feet, a 30–80-foot indoor range, a tripod thread, and a secure mounting bracket. Choose green for bright work areas, 360-degree lines for repeated room-wide layouts, and a rotary laser with a detector only when long outdoor range justifies the extra equipment.