What's inside
As an Amazon Associate I earn from qualifying purchases. This post may contain affiliate links at no extra cost to you.
Sections
Our Top Picks
 IRWIN Tools Marples High-Impact Chisel Set3 Piece12.63 x 5.75 x 1.3 inches2.05 poundsCheck on Amazon


What makes a good housing-joint chisel?
A housing joint—a dado cut across the grain to hold a shelf—needs a flat bottom, clean walls and a close fit. A chisel helps remove the waste and pare the joint to its final width, but it is not a substitute for accurate layout or a saw kerf at the shoulders. For ordinary shelving, a sharp, well-supported bench chisel matters more than a premium handle or a specialist pattern.
For most work, start with a 12 mm (½-inch) chisel, then add a 19 mm (¾-inch) chisel if you make wider housings. The 12 mm size is useful for cleaning corners and controlled paring; the wider tool removes waste faster from a typical 18–19 mm-thick shelf. A very wide chisel can be awkward in a narrow joint, while a narrow one takes many more cuts.
As an Amazon Associate we earn from qualifying purchases at no extra cost to you.


Chisel types worth considering
| Type | Best use in a housing | Trade-off |
|---|---|---|
| Bench chisel | General chopping and paring; the best first choice | One tool rarely matches every joint width |
| Bevel-edge chisel | Working into corners and trimming shoulders | Thin edges need care; do not lever out large chunks |
| Mortise chisel | Heavy chopping where a stout blade is useful | Usually too thick and wide-behind-the-edge for fine housing cleanup |
| Budget bench chisel | Occasional shelving and learning to sharpen | May need more setup before it cuts cleanly |
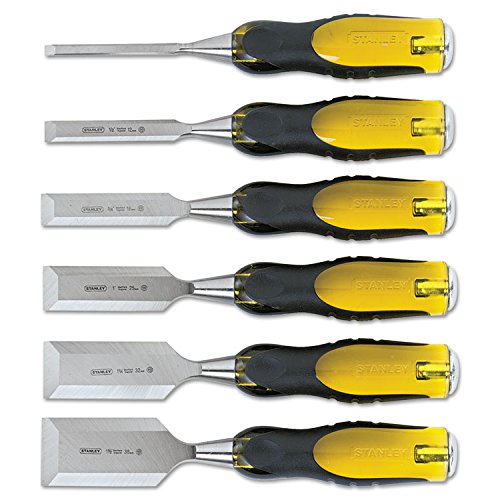
A standard bevel-edge bench chisel is the sensible buy for most shelving. A bevel-edge bench chisel set gives you useful size options, but check the actual blade widths rather than assuming the set includes a 12 mm tool. If you only build shelves occasionally, one decent chisel in the width you use most is often a better purchase than a large set of mediocre tools.
Mortise chisels are built for forceful work, but their thick blades can be hard to maneuver when paring a housing wall. They make sense if you also cut mortises by hand; they are not a necessary upgrade for shelf dados.
Steel, handle and edge quality
Chisel steel affects how long an edge stays sharp, but the maker’s heat treatment and your sharpening routine matter more than a label such as “high carbon” or “chrome vanadium.” A harder edge may hold up longer but can be less forgiving if you strike it carelessly. For hand-cut housings, any reputable bench chisel that sharpens without fuss can do the job.
Wooden and plastic handles both work. A wooden handle feels familiar and can be comfortable for paring; a tough plastic or composite handle is often more tolerant of mallet blows and site use. If you expect to chop, choose a handle explicitly made for striking. Do not hit a delicate paring chisel with a steel hammer: it can damage the handle or send fragments flying. Use a wood or plastic mallet.
Budget chisels can be fine, but expect to spend time flattening the back near the edge and honing the bevel. A basic bench chisel is a reasonable choice for occasional work if you are prepared to sharpen it. Paying more may buy a better-finished tool and less setup, but it will not compensate for a blunt edge or poor technique.
Choosing sizes and keeping them sharp
Match the chisel to the joint, not just to the shelf thickness. For a 19 mm shelf, a 12 mm and a 19 mm chisel cover most cleanup. For a 25 mm shelf, add a wider chisel only if you often cut housings of that size. A narrow chisel is safer for the last few millimetres at a wall; a wide blade can catch the layout line or bruise the shoulder if pushed too hard.
Before buying, check that the blade is straight and that the cutting edge is square across the width. On arrival, inspect the back: a hollow or uneven back can make accurate paring frustrating. Flatten only the area near the edge rather than polishing the entire blade. Hone a consistent bevel, commonly around 25 degrees for general bench work, and raise a small secondary bevel if that suits your sharpening setup. The exact angle is less important than a keen, repeatable edge.
Keep a honing stone or sharpening system handy. A chisel that no longer slices end grain cleanly needs attention before it goes into a housing. A basic sharpening stone and honing guide can make repeatable sharpening easier, though the guide is optional once you can hold a steady angle. Avoid letting the edge get so dull that you compensate by striking harder; that increases the chance of splitting the shoulder.
Cutting a clean housing
Mark both edges of the housing with a knife or a sharp marking gauge, and use a square to carry the lines across the board. Set a depth gauge or marking gauge to the intended depth—often about 6–8 mm for a light-duty shelf in 18–19 mm stock, though the design and load determine what is appropriate. Saw the shoulder lines carefully if you want crisp ends. Clamp the work so it cannot move, and protect the bench beneath the cut.
Work from the waste side in shallow stages. Make a series of cross-grain cuts inside the waste area, stopping short of the final depth, then remove the ridges with the chisel bevel down. Leave roughly 1 mm for the final pass rather than trying to reach full depth in one blow. For the walls, pare toward the layout line with the flat back registered against the surface. Take small shavings; levering sideways against the wall can break out the shoulder or widen the joint.
Test the shelf frequently. It should enter with firm hand pressure, not require hammering. A fit that is too tight can split the carcass during assembly; one that is loose may need a shim or a revised layout rather than more chiseling. If the bottom is uneven, take high spots down with controlled cuts and check with a straightedge. Do not chase tiny marks so aggressively that you lower the whole floor below the planned depth.
What to buy for your shelf project
For a first set, choose two bevel-edge bench chisels near 12 mm and 19 mm, with handles that suit how you work and edges you can maintain. If the budget is tight, buy one 12 mm chisel and add sizes later; it is more useful to own one sharp, reliable tool than six blunt ones. A premium set is worthwhile when you use chisels often and value better finishing and edge retention, but occasional shelving rarely demands the most expensive steel.
Prioritize a straight blade, a secure handle, usable width markings and a sharpening plan. Those details have a direct effect on whether the housing fits cleanly. Brand prestige and an oversized kit do not.