What's inside
As an Amazon Associate I earn from qualifying purchases. This post may contain affiliate links at no extra cost to you.
A folding rule earns its place in an interior carpenter’s pocket when a tape measure is awkward and a rigid rule is too short. It is useful for checking cabinet depths, transferring short dimensions, setting hinge positions, measuring reveals, and gauging stair or trim details. The best compact folding rules are not simply the smallest ones. They balance closed length, stiffness, readable graduations, joint quality, and the ability to measure into corners without excessive flex.
For most interior carpentry, look for a rule that folds to roughly 8 to 12 inches and opens to at least 4 feet. A six-foot rule is more versatile, but a four-foot version is easier to carry in a tool belt and is usually sufficient for cabinet, trim, and furniture work.
As an Amazon Associate we earn from qualifying purchases at no extra cost to you.


Sections
Our Top Picks
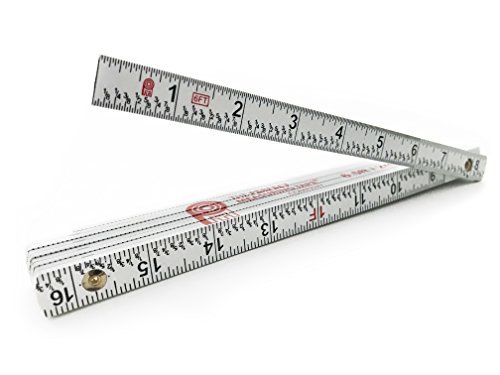 Perfect Measuring Tape Co. FR-72 Carpenter's Folding Rule2 m9.5 x 1.5 x 0.5 inches0.3 poundsCheck on Amazon


What to Look For in a Compact Folding Rule
The first decision is material. Wood rules are pleasant to handle and easy to mark with a pencil, but they can swell, shrink, or become rough if left in a damp van. Fiberglass-reinforced or composite rules resist moisture and usually have more durable printed graduations. Aluminum rules are stiff and stable, though they can feel cold and may damage a finished surface if dropped or dragged across it.
Joint design matters more than appearance. Each hinge should open smoothly, stop close to 180 degrees, and hold the sections in line. A loose joint creates a cumulative error. If every hinge has only 0.5 mm of play, a long rule can be several millimeters short or long by the time it is fully extended. That is unacceptable when fitting cabinet fillers or scribing a tight opening.
Choose graduations that match your work. A rule marked in 1/16-inch increments is suitable for general trim and cabinet installation. A 1/32-inch scale can help with fine furniture work, but it is slower to read and easier to misinterpret. Metric-only rules are excellent if your plans and hardware use millimeters; combination inch-and-metric markings are practical on mixed job sites but can make a narrow scale crowded.
Raised edges or a built-in depth slide are useful for measuring inside corners. Some rules have a metal end or offset section that allows the edge to sit against a cabinet side while the scale remains visible. This is more convenient than bending a tape blade into a corner, but it can add bulk and cost.
The Best Formats for Interior Work
| Rule format | Closed length | Best use | Main drawback |
|---|---|---|---|
| Four-foot, six-section | About 8–10 inches | Cabinetry, trim, shelving, tool-belt carry | Too short for wide openings and longer layout lines |
| Six-foot, six-section | About 10–12 inches | General interior carpentry and stair components | Heavier and more flexible when fully open |
| Two-foot, four-section | About 6 inches | Furniture, drawers, small repairs, quick pocket measurements | Limited reach; not a replacement for a full rule |
| Folding rule with depth gauge | About 9–12 inches | Inside cabinet and recess measurements | More expensive and sometimes bulky in a pouch |
A four-foot rule is the sensible compact choice for a trim carpenter who already carries a tape. It handles common measurements such as door casing lengths, shelf depths, baseboard returns, and cabinet openings without taking over a pocket. A six-foot rule is better as a primary measuring tool, especially when you regularly measure stud bays, stair parts, or longer runs of molding.
Features Worth Paying For
Clear, permanent markings are the priority. Black graduations on a pale surface are easiest to read in a dim hallway or inside a cabinet. Look for numbers printed on both faces or on both edges if you frequently measure from different directions. Some rules have a scale that reads from either end, which reduces the need to turn the tool around.
A rule that locks at common angles can be useful for setting bevels and copying odd angles, but do not treat a folding rule as a precision bevel gauge. Its hinges and printed scale are intended for practical layout, not machine-shop accuracy. For repeated angle work, use a dedicated sliding bevel gauge.
Make sure the sections remain flat when opened. Place the rule on a known-flat surface and inspect it from the side. A slight bow may not matter for a rough framing measurement, but it can transfer an error when you mark a cabinet door or lay out a narrow trim piece. A stiff rule should not twist noticeably when you hold one end and gently rotate the other.
For finished work, a smooth, non-scratching edge is important. Burrs around metal joints can leave lines in lacquer, paint, or veneered panels. Run a fingertip along the edges before buying, and reject any rule with sharp hinge hardware or proud rivets.
How to Use One Accurately
Use the same edge and the same scale every time. Mixing the inside and outside edges can introduce small differences caused by printing, wear, or an offset end. When transferring a measurement, place the rule firmly against the reference edge and mark with a sharp pencil or marking knife rather than trying to read a fraction while holding the rule loosely.
For a cabinet opening, measure the top, middle, and bottom. Interior walls are rarely parallel, and a single measurement can hide a 3–6 mm variation. Record the smallest dimension when making a shelf or filler that must fit, then allow the clearance the job requires. For a removable shelf, 2–3 mm total clearance is often practical; a tight built-in may need less, but painted surfaces and seasonal movement can close up a zero-clearance fit.
When checking a long dimension, open the rule fully and support it at several points. Do not force a partly open rule into a straight line. The hinges are not designed to act as a rigid beam, and forcing them can loosen the rivets. For measurements longer than the rule, use a reliable compact tape measure and use the folding rule for the short, precise transfers.
When a Cheaper Rule Is Fine
A budget composite or wood rule is perfectly adequate for rough trim work, framing small partitions, setting outlet box positions, and measuring stock for cuts. If it costs little and stays in your pouch as a backup, small cosmetic defects are not important. Replace it when the joints loosen, the graduations fade, or the sections no longer align.
Spend more when the rule will be used for cabinet installation, furniture, or repeated finish work. Better joints, sharper markings, and a straighter body save time every day. A practical setup is a durable four-foot folding rule for pocket work, a longer tape for openings, and a precision marking knife for final layout. That combination covers most interior carpentry without asking one compact tool to do everything.