What's inside
As an Amazon Associate I earn from qualifying purchases. This post may contain affiliate links at no extra cost to you.
A saw-cut mortise is fast to remove, but the cuts rarely leave a clean, square-walled hole. The usual problems are a ragged shoulder, a few uncut fibres in the corners, and a bottom that is uneven or slightly too shallow. The right chisel makes cleanup controlled work rather than an exercise in levering and damaged edges.
For most carpenters, the best choice is a sharp bevel-edge bench chisel in a width that fits the mortise. A dedicated mortise chisel can be useful when there is heavy chopping, but it is often more tool than you need for cleaning up an opening made with a saw.
As an Amazon Associate we earn from qualifying purchases at no extra cost to you.


Sections
Our Top Picks


What the Chisel Has to Do
Cleanup has three separate jobs. First, pare the long walls straight. Second, square the ends and corners. Third, level the bottom without digging below the layout line. These jobs put different demands on the tool.
A chisel for this work should have a flat or nearly flat back, a reasonably thin edge, and enough side clearance to enter a narrow mortise. The handle must also tolerate light mallet taps, because paring alone is not always enough to remove the ridges left by a saw.
Do not treat the chisel as a crowbar. A mortise chisel has a thick blade designed for levering out waste, but a thin bench chisel is easier to control when you are correcting a wall or fitting a tenon. Levering sideways with a thin chisel is the quickest way to chip the edge or bend the blade.
Best Chisel Types for the Job
| Chisel type | Best use | Main advantage | Trade-off |
|---|---|---|---|
| Bevel-edge bench chisel | General mortise cleanup | Thin sides and good control in corners | Not ideal for heavy levering |
| Firmer chisel | Straight walls and moderate chopping | Stronger blade and useful flat sides | Less clearance in tight corners |
| Mortise chisel | Deep, waste-filled mortises | Strong enough for chopping and levering | Thicker, heavier, and slower for fine paring |
| Long paring chisel | Final wall and shoulder fitting | Excellent control over a long cut | Too delicate for mallet work |
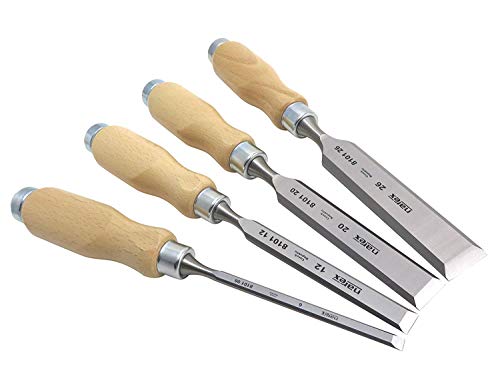
A bevel-edge bench chisel set covering 6 mm, 10 mm, 12 mm, 18 mm, 25 mm, and 32 mm will handle most site and workshop mortises. You do not need every size. For common door, cabinet, and framing work, 10 mm, 12 mm, and 18 mm are the most useful starting points.
Blade Width and Shape
Choose a chisel slightly narrower than the mortise when cleaning the inside walls. A 12 mm chisel is a good fit for a 12 mm mortise only if the opening is already accurate. For rough saw work, a 10 mm or 11 mm tool gives you room to work without bruising the edges.
For squaring the ends, use a chisel narrower than the mortise width. Trying to force a 25 mm blade into a 25 mm opening leaves no margin for tilted cuts. It also makes it hard to see the cutting edge. Work progressively: remove the high spots with a narrow chisel, then take a full-width paring pass when the walls are close.
Bevels on both sides are helpful in corners because they reduce interference. A chisel with a very thick blade or large side bevels may still struggle in a narrow mortise, particularly near a shoulder. Check the blade thickness as well as its stated width; two nominally 12 mm chisels can have noticeably different clearance.
Bench or Mortise Chisels?
Use a bench chisel when the saw has removed most of the waste and you are correcting the shape. Its thinner blade reaches corners and its lighter weight makes it less likely that you will overcut the layout. This is the sensible choice for occasional mortises and for work in softer hardwoods or softwood.
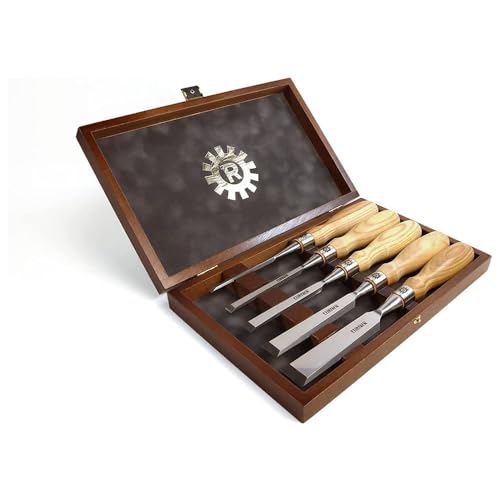
Choose a mortise chisel set when you regularly chop deep mortises, work in hard maple, oak, or beech, or need to lever out compacted chips. The extra steel behind the edge matters when the chisel is struck repeatedly. The downside is weight: a mortise chisel is tiring for delicate cleanup and may not enter a narrow opening.
The cheaper option is fine if you are making only a handful of mortises each year. A good-quality bench chisel, sharpened properly, will clean up saw cuts without trouble. Spend more on a mortise chisel set only when the workload justifies its tougher construction.
Sharpness and Bevel Angles
Sharpness matters more than brand. A practical setup is a primary bevel around 25 degrees with a small secondary bevel around 30 degrees. That edge cuts cleanly but has enough support for light mallet work. For abrasive timber, end grain, or frequent chopping, a 30- to 35-degree working bevel lasts longer, although it requires more force.
Hone the back until the first 10 to 15 mm is flat and polished. It does not need to be mirror-polished along the entire blade. A bur-free edge should shave end grain and leave a clean, continuous shaving from the wall. If the chisel crushes fibres instead, stop and hone it rather than hitting harder.
A chisel sharpening guide and waterstone setup is worthwhile if your existing tools lose their edge during cleanup. A honing guide is slower than freehand sharpening, but it helps maintain a consistent angle while you learn.
A Reliable Cleanup Method
Mark the finished depth and protect the shoulder with a knife line, not just pencil. Start from the waste side of the line, leaving roughly 1 mm of material until the wall is straight. Chop across the grain in 2 to 3 mm steps rather than driving the blade to full depth in one blow.
For the long walls, place the bevel toward the waste when chopping, then use the flat back as a reference for paring. At the ends, make shallow vertical cuts first. This prevents a long chip from running past the mortise and breaking the shoulder.
Check depth with a rule or marking gauge. A mortise that is 2 mm deeper than intended may be harmless if the joint has clearance, but a wall that is 1 mm out of square can leave a visible gap or force the tenon off centre. Test the joint often, and remove only the shiny high spots.
Useful Sizes and Buying Advice
If you are buying individually, start with a 10 mm or 12 mm bevel-edge chisel, then add an 18 mm or 20 mm chisel for wider mortises. Add a dedicated 1/4-inch mortise chisel if you routinely cut deep narrow joints.
Look for a handle that can be struck without splitting, a blade that is straight, and a back that can be flattened without removing excessive steel. Avoid very cheap sets with soft edges or handles that loosen after a few mallet blows. Conversely, an expensive presentation-grade set will not compensate for poor layout or a dull edge.