What's inside
As an Amazon Associate I earn from qualifying purchases. This post may contain affiliate links at no extra cost to you.
If you route hinge mortises with a jig or trim router, you get the depth perfect but the corners stay round. A 1/2″ template guide or 1/4″ straight bit leaves a 1/4″ radius in each corner, and standard hinges need a square 90-degree seat or they won’t close flush. You have two ways to square them: chop the corners with a corner chisel in one hit, or pare them square with a regular bevel-edge chisel. Both work, but they fail differently and suit different volumes of work.
As an Amazon Associate we earn from qualifying purchases at no extra cost to you.


Sections
Our Top Picks
 Narex Premium Corner Chisel 10 mmBladlängd: 120 mm10.07 x 1.37 x 0.1 Inches0.4 PoundsCheck on Amazon


What each chisel actually does
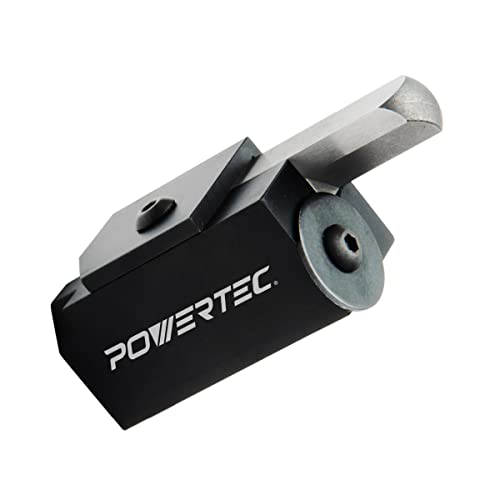
A corner chisel is a 90-degree V-shaped chisel. The two wings are ground to a perfect inside square, typically 1/4″, 3/8″, or 1/2″ wide. You set it straight down in the corner of the mortise and strike it once. It shears both walls at the same time, leaving a crisp square. It does nothing else. You cannot pare, chop long grain, or clean the bottom of the mortise with it.
A bevel-edge chisel is the general-purpose bench chisel most carpenters own. The sides are ground down at a bevel so the edge can get tight into dovetails and the flat back can register on the mortise floor. To square a hinge corner, you work one wall at a time: register the flat back against the scribed line, make a vertical chop to depth, then pare away the waste. A sharp bevel edge bench chisel set in 1/2″ or 3/4″ will do hinges, pare plugs, trim scribes, and hundreds of other tasks. The corner chisel does exactly one.
Technique and accuracy in practice
With a bevel-edge chisel, you need a clear layout line. If you routed the mortise, deepen your knife or pencil lines at the corners with a marking knife before you chop. Place the chisel 1/32″ inside the line with the flat against the waste side, bevel toward the waste. Tap straight down to your hinge depth — usually 0.062″ to 0.120″ (1/16″ to just under 1/8″) for residential butt hinges. Don’t try to hit full depth on soft jambs in one blow or the chisel will crush past the line. Make two controlled taps. Then pare from the middle of the mortise toward the corner to remove the half-moon waste. Flip and do the adjacent wall. The critical failure mode here is undercutting. If you angle the chisel even 2-3 degrees inward, you cut a pocket that shows as a gap around the hinge leaf. Keep the back dead vertical.
With a corner chisel, alignment is everything. Set the outside corner of the tool exactly on the intersection of your two layout lines. The tool must be perfectly vertical in both axes. One firm strike with a mallet — not a steel hammer — drives it to depth. Lift straight up. Done. The failure modes are different and less forgiving. If the mortise was routed 1/64″ shallow at the corner, the corner chisel will ride up and leave a small ledge that stops the hinge. If you strike it off-vertical, one wing will dive and the other will skate, blowing out the shoulder line on paint-grade jambs and badly on oak or maple. On cross-grain mortises in hardwood doors, a dull corner chisel will crush fibers rather than shear them, leaving a bruised corner that won’t take stain evenly.
Sharpness matters more than the tool type. A bevel-edge chisel at 25 degrees primary with a 30-degree micro-bevel and a flat, polished back will pare end grain cleanly. A corner chisel has two bevels to maintain and an inside corner that is difficult to hone without a small slip stone. If you don’t keep that inside V flat and burr-free, it will fold the corner over instead of cutting it.
Speed, consistency, and when it matters
On a timed test squaring four corners per hinge, three hinges per door:
An experienced carpenter with a bevel-edge chisel averages 45 to 75 seconds per mortise (all four corners) once layout is done. A corner chisel averages 20 to 30 seconds per mortise. The time savings is real but small per door — about 2 minutes for a standard pre-hung with 3 hinges.
Consistency favors the corner chisel when it is sharp and the mortise depth is uniform. It stamps an identical square every time. The bevel-edge method depends on hand control, so corner-to-corner variation is larger, especially if you are tired or working overhead on a hung jamb. For one or two doors, that variation doesn’t matter. For a house lot with 20+ doors, variation adds up to callbacks where hinges bind because one corner wasn’t cleared to full depth.
Depth control is easier with the bevel-edge. You can feel the bottom and take light paring cuts. The corner chisel hits depth in one blow. If your router left the corners 0.020″ shallow, you will need to pare the floor anyway, which erases much of the speed advantage.
Head-to-head comparison
| Feature | Corner Chisel | Bevel-Edge Chisel |
|---|---|---|
| Cut | Both walls at once, one vertical strike | One wall at a time, 2-4 chops plus paring |
| Time per mortise (4 corners) | 20-30 seconds | 45-75 seconds |
| Versatility | Only 90-degree corners | General chopping, paring, trimming |
| Skill required | Low technique, high alignment sensitivity | Higher hand control, more forgiving of alignment |
| Common failure | Blown shoulder line if not vertical; crushed grain if dull | Undercut corner, angled wall, torn grain if pried |
| Sharpening | Hard — inside V and two outside bevels | Straightforward flat back + bevel |
| Price (new, decent quality) | $30-$65 for one size | $15-$40 per chisel, or $60-$120 for a set |
| Best for | 10+ doors, repetitive router work, paint or stain where perfect squares matter | 1-5 doors, site repairs, varied chisel work |
Which should you buy
If you already own a sharp bevel-edge chisel, you don’t need a corner chisel for occasional hinge work. Learn to chop vertical and pare to the line. For standard 3-1/2″ interior hinges, a 1/2″ or 3/4″ bevel-edge is ideal — wide enough to register but narrow enough to see the corner. Keep it sharp, and your corners will be square and flush. The cheaper option is completely fine for a homeowner hanging 2 or 3 doors a year or a finish carpenter who mortises by hand with a marking gauge and chisel anyway.
Buy a corner chisel when you are routing batches. If you use a hinge template and router for a whole house, a remodel with 12 doors, or you install commercial ball-bearing hinges where a 1/64″ gap is obvious, the dedicated tool pays for itself in reduced fatigue and uniform corners. Stick to one size that matches your most common hinge. For most interior work that is 3/8″ corner chisel; for 4″ heavy hinges, go 1/2″. Test it on scrap first: scribe a line, set the tool dead vertical, and check the corner with a small square. If light shows under the square along either wall, you leaned the tool or it needs honing.
A practical compromise many trim crews use: own both, but use the bevel-edge for the work. Route, then use a corner chisel to stamp the corners quickly, then kiss the bottom flat with your bevel-edge chisel if the corner hit shallow. That gives you speed and a clean seat without relying on a single perfect blow.
Whichever you choose, add two habits that prevent bad hinges. First, always mark hinge locations with a sharp marking knife or marking gauge rather than a pencil. A knife line gives the chisel a physical shoulder to register against. Second, seat-test with the hinge leaf and look for rocking. If the leaf rocks, one corner still has a radius. Ink the back of the leaf with pencil lead, press it in, and the waste will show as a dark smudge you can pare precisely.