What's inside
As an Amazon Associate I earn from qualifying purchases. This post may contain affiliate links at no extra cost to you.
A good tape measure does more than tell you how long a board is. For carpentry layout, it needs to make fractional readings quick, repeatable, and easy to transfer to a pencil line. The best calibrated tape measures combine clear graduations with a controlled hook, a stiff blade, and markings that remain readable in dust and low light.
“Calibrated” can mean two different things in the tool aisle. Some tapes are simply printed with fractional or decimal markings. Others are designed for a specific layout system, such as a tape with highlighted common fractions, center markings, or scales that help you divide material quickly. Neither replaces a square or marking knife, but the right tape can remove several opportunities for arithmetic and reading errors.
As an Amazon Associate we earn from qualifying purchases at no extra cost to you.


Sections
Our Top Picks
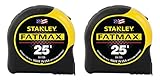
 Stanley FMHT74038A FatMax 25 Foot Tape Measure 2PK7.6 m5.13 x 3.38 x 3.63 Inches1.2 PoundsCheck on Amazon


What matters in a calibrated tape
Start with the graduations. A standard carpenter’s tape usually has 1/16-inch marks, with longer lines at 1/8, 1/4, and 1/2 inch. That is adequate for framing and most site work. For cabinetmaking and furniture, a tape with clearly differentiated 1/32-inch marks can be useful, although crowded printing is harder to read and easier to misread.
Look for markings printed on both edges of the blade. They let you read the tape from either side without twisting it. A center-marking scale is also helpful when laying out a board or finding the midpoint of a stud bay. Be aware that center scales are only useful when their reference marks are obvious; a busy blade can be slower than simply dividing the measurement yourself.
The hook is a major source of error. It should move slightly on its rivets so it accounts for the thickness of the hook when measuring inside or outside dimensions. That movement should be controlled, not loose. A hook that rattles several millimeters can introduce more error than the printed graduations. When buying, extend the blade, hold the hook against a known square edge, and reverse the tape for an outside measurement. The readings should agree.
Features worth paying for
Blade width is a practical trade-off. A 1-inch blade generally offers a useful 8 to 10 feet of standout, depending on its shape and coating. A 1-1/4-inch blade may reach 11 feet or more and is easier to read, but it is bulkier on a belt. For trim work, a compact 16-foot tape is often more comfortable than a large 25-foot framing tape.
Choose a blade with a matte, low-glare finish if you work outdoors or under bright shop lights. Glossy blades can be difficult to read at a shallow angle. A nylon or polymer coating helps with wear, but no coating makes a tape immune to kinks. Once a blade develops a sharp crease, its hook alignment and standout performance can both suffer.
For quick layout, consider calibrated tape measures with fractional markings. These are most useful when several people are reading the same tape or when you routinely work in sixteenths and eighths. They are less valuable if you already use a sharp pencil and a reliable combination square for every mark.
| Type | Best use | Advantages | Limitations |
|---|---|---|---|
| Compact 16-foot tape | Trim, cabinetry, general shop work | Light, easy to carry, usually adequate for furniture parts | Less standout and shorter reach for framing |
| 25-foot wide-blade tape | Framing, decks, sheet goods | Longer reach, easier-to-read blade, stronger case | Heavier and awkward for fine interior work |
| Fractional-marked tape | Fast reading and repeated layout | Common fractions are immediately visible | Extra markings can clutter the blade |
| Center-marking tape | Stud layout, panel work, balanced parts | Speeds up finding centers and spacing | Center scale may be confusing at first |
Which tape should you buy?
For general carpentry, a 25-foot tape with a 1-inch or wider blade is the safest all-around choice. It covers wall, cabinet, and sheet-good dimensions without requiring a second tool. Pair it with a 25-foot wide-blade carpentry tape if you need a dependable site tape that can stand out across a sheet of plywood.
For furniture and interior trim, a compact 16-foot tape is often the better tool. Most parts are under 8 feet, and the smaller case is less likely to knock against finished work. A clearly printed 1/16-inch scale matters more here than maximum standout. If your work regularly involves doors, built-ins, or long casing, step up to a 25-foot model.
A center-marking tape makes sense for framing walls, laying out studs, and dividing panels. It can save time, but do not treat its center numbers as a substitute for checking the actual dimension. A small reading error repeated across a row of studs can leave the final bay noticeably wrong. Use the tape to establish the rough layout, then verify critical locations with a square or story stick.
How to use it accurately
Keep the blade straight and flat against the work. A bowed blade can shift the reading by 1/16 inch or more over a short distance. For inside measurements, hook the tape over one wall, extend it to the other, and read the point where the case meets the edge. Do not guess the case length; use the case dimension printed on it, and confirm that dimension occasionally with a ruler.
When transferring a measurement, mark one edge of the pencil line deliberately rather than scribbling over the point. For repeated parts, cut a story stick or use a stop block. Re-measuring ten identical pieces from the tape invites accumulated reading errors, while a physical reference transfers the same dimension consistently.
Clean sawdust from the blade before retracting it. Grit can damage the coating and eventually clog the lock or hook. Never let the blade snap back uncontrolled; the hook can bend, and the last few inches of the blade can become sharply kinked.
When the cheaper tape is fine
A basic tape is perfectly suitable for rough framing, demolition, firewood, and dimensions that will be trimmed to fit. You do not need a premium calibrated tape to measure a temporary brace or mark a cut that will be checked against the actual opening.
Spend more when the tape is part of a repeatable layout system: cabinet parts, stair components, built-ins, or long runs of trim. In those jobs, readable markings, a consistent hook, and a blade that stays straight can save material. Buy the smallest, clearest tape that covers your longest routine measurement, and replace it when the hook becomes loose or the blade develops a permanent crease.