What's inside
As an Amazon Associate I earn from qualifying purchases. This post may contain affiliate links at no extra cost to you.
Reproducing a compound angle means matching two bevels at once: the angle across the face and the angle across the edge. A standard sliding bevel gauge can copy one visible angle, but it cannot reliably tell you whether the second plane is correct. The best bevel gauge for this work is the one that lets you capture, hold, and transfer both angles without the reference piece moving.
As an Amazon Associate we earn from qualifying purchases at no extra cost to you.



Sections
Our Top Picks
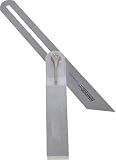
 Johnson Level & Tool 1913-1000 Professional Aluminum T-Bevel10 Inch0.75 x 3.75 x 13.13 inches0.02 poundsCheck on Amazon


What you need to measure
Before buying a tool, identify the two angles involved. On a compound cut, one angle is usually the miter or plan angle when viewed from above. The other is the bevel or tilt angle when viewed from the end. For example, a roof trim cut might require a 30-degree plan angle and a 20-degree bevel angle. A single bevel gauge set to 30 degrees will still leave the saw or plane wrong if the 20-degree tilt is not also transferred.
For occasional work, you can capture each plane separately with a sliding bevel and a reliable digital angle finder. For repeated joinery, a bevel gauge designed for compound work is faster because it references two surfaces at the same time.
The best bevel gauge types
| Gauge type | Best use | Main advantage | Weakness |
|---|---|---|---|
| Standard sliding bevel | Copying one angle | Cheap, simple, useful for many jobs | Does not directly capture a compound angle |
| Compound-angle bevel gauge | Trim, roof work, complex joinery | Captures two related planes in one setup | More expensive and less versatile for ordinary work |
| Digital angle finder | Checking or calculating angles | Fast numerical readings and good repeatability | Needs batteries and careful placement |
| Sliding T-bevel with protractor | Shop work and layout | Combines physical transfer with angle measurement | Can be awkward on narrow or irregular stock |
When a standard sliding bevel is enough
A standard sliding T-bevel is the sensible choice when the compound angle is already known or can be broken into two separate operations. Set the blade to the plan angle and mark one face. Then set it to the bevel angle and mark the second face. This works well for one-off cuts, especially when you can test the fit on scrap.
Look for a blade at least 6 inches long, a rigid stock, and a locking mechanism that can be tightened firmly without a screwdriver. Brass-and-hardwood gauges are pleasant to use and resist damage, while stainless steel versions are generally cheaper and tolerate a jobsite better. A budget 6-inch sliding bevel gauge is fine if the blade is straight and the joint does not depend on a degree or two of precision.
The common failure is assuming that a bevel gauge is an angle measurer. It is not. It copies an angle from a reference surface. If the reference is inaccurate, dirty, or held against the wrong face, the gauge faithfully transfers the error.
When a compound-angle gauge earns its cost
A dedicated compound-angle gauge is worthwhile when you are making several identical parts or working from an existing fitting that cannot be measured conveniently with two separate tools. These gauges typically have two blades, a hinged arrangement, or an adjustable head that registers against adjacent faces. They reduce the chance of losing the relationship between the two angles.
Choose one with positive locks on both axes. A gauge that relies on one shared wing nut can shift the first setting while you tighten the second. The blades should be long enough to span the stock—usually 6 to 10 inches for trim and furniture parts—and narrow enough to sit against inside corners. A scale is useful, but the ability to lock accurately matters more than printed graduations.
Dedicated compound gauges are not automatically more accurate. Cheap versions can have loose pivots, rough edges, or scales that are only approximate. If you buy one, check that both blades meet cleanly, the pivots have no sideways play, and the locks hold after five or six firm hand-tightening cycles. A professional compound-angle bevel gauge is mainly a productivity purchase, not a guarantee of perfect cuts.
How to copy a compound angle accurately
Start by cleaning the reference surfaces and the workpiece. Dust under a blade can change a short bevel by more than a degree. Place the gauge against the reference with its stock fully seated, then lock the first axis lightly. Set the second blade against the adjoining surface and tighten both locks in turn. Do not force the blade into an inside corner; springing the blade produces a false angle.
Transfer the setting with the gauge held against the same faces of the workpiece. Mark the cut line with a sharp pencil or knife, and mark the waste side. For a powered saw, make a test cut in material of the same thickness. For hand work, leave a small amount—about 1/32 inch—of waste and creep up to the line with a sharp bevel-edge chisel set or block plane.
Checking the result
Do not judge a compound cut from one edge. Assemble the parts dry and check the joint at the face, edge, and back. A gap that changes width along the joint usually means one angle is wrong or the stock was not held flat. A consistent gap often points to a blunt tool, a saw kerf error, or stock that is not square.
For repeat work, record both settings and make a dedicated test block. Check the test block against the original reference before cutting valuable material. If the gauge slips, roughen nothing and tighten harder; inspect the pivot, remove dust, and replace worn washers or screws. Excessive force can distort thin blades and make the next setting less reliable.
What to buy
Buy a standard sliding bevel if you mostly copy single angles and only occasionally make compound cuts. Choose a digital angle finder when you need numerical verification or must reproduce an angle without an existing sample. Choose a dedicated compound gauge when several parts must match and setup time matters. A sliding bevel with protractor is a useful middle ground for a small workshop.
Whichever style you choose, prioritize rigid blades, readable contact surfaces, positive locks, and a size suited to your stock. Accuracy comes from stable reference faces and a test cut; the gauge simply preserves that information.