What's inside
As an Amazon Associate I earn from qualifying purchases. This post may contain affiliate links at no extra cost to you.
Sections
Our Top Picks


Choosing a Layout Tool for a Large Timber Arc
Large timber arcs are simple to draw badly. A pencil, a length of string, or a straight board can produce a curve that looks convincing on the floor but changes radius noticeably from one end to the other. That error becomes obvious when you cut several matching rafters, curved braces, stair parts, or laminated arch pieces.
The main choice is between a beam compass and a long straightedge. They are not interchangeable tools. A beam compass lays out a true circular arc from a fixed centre. A straightedge helps you establish a chord, tangent, offsets, or a fair curve, but it does not draw a mathematically consistent radius by itself.
As an Amazon Associate we earn from qualifying purchases at no extra cost to you.


What a beam compass does best
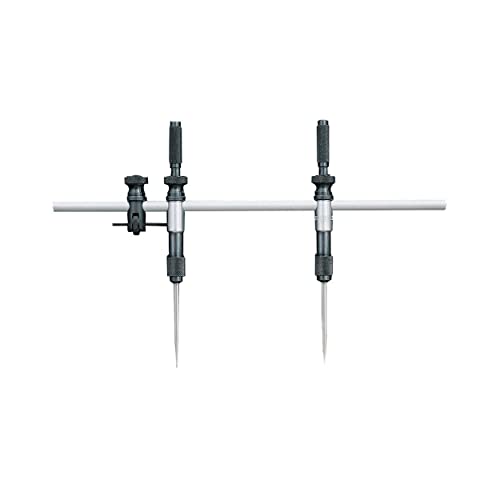
A beam compass has two points mounted on a rigid beam: one pivot point and one pencil or marking point. Set the distance between them to the required radius, hold the pivot at the centre, and swing the pencil across the timber. For a circular arc, this is the most direct and reliable method.
For site work, a purpose-made large woodworking beam compass is useful when the radius is more than about 600 mm (24 in). Small drafting compasses are too short, while improvised string can stretch or snag. A beam around 1,200 to 1,800 mm long covers many joinery and framing layouts, though the usable radius depends on the pivot and pencil positions.
The beam must be stiff. A narrow pine strip can bow under hand pressure, especially when the pencil catches grain. That changes the radius by several millimetres and can make a large arc visibly uneven. A straight hardwood strip, aluminium layout bar, or purpose-built compass beam is better. Locking clamps matter too; a sliding pencil block that moves during the sweep ruins the layout.
Use a sharp pencil for a visible but narrow line, or a marking knife where the cut will follow a gauge or saw. Do not push hard. Heavy pressure flexes the beam and can move the pivot. A small pilot hole or a temporary nail at the centre gives the pivot a positive location.
Where a long straightedge earns its place
A long straightedge is the better tool when the job is not actually a circular arc. It is useful for laying out tangents, checking the edge of a timber, transferring points, and connecting plotted offsets. It also helps when the curve is designed from known stations rather than from one fixed radius.
For example, a shallow roof sweep may be specified by its height at several points rather than by a radius. Mark those points on a grid, then use a thin flexible batten to form a fair curve. A straightedge helps build the grid and check the end lines, but it cannot replace the batten for the curve itself.
A long straightedge is also practical for checking your work. After cutting, place it across the curve at several positions and measure the gap with feeler gauges or a rule. This will reveal a hollow, flat spot, or accidental kink. A straightedge with a known, machined edge is preferable to a random construction board; a 2 m board that is 3 mm out of straight can transfer that error directly to the layout.
If you mainly need a straightedge, choose a long aluminium straightedge for carpentry. Aluminium is light and remains easier to handle than a heavy steel bar, but check it against a known straight edge before trusting it for close joinery.
Beam compass versus long straightedge
| Feature | Beam compass | Long straightedge |
|---|---|---|
| Best for | True circular arcs | Lines, checks, tangents, and plotted curves |
| Accuracy depends on | Fixed centre, radius setting, and beam stiffness | Edge straightness and accurate point transfer |
| Typical failure | Pivot slips or pencil block moves | Curve becomes a series of flats or an arbitrary sweep |
| Large-radius limitation | Beam must reach from centre to workpiece | No radius limitation, but no true radius either |
| Best value | Repeated matching arcs and circular work | General layout and inspection |
A reliable layout process
Start by confirming what the drawing means by radius. An outside radius, inside radius, and centreline radius can differ by the timber thickness. If a curved member is 100 mm thick and the specified centreline radius is 1,000 mm, the inside and outside radii are normally 950 and 1,050 mm. Setting the compass to the wrong reference line can create a full 50 mm error.
Mark the centre and the two end points before setting the compass. Check that the distance from the pivot to the pencil equals the intended radius using a tape measure or rule. Swing a light test line on scrap or on a waste portion of the timber. If the arc does not pass through both required endpoints, stop and find the error before cutting.
For a matched pair, keep the centre mark and compass setting intact. Transfer the layout rather than resetting the beam by eye. Even a 2 mm difference in radius can show at the meeting point of two curved components.
Support the timber properly. A board that rocks while you draw can move the pencil vertically and create a wavering line. Clamp it to a stable bench or lay it on firm trestles. When cutting with a bandsaw or jigsaw, leave the line visible and remove the waste in controlled passes. Cutting directly on a thick pencil line makes later correction difficult.
When an improvised tool is good enough
You do not need a specialist compass for one rough outdoor project. A straight, dry strip of timber, a screw for the pivot, and a separate pencil block can work for a non-critical garden arch or temporary form. Use a cord only when the radius is large and the accuracy requirement is low. Cord stretches, knots shift, and the pencil tends to cut across the intended line, so allow at least 3 to 5 mm for cleanup.
For furniture, stairs, visible joinery, or repeated parts, the cheaper method often costs more in wasted timber and correction. Buy or make a rigid beam compass if the arc must be circular. Buy a long straightedge if your broader work includes framing layout, joint marking, and checking stock. Many carpenters eventually need both: the compass establishes the geometry, while the straightedge checks the timber and keeps the rest of the layout honest.