What's inside
As an Amazon Associate I earn from qualifying purchases. This post may contain affiliate links at no extra cost to you.
The best woodworking bench with a table saw is one where the saw deck sits flush with or slightly below your bench surface (34–36 inches for most adults), the bench provides at least 4 feet of outfeed clearance behind the blade, and the whole assembly weighs enough — or is bolted down enough — that ripping an 8-foot sheet doesn’t push it across the shop. Integrated saws like the SawStop PCS or Bosch 4100XC-10 on its stand handle this out of the box; a bench-mounted jobsite saw inside a dedicated workbench gives you more surface for less money, but only if you engineer the flush fit and outfeed yourself.
As an Amazon Associate we earn from qualifying purchases at no extra cost to you.
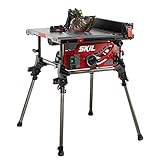
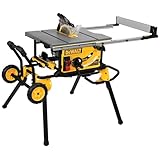

Sections
Integrated Saw vs. Bench-Mounted Saw: The Core Decision
A table saw woodworking bench falls into two categories. An integrated setup places the saw at standing height on its own cabinet or folding stand, sometimes with the surrounding bench built to meet it. A bench-mounted setup drops a compact jobsite saw into a cutout in a larger workbench so the tabletop becomes your infeed, side, and outfeed support in one surface.
| Factor | Integrated / Standalone Saw | Saw Mounted in Bench |
|---|---|---|
| Surface height | 34–38 in (fixed by cabinet/stand) | 34–36 in (you set it during build) |
| Outfeed support | Usually none; needs a roller stand or added table | Built in — full bench behind the blade |
| Footprint | 27–32 in deep for the saw alone | Shared with bench; 60–96 in typical total |
| Stability (weight) | 90–300+ lb; cabinet saws don’t move | Depends on bench build; 150–250 lb achievable |
| Dust collection | Port below blade; decent enclosure on cabinets | Must be framed in or dust sprays into bench bay |
| Typical all-in cost | $300–$3,500+ | $150–$600 bench build + saw you may already own |
The practical tradeoff: bench-mounted gives you a bigger, safer work surface per dollar and square foot, but every benefit depends on the quality of your cutout, leveling, and anchoring. A sloppy cutout creates a lip that catches sheet goods mid-rip — a genuine kickback risk, not a cosmetic flaw.
Getting the Fit Right: Height, Flushness, and Clearance
Surface height
Rule of thumb: the saw table should sit at or just below your wrist crease when standing with arms relaxed — 34 inches for most people under 5’10”, 35–36 inches above that. Too low causes back fatigue on long rips; too high makes it hard to apply downward pressure safely.
Flushness tolerance
The saw deck must be flush with the bench within 1/32 inch, and if anything it should sit a hair below the bench surface — a workpiece riding up onto a raised saw table is far worse than dropping a hair onto it. Achieve this with a routed recess, adjustable leveling feet under the saw cradle, or hardboard shims.
Outfeed and clearance math
Support is needed where the workpiece leaves the blade, not just at the table edge. For a full 8-foot sheet, you want support extending 36–48 inches past the back of the saw table and 24+ inches to each side of the blade. A quick sizing calculation: bench length needed = saw depth (typically 27 in) + minimum 36 in outfeed + whatever infeed you want (18–24 in minimum). That’s an 82-inch bench for full-sheet capability — which is why many shops put the saw near one end and let the rest of the bench handle assembly duty.
Picks by Situation
| Your situation | Recommended setup | Why |
|---|---|---|
| Garage shop, must park a car nightly | Jobsite saw on folding stand (e.g., DeWalt DWE7491RS, Bosch 4100XC-10) | Rolls away; gravity-rise stands fold in seconds |
| Dedicated space, limited budget | Compact saw inset into a plywood workbench | Biggest usable surface per dollar; outfeed free |
| Regular cabinet/furniture work | Cabinet or hybrid saw (SawStop, Powermatic, Grizzly) plus separate outfeed table | Mass and fence quality matter at this level |
| Beginner, occasional cuts | Contractor/jobsite saw + roller stands for outfeed | Lowest entry cost; upgrade the bench later |
| Rips 4×8 sheet goods weekly | Bench-integrated saw with 48 in+ outfeed or track saw alternative | Sheet handling is the failure point of small setups |
Building a Table Saw Work Bench: Setup Sequence
A homemade table saw bench done right beats a cheap integrated unit. The order matters:
- Frame first, cutout second. Build the bench frame (2×4 or 80/20 extrusion), then cut the top opening 1/8–1/4 inch larger than the saw’s tabletop on all sides — you need airflow for dust and wiggle room for leveling.
- Cradle, don’t hang. Support the saw from below on adjustable rails or a shelf with threaded leveling feet. Screwing a saw to the underside of the top makes leveling nearly impossible.
- Level the saw to the bench, not the bench to the floor. Level the whole bench first, then shim the saw deck to flush.
- Anchor it. A bench under 150 lb total can walk during a heavy rip. Bolt to the floor, or load the lower shelf with sandbags, lumber, or a tool cabinet.
- Miter slots must align. If you plan crosscut sleds that run past the saw table, cut matching slots in the bench top so jigs don’t hit a wall.
- Box in the underside for dust. A simple plywood shroud under the saw plus a 4-inch port to a shop vac or collector captures the majority of dust that jobsite saws otherwise spray everywhere.
Stability and Safety: What Actually Prevents Accidents
Three failure modes cause most bench-saw problems. First, rocking: check by pushing the bench corner diagonally — any wobble means the frame needs diagonal bracing or the floor needs a shim. Second, the outfeed drop: if a workpiece’s weight isn’t supported past the blade, it pivots up into the blade — this is a leading cause of kickback and the main reason the outfeed math above matters. Third, fence alignment: on any saw you mount yourself, verify the fence is parallel to the blade (or toed out ~1/64 inch at the rear) before the first cut. Use a combination square against the miter slot; a fence toed in pinches the workpiece between fence and blade.
Ownership Realities
What wears first on a bench-integrated setup: the cutout edges (soften and splinter — radius them or add an aluminum angle trim), the leveling feet (vibration loosens them — use lock nuts or threadlocker), and the dust shroud seams (reseal yearly). Jobsite saws run universal motors; carbon brushes typically need replacement around 100–200 hours of use. The most common mistake is building the bench first and choosing the saw later — pick the saw first, because tabletop dimensions, miter slot position, and dust port location all dictate the bench design.
FAQ
Can I just set a jobsite saw on top of a bench?
Temporarily, yes, but the saw’s table sits 4–6 inches above the bench, making the effective cutting height too tall for most people and reducing leverage on the workpiece. Insetting is worth the afternoon it takes.
Is a bench-mounted saw as accurate as a cabinet saw?
For ripping and crosscutting with a good fence and aligned blade, close enough for furniture work. Cabinet saws win on vibration, fence quality, and dust collection — not on fundamental cut geometry.
How big should a table saw bench be?
Minimum viable: 60 in long × 30 in deep for small plywood work. For full sheet goods, plan 84+ in long or use removable outfeed extensions.