What's inside
As an Amazon Associate I earn from qualifying purchases. This post may contain affiliate links at no extra cost to you.
Small joinery parts punish small measuring errors. A 3 mm error on a long framing cut may disappear into the job, but the same error on a drawer divider, tenon shoulder, or hinge mortise can leave a visible gap. That is where a try square and a combination square earn their place. Both check 90 degrees, but they are not interchangeable in daily use.
A try square is the simpler tool: a fixed blade set at right angles to a stock. A combination square has a sliding head, usually with 90-degree and 45-degree faces, plus a ruler and often a built-in level and scriber. For small joinery components, the better choice depends on whether you mostly need a reliable reference edge or several adjustable measurements.
As an Amazon Associate we earn from qualifying purchases at no extra cost to you.



Sections
Our Top Picks
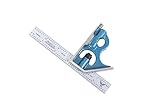
 Starrett Steel Combination Square with Square Head12"1 x 1.4 x 12.3 inches1.22 PoundsCheck on Amazon


What Each Square Actually Does
A try square is primarily a checking and marking tool. Place its stock against a straight edge and run a pencil or knife along the blade. It is quick, rigid, and hard to misadjust. A good 150 mm (6-inch) try square is particularly useful for checking chisel work, marking shoulder lines, and testing whether a small component has been planed square.
A combination square does the same 90-degree work, but its blade slides through the head. You can set a repeatable distance from an edge, such as 10 mm for a tenon shoulder or 20 mm for a rabbet. Turn the head around and it becomes a 45-degree square. The ruler can also act as a depth or height reference, although its accuracy depends on the quality of the head and locking mechanism.
For a first tool, a 6-inch woodworking try square is the least complicated route. If you mark shoulders, housings, and repeated offsets often, a 6-inch combination square gives you more range for little extra bench space.
Try Square vs Combination Square
| Feature | Try square | Combination square |
|---|---|---|
| Best use | Checking and marking 90-degree lines | Checking, marking, and setting repeated offsets |
| Adjustment | None | Sliding head with locking screw or nut |
| Typical small-work size | 100–150 mm blade | 150 mm blade |
| Accuracy risk | Blade or stock can loosen or warp | Head can shift, blade can have play, scale can be poor |
| Other functions | Mostly 90-degree checking | 45 degrees, depth setting, sometimes level and scriber |
| Maintenance | Keep faces clean and check for damage | Clean the groove and keep the lock operating smoothly |
Where a Try Square Wins
The fixed geometry is its main advantage. There is no sliding head to knock out of position while you mark a line. This matters when you are working quickly on small parts and using a marking knife against the blade. A try square also has a broad stock that is easy to register against the edge of a board without looking closely at the tool.
It is a strong choice for dovetail layout, checking the end of a planed board, and testing whether a tenon shoulder is square to its face. When cutting a mortise, you can use it to carry layout lines around the workpiece. A 100 mm (4-inch) square is handy on narrow stock, but a 150 mm square is usually easier to control and still compact.
The limitation is that it only gives you its fixed blade length and angle. To mark a shoulder 12 mm from an edge, you must measure separately, which introduces another opportunity for error. A try square also does not provide a built-in 45-degree reference for miters or chamfers.
Where a Combination Square Wins
The combination square is more useful when one component has several related dimensions. Set the head 15 mm from an edge, lock it, and mark every shoulder on a batch of parts. You can then use the same setting to check the cuts. That repeatability is valuable for drawer runners, small frames, box joints, and loose-tenon work.
The 45-degree face is useful for marking chamfers and checking miters, while the end of the ruler can help set a shallow mortise depth. Some combination squares include a small spirit level, but do not treat that as a replacement for a proper level. It is a convenience for rough positioning, not a precision reference.
The trade-off is mechanical play. A cheap head may rock slightly on the blade, or the lock may fail to hold the setting. If the head moves 0.5 mm while marking, a row of identical components can end up with visibly different shoulders. Combination squares also collect dust and shavings in the blade groove, making the lock less reliable.
Check Accuracy Before Trusting Either Tool
Do not assume a square is square because it came in a package. Place the stock against a straight edge of scrap and draw a line with the blade. Flip the square over using the same edge and draw a second line from the same starting point. If the lines diverge, the square is out. Over a 100 mm test length, a 1 mm gap is a serious fault for joinery.
For a combination square, repeat the test with the head locked, then unlock and relock it several times. The lines should remain together. Check the blade for burrs and the stock for dents, especially around the reference corner. A damaged corner can make a sound blade appear inaccurate.
For knife marking, a blade with a slightly thicker edge is often easier to control than a thin, flexible ruler. If you need very fine dovetail or hinge layout, pair the square with a woodworking marking knife rather than relying on a pencil line that may be 1 mm wide.
What to Buy for Small Joinery
Choose a try square if your work is mainly planing, chiseling, and checking 90-degree edges, or if you want the most dependable tool at the lowest cost. The cheaper option is perfectly adequate when it passes the flip test and has a flat stock. Spending more will not fix poor technique or a board edge that is not straight.
Choose a combination square if you regularly repeat dimensions, mark shoulders from an edge, or work with both square and 45-degree layouts. Look for a head that locks firmly without excessive force, a clear etched or engraved scale, and no visible gap between the blade and the head. Avoid a tool whose head slides under its own weight when the lock is tightened.
For most small joinery, a 150 mm square is the practical middle ground. Larger 300 mm combination squares are useful for cabinet panels but awkward on short components. Whichever type you buy, keep the reference faces free of glue and grit, store it where it cannot be dropped, and verify it occasionally against a known straight edge. Accuracy comes less from owning both squares than from using one square you have tested and trust.