What's inside
As an Amazon Associate I earn from qualifying purchases. This post may contain affiliate links at no extra cost to you.
Sections
Our Top Picks
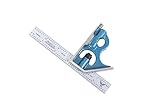
 Starrett Steel Combination Square with Square Head12"1 x 1.4 x 12.3 inches1.22 PoundsCheck on Amazon


What a shallow setback requires
A shallow setback is a short distance marked in from an edge, often 1/8 to 1/2 inch. Common examples include marking a hinge recess, setting a chisel line beside a shoulder, trimming a door edge, or laying out a small stopped rabbet. The measurement is simple. Making the line accurate is not always simple because the reference edge may be rough, the pencil may be too thick, and a small error can be obvious after cutting.
The choice between a steel rule and a combination square comes down to how you need to control the reference edge. A steel rule is quick and compact. A combination square gives you a built-in fence, which makes repeated marks and square lines easier. Neither tool automatically produces a good result: you still need a clean edge, firm contact, and a marking tool suited to the material.
As an Amazon Associate we earn from qualifying purchases at no extra cost to you.


Where a steel rule works best
A steel rule is the cheaper and more versatile option for occasional shallow setbacks. Lay its edge along the workpiece edge, place a pencil or knife at the required graduation, and draw or score the line. For a single 1/4-inch mark on a board with a clean edge, this is often all you need.
Its main advantage is access. A 6-inch or 12-inch rule can mark inside a narrow opening where a combination square will not fit. It is also easier to use for offsets that are not square to the edge. A rule can measure 3/16 inch, 7/32 inch, or another odd distance without changing setup.
The weaknesses show up during repeated marking. The rule can slide, especially on smooth painted stock or across sawdust. If you hold it at a slight angle, the reading changes. On a 1/4-inch setback, a 1/32-inch shift is a 12.5 percent error. A thick pencil can add another 1/32 inch to the visible side of the line, making it unclear which edge is the actual cut line.
For the best results, use the rule to set a marking knife or sharp pencil rather than a carpenter’s pencil. Keep the rule flat, reference its same edge every time, and make a light first pass. A crisp knife line is particularly useful when paring to a shoulder with a chisel.
If you need a basic rule, look for a rigid stainless tool with etched or deeply engraved graduations rather than a flexible promotional ruler. A 6-inch stainless steel rule is enough for most small joinery marks, while a 12-inch version is more convenient on wide boards.
Where a combination square earns its place
A combination square has a graduated rule locked into a stock, or head. The stock bears against the edge of the workpiece while the rule sets the setback. This makes it faster to repeat the same dimension and less likely that the tool will drift while marking.
For a shallow setback, set the rule to the required dimension, tighten the lock, and hold the stock firmly against the edge. You can then mark a line square across the board with a knife or pencil. If the workpiece is 3/4 inch thick and you need a 1/4-inch shoulder, the square can mark the line in a controlled, repeatable way in a few seconds.
A combination square is also better when the setback must continue across several faces. Keep the stock against the same reference edge and carry the line over the top and down the side. This is useful for marking shoulders, housing joints, and hinge positions. A rule can do the same job, but it demands more attention to alignment.
There are two important failure modes. First, a loose locking mechanism can let the rule creep as you mark. Second, a poorly made square may not be truly square. Check it before trusting it: place the stock against a straight edge, draw a line, flip the square over against the same edge, and draw another line from the same starting point. If the lines diverge, the square needs adjustment or replacement.
Cheap combination squares can be perfectly adequate for rough carpentry, but very loose heads and poorly engraved rules are frustrating for fine work. A 6-inch combination square suits most bench and site marking. Choose a model with a firm lock and a stock that has no rocking or visible gap against a straight edge.
Steel rule versus combination square
| Feature | Steel rule | Combination square |
|---|---|---|
| Best use | One-off offsets and tight spaces | Repeated setbacks and square lines |
| Typical cost | Low | Moderate; quality varies widely |
| Speed | Fast for a single mark | Fastest for several identical marks |
| Edge control | Depends on your hand | Built-in stock controls contact |
| Accuracy risk | Sliding, angled placement, thick pencil | Loose head or inaccurate square |
| Access | Works in narrow openings | Needs room for the stock |
Which tool should you buy?
Buy a steel rule if you are marking occasional small offsets, working in restricted spaces, or already own a reliable square for larger layout. It is the sensible low-cost choice for a homeowner assembling a basic carpentry kit. A rule also complements a separate marking gauge or small try square rather than duplicating them.
Choose a combination square if you regularly mark shoulders, crosscuts, dados, hinge recesses, or repeated setbacks. The fence saves time and reduces hand-position errors. It is especially worthwhile when you need a line to remain square while crossing a board face, edge, and adjoining face.
For fine joinery, consider adding a carpenter��s marking knife. The knife does not replace either measuring tool, but it gives you a precise edge to pare toward. For rough framing or painted trim, a sharp pencil is usually faster and sufficiently accurate.
A reliable marking method
Start by removing dust and checking the reference edge. If it is chipped or bowed, true a short section with a plane or choose a sound area; no measuring tool can compensate for a bad reference. Set the tool against the edge without rocking it. Use the same contact face for every mark.
Mark the dimension lightly, then verify it from the edge with a second measurement. For a 1/4-inch setback, check at both ends if the line will guide a cut across a wide face. Hold the knife or pencil nearly vertical and mark on the waste side. If the line is critical, make one light knife pass rather than repeatedly widening a heavy pencil mark.
Finally, cut just to the waste side and leave the line visible. A shallow setback is often ruined not by the initial measurement but by cutting directly through a line that was meant to identify the finished edge.