What's inside
As an Amazon Associate I earn from qualifying purchases. This post may contain affiliate links at no extra cost to you.
For most crosscuts in timber, a sharp pencil is the quicker and more forgiving marking tool. A knife line is more precise, but it also demands better technique and cleaner stock. The right choice depends on whether the cut is rough framing work, general site carpentry, or fine joinery where the line itself becomes part of the fit.
As an Amazon Associate we earn from qualifying purchases at no extra cost to you.


Sections
Our Top Picks


What the Two Lines Actually Do
A pencil line gives you a visible target for the saw. It is easy to extend across a wide board, easy to erase, and quick to correct if your measurement changes. A reasonably sharp carpenter’s pencil produces a line around 1–2 mm wide, depending on how it is held and sharpened.
A knife line cuts a small groove into the fibres. With a fine marking knife, the groove may be less than 0.5 mm wide and has a definite edge that can register against a chisel, shooting board, or saw teeth. It does not disappear under dust or become ambiguous where two lines overlap.
The important distinction is that a knife line marks an exact boundary, while a pencil line marks a zone that you must interpret. If you cut on the wrong edge of a pencil line, you can easily lose 1 mm or more. That may not matter on a fence rail, but it can matter on a short shoulder, a cabinet part, or a visible trim joint.
When a Pencil Line Is the Better Choice
Use a pencil for most construction crosscuts: studs, joists, rafters, battens, flooring, rough shelving, and timber that will be covered or trimmed later. It is faster, especially when marking a stack of parts. A pencil also works better on dusty, rough-sawn, damp, or resinous timber where a knife may skate over the surface.
The line is easy to see from both sides of a board, and you can mark a long piece without repeatedly resetting a square. For repeated cuts, a pencil combined with a stop block is usually more accurate than carefully knifing every piece. The stop controls the length; the pencil only identifies the cut.
A pencil is also the safer option when the cut is not final. If a measurement changes by 3 mm, you can erase or cross out the old mark. Knife lines remain in the timber and can be mistaken for the current layout line.
Choose a sharp carpenter’s pencil for rough timber, or a fine mechanical pencil for planed stock. A mechanical pencil is useful for narrow lines, but its lead can snap when pushed against a rough edge. For general site work, a carpenter pencil and sharpener is usually better value than trying to make one pencil do every job.
When a Knife Line Earns Its Place
Use a knife line when the cut must finish at an exact shoulder or when the end grain will remain visible. Typical examples include tenon shoulders, short housed joints, small moulding parts, cabinet components, and crosscuts made with a backsaw. The groove gives the saw teeth a positive starting point and reduces the chance of wandering.
On a clean, planed board, a knife line can also help prevent breakout. The compressed and severed fibres at the cut boundary are less likely to tear beyond the intended end. This is not a substitute for proper sawing technique: support the waste, use a sharp saw, and keep the first strokes light.
Do not use a knife like a pencil and drag it freely across the timber. Register a square firmly against the reference edge, then make one or two controlled passes with the knife. Keep the blade on the waste side of the intended cut. A heavy pass can bruise the edge, widen the mark, or make it difficult to tell the true layout boundary.
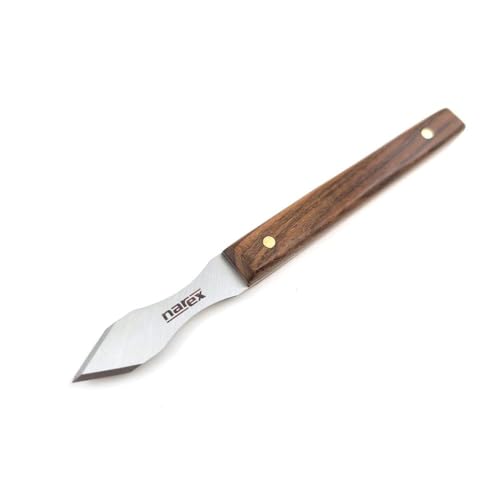
A dedicated woodworking marking knife is easier to control than a utility knife with a thick, flexible blade. A spear-point or single-bevel marking knife can work well, but the bevel orientation matters: the flat side should normally bear against the rule or square so the point follows the reference edge accurately.
Put the Line in the Right Place
Neither marking method compensates for poor line placement. First mark the required length from a reliable reference edge. Then identify the waste side with a clear tick or cross. The cut removes material equal to the saw’s kerf, commonly about 0.5–1.0 mm for a fine backsaw and roughly 1.5–2.5 mm for many handsaws.
For a crosscut to length, place the line at the finished boundary and saw on the waste side, leaving the line intact. With a knife line, the first teeth should sit just in the waste immediately beside the groove, not in the groove’s finished edge. If you saw through the centre of the line, the part will usually finish short.
When marking both faces of thick timber, carry the line around the two edges with a square. If the lines do not meet, the square, stock edge, or marking method is telling you something is out of alignment. Do not simply average the marks. Check the reference face and square before cutting.
Knife Line Compared with Pencil Line
| Factor | Knife line | Pencil line |
|---|---|---|
| Typical precision | About 0.2–0.5 mm when used well | About 1–2 mm, depending on tip and handling |
| Best timber | Clean, planed, stable stock | Rough, dusty, damp, painted, or resinous stock |
| Speed | Slower, especially for many parts | Fast and easy to repeat |
| Correction | Permanent or difficult to remove | Easy to erase or cancel |
| Risk | Can bruise edges or follow grain | Can be misread or cut on the wrong side |
| Best use | Joinery and visible finished work | General carpentry and rough construction |
A Practical Marking Set
If your work is mainly site carpentry, start with a good square, a sharp carpenter’s pencil, and a reliable means of sharpening it. A combination square for woodworking is useful because it marks 90-degree crosscuts and can also check timber thickness and short offsets.
Add a marking knife when you begin making joints or cutting expensive, visible hardwood. You do not need an elaborate kit: a fine knife, a square with a straight stock, and a way to protect the blade in your tool belt are enough. Keep the knife sharp, but not needle-thin; an overly delicate point bends or snaps when it meets a knot.
For the best everyday results, use both methods rather than treating them as competitors. Pencil the rough layout and waste marks, then knife only the final shoulder or cut that controls the fit. That combination keeps the work fast while putting precision where it has a measurable benefit.