What's inside
As an Amazon Associate I earn from qualifying purchases. This post may contain affiliate links at no extra cost to you.
Sections
Our Top Picks


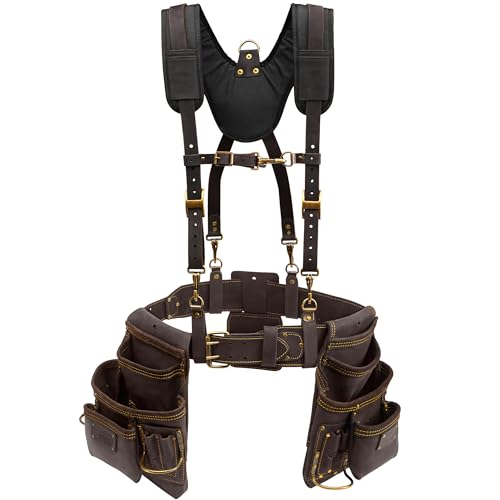
Start with the work, not the number of pockets
First-fix carpentry means measuring, cutting and fastening framing, grounds, noggins and openings—often while moving around a site and climbing ladders. A useful belt keeps the tools you reach for constantly close at hand without swinging into your thigh or catching on timber. It is not a substitute for a saw, drill or stock of fixings carried in a box or set down nearby.
For most carpenters, a practical starting point is a compact belt with two main pouches, a hammer loop, tape clip and a few smaller pockets. Load it with the tools you actually use on a typical day, then walk, kneel and climb a step ladder. If the belt shifts, digs into your hip or pulls your trousers down, reduce the load or improve the support before adding more pockets.
As an Amazon Associate we earn from qualifying purchases at no extra cost to you.


Choose a belt that fits your body and task
A simple nylon or polyester belt is light, affordable and adequate for occasional work or a short list of hand tools. It can be easier to adjust than a leather belt, but stitching and pocket mouths are common weak points when the belt is loaded daily. Leather can last well, though it is heavier and usually costs more. Neither material makes a poor fit comfortable.
Measure around the place the belt will sit, over the clothes you wear on site. Check the maker’s usable adjustment range rather than relying on a trouser waist size. If you carry a tape, hammer, square, knife and a pouch of nails, try the belt with that actual load. A padded belt or suspenders can help with sustained loads, but suspenders may snag and make quick removal less convenient.
Consider a two-pouch carpenter tool belt if you want a straightforward setup. A modular belt is more flexible: you can move or remove pouches for different jobs. The trade-off is extra bulk at the attachment points and the temptation to carry every pouch at once.
Arrange tools to avoid snags and wasted movement
Put frequently used tools where your hand naturally lands, and keep sharp tools covered. Many right-handed users carry the hammer on the right and the main nail pouch on the left, leaving the dominant hand free to reach fixings. Left-handed users can reverse that arrangement. Treat this as a starting point, not a rule: framing layouts, ladder access and personal reach all matter.
Keep the tape measure on a dedicated clip or in a pocket that lets it return without catching. A dedicated clip is fast but can release the tape if it is bumped; a snug pocket is more secure but slower. Store the utility knife closed, and don’t put an exposed blade loose beside nails. Keep pencils and a small marker in separate sleeves so they don’t disappear under fixings.
For layout work, a compact small-parts pouch for a carpenter belt can hold a few nails, screws or connectors. Keep only a working quantity in it. A pouch filled with mixed fasteners gets heavy, and reaching into it can bring out the wrong length or type.
Three practical first-fix setups
The right setup depends on how much fastening you do by hand and whether you need to move freely. These are useful starting points rather than fixed kits.
| Setup | Typical belt contents | Best for | Main trade-off |
|---|---|---|---|
| Light layout | Tape, pencil, knife, small square, hammer | Setting out, checking openings and occasional hand nailing | Light and comfortable, but requires a separate fastener supply |
| Framing hand kit | Tape, pencil, knife, square, hammer, nail pouch, small parts pouch | Regular studwork, noggins and grounds | Fewer trips to the tool box, but the load can become tiring |
| Modular task kit | Removable tool and fastener pouches, tape clip, hammer loop | Switching between layout, fixing and finish tasks | Easy to adapt, but more costly and potentially bulkier |
Carry a working load, not your whole kit
A belt should carry the tools needed for the next operation, not every hand tool in the van. A tape measure, pencil, knife, hammer and square cover many basic framing tasks. Add a chalk line or marking gauge only when the job calls for it. Hand planes and most chisels are better transported in a case: loose edges can be damaged by nails, and a sharp tool in an open pouch is a poor risk when bending or climbing.
If you need chisels for trimming a mortise or cleaning a notch, carry one or two in a closed roll or guarded holder and put them away between uses. A basic chisel is often enough for site adjustments; buy a larger set only if the work regularly needs multiple widths. Keep plane irons and chisel edges away from loose metal fasteners, which can nick an edge before you notice.
Use a secure hammer holder for a carpenter’s belt that suits the hammer handle and your movement. A loose loop can let the hammer bounce out when you step over framing. Test it by walking and crouching—not by swinging the hammer around near other people.
Check the failure points before buying
Inspect seams, rivets, belt holes and the area around the hammer loop. These take the most strain. Thin fabric may be fine for a light layout belt but can tear when a heavy pouch is repeatedly pulled sideways. Metal fittings should be smooth enough not to gouge clothes or scratch finished work; exposed sharp edges can also catch cords and clothing.
One common mistake is buying a large set because it appears better value. Empty pockets add little, but filling them adds weight and makes tools harder to find. Another is carrying too many nails: the load shifts as the pouch empties, and fasteners can spill when you lean over. Refill small quantities from a nearby box and use separate storage for different fasteners.
Finally, test the belt around the actual site conditions. A pouch that works at waist height may snag on a ladder or bump an unfinished wall. Move tools that catch, leave surplus kit in a box, and check the belt’s adjustment after changing layers of clothing. A modest, balanced setup is usually faster than a crowded belt—and a basic belt is perfectly adequate when it fits, stays put and carries only what the job needs.