What's inside
As an Amazon Associate I earn from qualifying purchases. This post may contain affiliate links at no extra cost to you.
Most tape measures are built to stand out 10 feet and survive a drop off a roof. That means a 1-1/4 inch wide blade, a huge housing, and a lot of curve. For inside measurements — inside a cabinet, between studs, window jamb to jamb, drawer box — that wide blade is a liability. It won’t sit flat in a corner, it buckles when you try to bend it into the corner, and you end up guessing the last 1/16 inch.
A narrow-blade tape solves this. Blades in the 1/2 inch to 3/4 inch range lie flat, bend cleanly into an inside corner, and have a smaller, more accurate case size to add. If you do trim, cabinet work, or any finish carpentry, one of these should live in your apron even if you carry a 25-footer on your belt.
As an Amazon Associate we earn from qualifying purchases at no extra cost to you.


Sections
Our Top Picks


Why narrow blades win inside
There are two ways to take an inside measurement: butt the case into one corner and read the blade at the other, or hook the blade on one side and read to the other. Both are more accurate with a narrow blade.
First, case size. Every tape has the case length stamped on the bottom — something like 2-7/8″ or 3″. You butt the case to one wall and add that number to your blade reading. On a compact housing that number is typically 2″ to 2-1/2″. On a big 25ft x 1-1/4″ tape it’s 3-1/2″ or more. A smaller number means less added error, and on narrow tapes that number is often cast into the housing accurately to within 1/64″. On cheap wide tapes it can be off by 1/32″ or more.
Second, blade curl and stiffness. Wide blades have deep concavity so they stand out. That same curve lifts the graduations off the surface when you try to push the blade into a corner. A 1/2″ or 5/8″ blade has almost no curve. It sits flat on the bottom of a cabinet or on a sill, and you can actually see where the 1/16″ mark falls against the corner without parallax.
Third, flexibility. To get a true inside dimension you need to bend the blade 90 degrees into the corner. A 1″ wide blade kinks and creates a 1/8″ radius in the corner, so you are always short. A narrow blade folds cleanly with about a 1/16″ radius and springs back without taking a permanent kink.
Where inside measurements go wrong
Even with the right tape, three failure modes will bite you:
Hook slop. The riveted hook is supposed to slide exactly its own thickness — about 0.045″ to 0.055″ — so inside and outside measurements match. On tapes under $10, that slop is often 1/32″ loose or the rivets are peened too tight and it doesn’t slide at all. Check it: hook it on a block, read 10″, then butt it inside a known 10″ opening. If the two don’t match, that tape is for rough framing only.
Case addition error. People forget to add the case or add the wrong number. Some tapes have different numbers molded on the side vs. the bottom. The only number that matters is the one measured from the back of the case to the front face of the hook when the blade is fully retracted. Verify it with a known inside dimension — a 12″ combination square laid on a flat surface works well.
Bending error. If you bend the blade in the middle of the span instead of right at the corner, you add 1/16″ to 1/8″. The right technique is to keep the blade flat on the work and let it bend only at the opposing corner. Narrow blades make this natural; wide blades fight you and bow up in the middle.
For rough stud layout, none of this matters. For a face frame that needs to fit between two walls with a 1/32″ scribe allowance, it matters a lot.
What to look for in a narrow-blade tape
Blade width is the primary filter. For inside work, 1/2″ is excellent for drawers and boxes up to 24″ wide, 5/8″ is the best all-around compromise, and 3/4″ is the widest you should consider if inside accuracy is the priority. Anything over 1″ is a framing tape.
Length: 12ft and 16ft narrow tapes are far more useful than 25ft. A 12ft x 1/2″ tape fits in your palm, weighs 4-5 oz, and you will actually carry it. A 16ft x 3/4″ tape still fits in an apron pocket but gives you enough to measure most cabinet interiors diagonally. Avoid 25ft narrow tapes — the blade is too thin to support itself and will kink on the first hard pull.
Graduations: Look for 1/32″ marks for at least the first 12 inches, and a matte finish that doesn’t glare. Black on yellow or black on white is easier to read in a dark cabinet than chrome. Double-sided printing is not useful inside and just adds clutter.
Hook: A small, square hook with two rivets and minimal overhang is better than a giant triple-rivet hook with a magnet. Magnets add thickness variation and catch on everything. You want the hook to sit flush in a corner without rocking.
Case: Flat back and squared sides so it sits stable when butted into a corner. A belt clip is useless here — a lanyard hole or slim profile matters more. If you work in metric or dual units, get a tape that reads the same increment on both edges to avoid misreading.
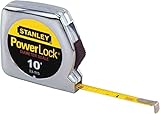
If you are buying one tape specifically for inside trim and cabinet work, a 5/8 inch wide blade tape measure in 16ft is the sweet spot. For a second pocket tape for hardware and drawer work, a 1/2 inch pocket tape measure in 12ft is hard to beat.
Comparison: narrow vs. standard tapes for inside work
| Blade Width | Typical Length | Case Add | Corner Bend Radius | Best For |
|---|---|---|---|---|
| 1/2″ (12-13mm) | 10ft – 12ft | 2″ – 2-1/4″ | ~1/16″ | Drawer boxes, hardware layout, small cabinet interiors |
| 5/8″ (16mm) | 16ft | 2-1/4″ – 2-1/2″ | ~1/16″ – 3/32″ | All-around trim, window/door openings, shelf fit |
| 3/4″ (19mm) | 16ft – 20ft | 2-1/2″ – 2-3/4″ | ~3/32″ | Largest that still works well inside; light framing |
| 1″ (25mm) | 25ft | 3″ – 3-1/4″ | ~1/8″ | Framing, deck layout; poor for tight interiors |
| 1-1/4″ (32mm) | 25ft – 30ft | 3-1/2″ + | ~3/16″ | Standout and durability only; avoid for inside fit |
The jump from 3/4″ to 1″ is where inside accuracy falls off. You gain 3 to 4 feet of standout but lose the ability to fold cleanly into a corner and you add a half-inch of case math.
How to take a reliable inside measurement
Use the case-add method for anything over about 24″ and the butt-and-read method for smaller boxes. For case-add: push the case firmly into one corner, keep the blade flat and straight, read the blade where it meets the opposite corner, and add the stamped case length. Keep pressure light — pushing hard bows the blade.
For very accurate work, measure twice: once near the bottom of the opening and once near the top. Walls and cabinet sides are rarely parallel. If those two numbers differ by more than 1/32″, you need to know which one governs your cut.
Alternatively, for openings under 12″, bend the tape itself. Hook the blade on one side, bend the blade into the opposite corner with your finger, and read the point where the blade creases. Only narrow blades do this without kinking. Burn an inch if you have to: hook on one side, read from the 10″ mark instead of the hook, and subtract 10″. This removes hook slop entirely and is the most accurate method with a cheap tape.
If you do a lot of inside fitting, consider pairing your narrow tape with a pair of pinch rods for carpentry for openings over 36″. You set the rods to the opening, then measure the rods on a flat bench. It eliminates the bend entirely.
When cheap is fine and when it is not
A $7 narrow tape from the bargain bin is fine for rough inside measurements if you verify the hook and case add. For cutting drywall, blocking, or framing, 1/16″ error does not matter.
For trim, cabinets, and built-ins, spend $15 to $25 and get a tape with a riveted end hook that actually slides, 1/32″ graduations, and a nylon-coated blade that won’t crack at the bend point after 20 uses. The coating also prevents the blade from taking a permanent curl where you repeatedly bend it into corners.
You do not need a premium $40+ tape for this job. What you are paying for at the high end is standout, drop protection, and auto-lock — all features that make a tape worse for tight inside work. Save that money for a good 6″ rule or a reliable combination square, which you will use to double-check every critical inside dimension anyway.
Practical picks without model hype
Instead of chasing a specific model that may be discontinued next year, buy by spec:
For a shop apron: 12ft x 1/2″, matte blade, 1/32″ for first foot, plain steel hook. This is your story stick for hardware. It weighs nothing and you will forget it is there until you need it.
For site trim bag: 16ft x 5/8″ or 16ft x 3/4″, nylon coated, stamped case add under 2-3/4″, two-rivet hook. This covers 90 percent of window, door, and cabinet openings without switching tapes.
Keep both blades clean and dry. Wipe sawdust off the hook so it slides freely. If the hook gets bent from a drop — common on narrow tapes — replace the tape. Trying to straighten it never restores the slide accuracy, and you will chase bad cuts all day.