What's inside
As an Amazon Associate I earn from qualifying purchases. This post may contain affiliate links at no extra cost to you.
Sections
Our Top Picks

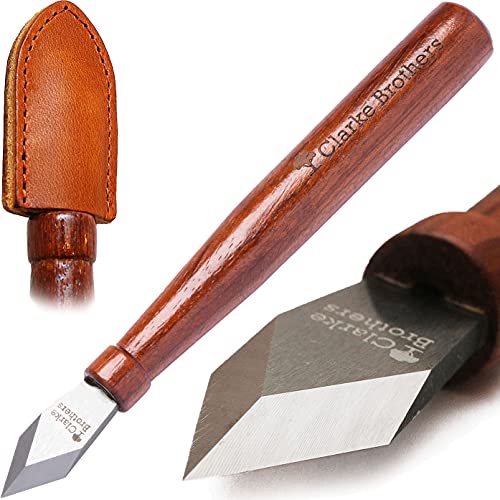
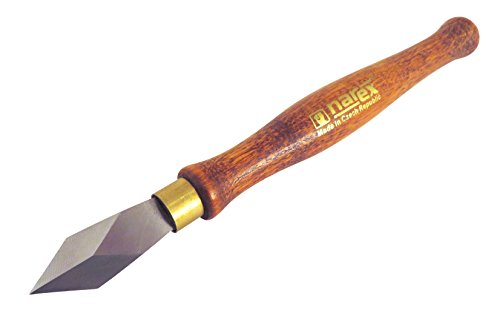

Why use a marking knife for shoulder lines?
A shoulder line marks where a tenon, rebate, housing or other joint changes height. A knife cuts a fine groove across the grain instead of leaving a pencil line, so a chisel can register against a physical edge when you pare to the line. That helps prevent torn fibres and makes the shoulder easier to fit accurately.
A knife does not make a joint precise by itself. A blunt edge, a ruler that slips or a square held at an angle can still put the line in the wrong place. For most small joinery, though, a sharp knife and a reliable square are a useful combination. If you mainly mark rough framing or work that will be covered, a sharp pencil is usually quicker and good enough.
As an Amazon Associate we earn from qualifying purchases at no extra cost to you.


Choose the right knife for your work
Marking knives broadly divide into single-bevel and double-bevel designs. A single-bevel blade has a flat face and a bevel on the other side. The flat face can register against a ruler or square, which makes it a good choice for accurate layout. It does have a preferred direction: turn it the wrong way and the bevel can push the blade away from the reference.
A double-bevel knife has two bevels and is less fussy about direction. It suits general marking and is easier to share between right- and left-handed users, but its blade may not sit as predictably against a straightedge as a flat-backed design. Blade shape matters too. A pointed, narrow blade reaches into corners; a broader blade can feel more stable for straight cuts. Choose a handle that gives you control without forcing a death grip.
For fine furniture and hand-cut joints, compare single-bevel marking knives and double-bevel marking knives. A budget knife can work well if it takes a clean edge and holds it long enough for your projects. Paying more may buy a better handle, steel or finish, but it does not compensate for poor sharpening.
Knife types compared
| Type | Best for | Trade-off |
|---|---|---|
| Single-bevel | Registering a flat back against a square or ruler | Must face the correct way; sharpening needs to preserve the flat back |
| Double-bevel | General marking and use by either hand | Less convenient when you want one flat face tight to a guide |
| Replaceable-blade knife | Quick, consistent sharpness without honing | Replacement blades add cost and may be too thick for very fine work |
| Workshop-made knife | Low-cost entry or occasional marking | Comfort and edge geometry depend on the blade and how well it is finished |
How to make a clean shoulder line
First, mark from a dependable reference face. If the stock has been planed square, choose one face and one edge as your references and keep using them; measuring from different edges can introduce cumulative error. Set a marking gauge for the shoulder position where possible. A gauge keeps the line parallel to the reference edge, while a square transfers that position across the face and around the sides.
Hold the square firmly, with its stock seated against the reference edge. Put the knife’s flat face against the blade of the square if the knife is single-bevel. Draw the tip lightly across the wood, with the blade inclined slightly in the direction of travel. Make two or three light passes rather than one forceful pass. Heavy pressure can make the knife follow grain, skid off the square or leave a ragged cut.
For a shoulder that runs around all four sides, mark each face from the same datum rather than measuring each one independently. Keep the knife line continuous at the corners, but do not dig the point into them: a deep corner cut can extend past the intended boundary and show after assembly. On soft or figured timber, start with especially light passes; a very sharp knife cuts cleanly, but its point can still follow reversing grain.
To establish a crisp shoulder, make a shallow knife wall and pare waste toward it with a sharp chisel. Stop a small distance short, then take thin paring cuts until the chisel meets the line. For a tenon shoulder, work from both faces toward the centre if the timber is thick, which reduces the chance of breaking out fibres on the far side. The knife line is a boundary, not a trench to deepen by repeated heavy strokes.
Sharpening and common mistakes
A knife that drags, crushes fibres or needs extra force is due for sharpening. Many marking knives use a small bevel that can be honed on a fine stone; check the blade’s shape before grinding, because changing the angle or rounding the back can spoil how it registers against a square. A flat, polished back is particularly useful on a single-bevel knife. Keep a stone handy and touch up the edge rather than waiting until the blade is badly worn.
Common failures are usually setup problems: a square shifts during the cut, the knife is used bevel-side against the guide, or a measurement is taken from an unreliable edge. Check the square against a known straight edge and confirm its stock seats fully on the work. If a line is misplaced, do not deepen it in the hope that it will disappear; recheck the measurement and decide whether the error can be trimmed away safely.
What to buy
For careful furniture joinery, start with a single-bevel knife if you are comfortable controlling its orientation. For mixed shop use, a double-bevel knife is a sensible, less directional choice. If you mark only occasionally, a modest knife or a suitable replaceable-blade option is enough; put the savings toward a dependable square and sharpening stone. A specialist handle is not essential, but the blade should feel controllable and arrive with geometry you can maintain.
Before buying, check blade thickness, replacement availability if applicable, and whether the edge can be honed with the tools you already own. Very thick blades can wedge against a square or make a wider-than-needed mark. A slim, sharp edge is better for fine shoulders; for rough site work, a pencil or marking gauge may be faster and more durable.