What's inside
As an Amazon Associate I earn from qualifying purchases. This post may contain affiliate links at no extra cost to you.
Sections
Our Top Picks

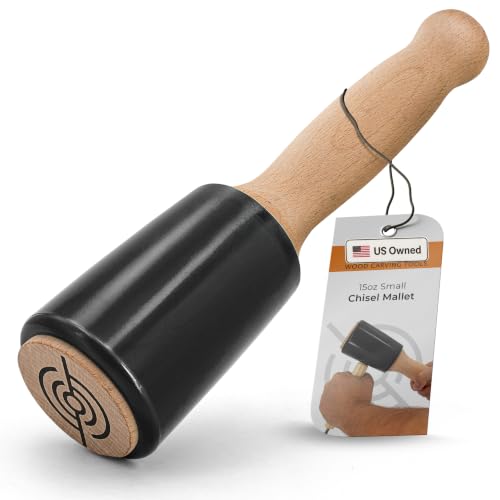
What a mallet needs to do
For chopping mortises and driving chisels, a mallet should deliver a controlled blow without bruising the handle, tiring your arm, or bouncing unpredictably. The right choice depends on the chisel as much as the job. A heavy mortise chisel needs more striking force than a narrow paring chisel, and a plastic-handled bench chisel can take blows that would damage a delicate wooden handle.
For most general bench work, a mallet weighing roughly 12 to 20 ounces is a useful starting range. For repeated chopping in dense hardwood, 20 to 28 ounces can reduce the effort per blow. Weight alone does not determine how hard a mallet hits: head shape, material, and how comfortably you can control the swing all matter. If you have to grip tightly or raise your elbow high to make it work, it is probably too heavy for routine chisel work.
As an Amazon Associate we earn from qualifying purchases at no extra cost to you.


Mallet types and their trade-offs
A wooden joiner’s mallet is a good all-round choice for wooden-handled chisels. Its broad, slightly rounded striking face is forgiving of off-center hits, and the wood is less likely than steel to damage a handle. A rectangular head also gives you a clear sense of the striking face’s orientation. The drawback is that wood can split, dent, or loosen at the head, especially after years of hard chopping.
A urethane or other soft-faced mallet is kinder to plastic handles and finished parts, but the softer face can absorb some energy and feel less direct when chopping a deep mortise. A hard plastic mallet transfers force well and holds up to rough use, though it can mark a wooden handle. Check the face for deep mushrooming or cracks; a damaged face can slip off a chisel handle instead of landing squarely.
Dead-blow mallets contain shot or other loose material that reduces rebound. That can help with assembly and controlled seating, but it is not essential for ordinary mortise chopping. Some are bulky for their weight, and a broad round head may be awkward when you need to strike a chisel near a wall or the edge of a workpiece.
Quick comparison
| Type | Best suited to | Main advantage | Watch out for |
|---|---|---|---|
| Wooden joiner’s mallet | Wooden-handled chisels and general bench work | Controlled, familiar feel; gentle on handles | Head or handle can split or loosen |
| Hard plastic mallet | Plastic-handled chisels and rough site work | Durable and easy to maintain | Can mark wooden handles |
| Soft-faced mallet | Light chisel work and fitting parts | Reduces risk of damaging handles or surfaces | Less direct for heavy chopping |
| Dead-blow mallet | Assembly and work where rebound is a nuisance | Stays in contact more readily after impact | Often bulkier; not necessary for most mortises |
Choosing for mortises and general chisel work
For a mixed shop, a medium-weight wooden joiner’s mallet is the simplest first purchase. Look for a solid head around 3 to 4 inches across and a handle that lets you hold it near the end without the head feeling unstable. A wooden mallet in the 16- to 20-ounce range is enough for many mortises in pine, poplar, and moderately hard hardwoods. If you regularly chop wide mortises in oak or maple, a 24-ounce head may be more efficient, but it is tiring for fine work.
Choose a wooden joiner’s mallet if most of your chisels have wooden handles. If the same mallet will see frequent use with plastic-handled chisels or on a job site, a hard plastic carpenter’s mallet is a practical alternative. Neither type is automatically better: match the striking face to the handles you actually own.
A cheap wooden mallet is fine if the head is secure and the striking face is not badly split or crushed. Do not pay extra for a premium finish if the tool will spend its life in a toolbox. Pay attention instead to balance, handle fit, and whether replacement handles are available. A loose head is a safety and accuracy problem: stop using it until it is repaired, rather than compensating with harder swings.
Using the mallet without damaging the work
For a mortise, mark the outline clearly and start with the bevel facing toward the waste. Make a shallow cut across the grain first, then work back toward the end of the mortise in small steps. Strike squarely, keep your other hand behind the cutting edge, and remove chips before they pack tightly. A packed mortise can make the chisel bind; levering hard against the side may bruise the walls or twist the blade.
Use several moderate blows rather than one full-force swing, especially near the final depth. A 1/4-inch chisel may need a lighter touch than a 1/2-inch mortise chisel even if both are being used in the same timber. If the chisel handle is spreading or mushrooming, inspect it before continuing. A wooden handle that has been struck repeatedly with a hard plastic face may need its damaged end trimmed and reshaped; a plastic handle with a crack should be replaced.
Keep the chisel sharp. A dull edge makes you compensate with heavier blows, which increases the chance of a glancing strike and makes accurate chopping harder. For shallow paring and delicate fitting, set the mallet aside and use hand pressure where the chisel and work allow it.
Buying and maintenance
Try to hold a mallet before buying if possible. The grip should feel secure without forcing your fingers into an awkward position, and the head should land flat when you make a short, relaxed swing. A light mallet is easier to control but may require more blows; a heavy one can save effort in a large mortise but is less forgiving when your aim slips.
Keep the striking face clean and check it periodically for cracks, loose parts, and excessive mushrooming. Store a wooden mallet dry, not beside a heater or in a wet site box; repeated swelling and drying can loosen the head. If you want one tool for broad, everyday use, start with a medium wooden mallet. Add a plastic or soft-faced option only when your chisel handles or assembly work make that difference worthwhile.