What's inside
As an Amazon Associate I earn from qualifying purchases. This post may contain affiliate links at no extra cost to you.
Sections
Our Top Picks
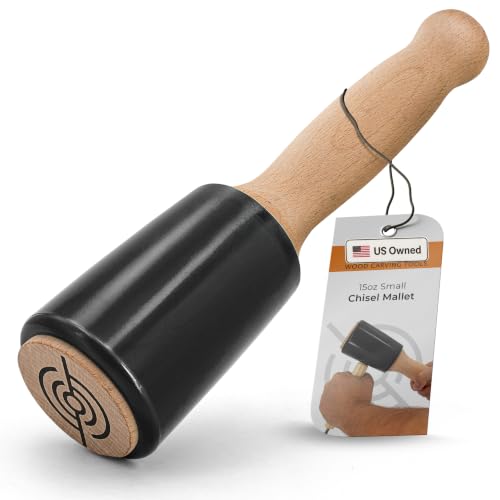


The short answer
For most bench-chisel work, a wooden mallet is the better choice. Its broad, relatively soft face delivers a controlled blow without battering the handle, and it feels balanced during repeated cuts. A rubber mallet can work for light paring and occasional adjustments, but its face may rebound, mark wood, or deliver less precise impact than you expect.
Neither tool is automatically right for every chisel. Match the mallet to the chisel’s handle and the work: a wooden-handled bench chisel is usually paired with wood; a heavy framing or mortise chisel needs a mallet with enough mass; and a delicate paring cut may need only hand pressure.
As an Amazon Associate we earn from qualifying purchases at no extra cost to you.


What the mallet does to a chisel
A mallet transfers impact through the chisel handle to the cutting edge. The weight, face material, and shape affect how much force reaches the cut and how easy it is to aim. A heavier head drives more assertively, but it also makes overstriking easier. A light mallet offers more control for shallow cuts but may require extra swings in hard wood.
That distinction matters because repeated, poorly controlled blows can split a handle, bruise the workpiece, or push a chisel past the intended depth. A mallet should let you advance the cut in measured steps, not encourage you to compensate for a dull edge with harder hits. Sharpen the chisel first; a sharp edge generally needs less force and is easier to steer.
Wooden vs. rubber mallets
| Factor | Wooden mallet | Rubber mallet |
|---|---|---|
| Best fit | Repeated chopping and driving bench or mortise chisels | Light tapping, assembly, and occasional chisel work |
| Handle impact | Firm, direct blow; broad face helps distribute contact | Soft face cushions impact, but the head may rebound |
| Control | Predictable for deliberate, repeated strikes | Can feel less precise when the face compresses or bounces |
| Workpiece risk | Can dent finished wood if the face lands off target | Can leave dark marks or residue, especially on pale wood |
| Wear | Face can mushroom, split, or loosen with use | Rubber can harden, crack, or shed material over time |
When to choose a wooden mallet
Choose wood if you regularly chop waste from joints, cut mortises, or drive a bench chisel through hardwood. A traditional wooden mallet has a large striking face that is easier to land squarely on a chisel handle than the narrow face of a hammer. Its impact is firm without the harshness of a steel hammer, and it is simple to inspect: look for a badly split head, a loose handle, or a face worn so unevenly that it glances off the chisel.
For general bench work, a head around 12–16 ounces is a sensible starting range. A lighter head gives better control for small chisels and modest cuts; a heavier one can be useful for larger mortise work, but it tires the arm faster and can drive a chisel too deep. If you want one dedicated tool, compare woodworking wooden mallets by head weight, face size, and whether the handle is replaceable, rather than choosing on appearance alone.
Wood is not indestructible. A badly misdirected blow can dent a handle or chip a sharp chisel corner. Keep the mallet face reasonably flat and strike the center of the handle end. Don’t use the mallet to hit a steel chisel handle unless that handle is designed for it; repeated blows can damage the handle and are harder to control.
When a rubber mallet is enough
A rubber mallet is a reasonable budget choice if you already own one and only occasionally tap a chisel for shallow cuts. It is also handy for knocking together a joint or nudging a plane adjustment without leaving a steel-hammer dent. For those mixed jobs, a soft-face rubber mallet can cover several tasks at the bench.
The trade-off is feel. Rubber compresses on impact, and some heads rebound more than a wooden mallet. That can make a series of short, controlled cuts less consistent. Rubber may also mark a pale surface: test the face on scrap, particularly if it is black rubber. A non-marking face reduces that risk but does not guarantee a clean strike if the mallet picks up grit or the workpiece has a delicate finish.
If you are buying a mallet specifically to drive chisels, don’t assume a large, soft head is better. Excessive mass and a bouncy face can make accurate work harder, not easier. For occasional use, though, the cheaper tool is fine if it is comfortable, clean, and heavy enough to move the chisel without wild swings.
Match the mallet to the chisel
Check the chisel before striking. A wooden-handled bench chisel is suited to a wooden mallet; a plastic or composite handle may be built to take harder blows, but follow the maker’s guidance. A paring chisel is generally pushed by hand rather than driven. If the handle is cracked, loose, or mushroomed, repair or replace it before using a mallet. A split handle can fail under impact and send the chisel off course.
Start with a light strike and increase force only as needed. For a mortise, remove waste in stages rather than trying to reach full depth in one blow. Keep the free hand behind the cutting edge, secure the work, and make sure the chisel’s bevel is oriented to guide the cut where you intend. If the tool is not advancing, check sharpness, grain direction, and chip clearance before swinging harder.
A practical buying checklist
Grip the handle if possible: it should feel secure without requiring a tight squeeze. Look for a head that sits firmly on its handle and has enough face area to hit a chisel handle cleanly. For a first mallet, moderate weight is more versatile than an unusually heavy head. If your work is mostly light fitting and assembly, a rubber mallet may already serve well; if you are regularly chopping joints, a wooden one is the more useful dedicated tool.
Whichever you choose, keep the striking faces clean and use the right tool for the job. A mallet that fits the chisel, the cut, and your level of control will do more for accuracy than simply adding weight.