What's inside
As an Amazon Associate I earn from qualifying purchases. This post may contain affiliate links at no extra cost to you.
Cutting a stair stringer by hand is mostly a layout job. A sharp handsaw cannot rescue a bad rise-and-run calculation, a square that shifts, or a pencil line that is too thick to follow accurately. The best layout kit makes it easy to repeat the same marks, check them against the finished timber, and spot errors before you remove wood.
As an Amazon Associate we earn from qualifying purchases at no extra cost to you.



Sections
Our Top Picks
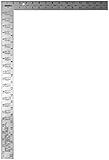
 Johnson Level & Tool CS9 Steel Framing Square16" x 24"24 x 19 x 0.06 inches1.4 poundsCheck on Amazon


Start with the right measurements
Before buying or setting up tools, determine the total rise, total run, and the number of risers. Measure the finished floor height, including flooring thickness at the top and the finished landing or floor at the bottom. A difference of even 10 mm (about 3/8 inch) can leave the first or last step noticeably wrong.
Divide the total rise by the planned number of risers. Then check the proposed tread run and the local stair rules. Common residential layouts use rises around 7 to 7-3/4 inches and runs around 10-11 inches, but permitted limits and requirements for nosings, landings, handrails, and headroom vary. Do not cut from a generic stair chart without checking the actual project.
Make a small drawing or write the rise and run in large figures on the timber. This prevents the common mistake of switching the two numbers when moving from the calculator to the square.
Best tools for stringer layout
A 24-inch or 26-inch framing square with stair gauges is the main tool for traditional stringer layout. The square’s long blade establishes the tread run and its shorter tongue establishes the riser. Stair gauges clamp to the square at those two settings, allowing every step to be marked without repeatedly measuring.
Stair gauges are inexpensive and the cheaper brass or steel versions are usually fine. The important features are positive clamping screws, square edges, and gauges that do not slide when the pencil is pressed against them. Test the setup on scrap: mark five or six steps, then compare the spacing. If the gauges move even 1/16 inch per step, the error becomes significant near the top.
Use a combination square for short cross-checks and for marking the plumb and level cuts at the ends of the stringer. It is more convenient than a framing square for checking whether a line is truly 90 degrees from the edge, but it is not a substitute for a full-size square when laying out long stair runs.
| Tool | Best use | Typical weakness |
|---|---|---|
| Framing square with stair gauges | Repeating rise and run marks quickly | Gauges can slip or be set on the wrong scale |
| Combination square | Checking short lines, ends, and 90-degree cuts | Too short for full stair layout |
| Sliding bevel | Transferring an unusual pitch or checking angles | Does not calculate rise and run for you |
| Sharp pencil and marking knife | Clear, accurate layout lines | Thick or damaged points create ambiguous cuts |
| Straightedge | Checking the timber and connecting layout lines | A short one can hide bow or twist |
Marking tools that prevent mistakes
Use a sharp carpenter’s pencil for the initial layout, preferably one that can be sharpened to a narrow flat or pointed lead. A broad carpenter pencil is useful on rough timber but can produce a line 1/8 inch wide. Always cut on the same side of the line. Do not center the saw kerf on a thick line unless you have deliberately allowed for it.
A carpenter’s marking knife is worthwhile for critical points, especially the edges of the seat cuts and the top and bottom ends. Knife lines are easier to locate with a saw and do not disappear when handling the timber. On coarse softwood, score lightly first and deepen the line only after confirming the layout.
Keep a sharp utility knife, a pencil sharpener, and a small eraser in your tool belt. Erasing a wrong line is safer than trying to remember which of two parallel lines is correct. Mark waste with a large X. On a stair stringer, confusing the waste side can ruin a board in minutes.
Check the timber before layout
Lay the board on trestles and inspect both faces. Use a 24-inch spirit level or straightedge to find bow, and sight down the edge for twist. Put the best, straightest edge against the framing square. A small bow can sometimes be placed toward the center of the staircase, but a badly twisted stringer makes every tread appear uneven.
Check the board width against the required remaining depth beneath the deepest notch. Cutting too deeply into a 2×12 can leave a weak, narrow web. Avoid large knots at the inside corners of the notches, where they can split during cutting or installation. If the layout will not leave enough solid wood, change the stringer size or design rather than hoping adhesive or screws will compensate.
How to use the square accurately
Set the stair gauges to the chosen rise and run using the correct scales on the square. Confirm the settings with a tape measure. Place the square against the reference edge, hold both gauges firmly against it, and mark the first tread and riser. Slide the square until the previous riser line meets the next run position, then repeat.
Do not rely only on the square’s printed graduations when the layout is unusual. Measure the gauge spacing directly, or make a full-size test mark on scrap. After laying out three steps, measure from the first tread line to the third. This catches a slipping gauge before it is repeated across the board.
At the end, extend the final lines with a straightedge and check the total run against the drawing. Add the correct allowances for the top floor, bottom floor, tread thickness, and nosing. These adjustments are where many otherwise accurate layouts fail.
Useful extras and when cheap is fine
A stair layout calculator can speed up the arithmetic, but it should be treated as a checking aid, not an authority on building-code limits. A basic tape measure, framing square, pencil, and straightedge are enough for one staircase. Spend more on a rigid, readable square and reliable gauges before buying specialized templates.
Reusable stair gauges or a dedicated stair-layout jig become more valuable when cutting several identical stringers. They improve consistency, but they also repeat an error on every board if the first setup is wrong. Mark and check one complete stringer before using it as the pattern for the others.