What's inside
As an Amazon Associate I earn from qualifying purchases. This post may contain affiliate links at no extra cost to you.
Lifting painted architraves without trashing the wall or bending your chisel comes down to using the wrong tool in the right way, or the right tool the wrong way. Old skirtings and architraves are usually pinned with lost-head nails, glued with decades of paint, and often hiding plaster that will blow out if you lever too hard. A standard 1/2″ bevel-edge bench chisel will flex or take a permanent set if you use it as a pry bar, and once it bends, it never quite sits flat on a stone again.
For this job you want a chisel that is designed to take a hit and a lever. That means thick stock, a stiff cross-section, and a handle connection that won’t loosen after the third architrave.
As an Amazon Associate we earn from qualifying purchases at no extra cost to you.


Sections
Our Top Picks
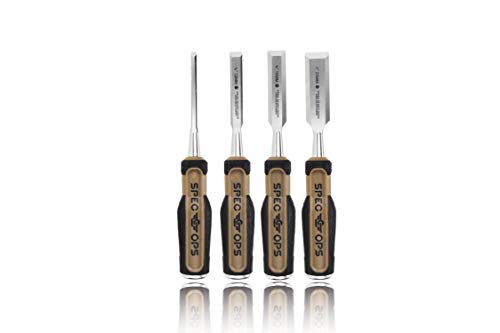 Spec Ops Tools Wood Chisel for Carpentry &( 1/4", 1/2", 3/4", 1" )13 x 2.2 x 0.1 inchesCheck on Amazon
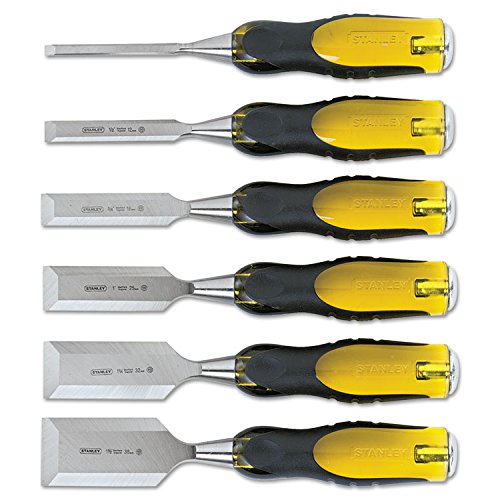


Why thin bench chisels bend on architraves
Most modern bevel-edge bench chisels are ground thin for paring and chopping dovetails. The blade might be 3-3.5mm thick at the shoulder and tapers aggressively toward the edge. That geometry is great for getting into corners, but it creates a weak point about 30-40mm back from the cutting edge. When you slip it behind a painted architrave and pull, you are putting a bending load right at that thin section.
A true heavy-duty chisel for demolition and lifting is 5mm to 7mm thick at the shoulder and stays thick for most of its length. It will still flex a little under load – all steel does – but it springs back instead of bending permanently. Chrome vanadium or chrome-manganese steel hardened to 58-60 HRC handles this better than brittle high-carbon steel that can chip when you hit a hidden masonry nail.
The second failure point is the handle. A tang chisel where a narrow steel spike is driven into a wooden handle will work loose if you pry sideways. Repeated levering opens up the handle and you get wobble, then the tang bends. A socket chisel or a full-length through-tang with a steel striking cap transfers much more leverage without deforming. If you plan to hit the chisel with a steel hammer to break paint seals, a plastic-capped or hooped handle is non-negotiable.
What to look for in a lifting chisel
Forget width for a moment. For architraves, a 25mm (1″) and a 38mm (1-1/2″) cover 90% of the work. Too narrow and you dent the back of the architrave; too wide and you cannot get behind the mitre without chewing plaster.
Look for three things: a firmer or registered profile, thick parallel sides, and a bevel length that is short. Firmer chisels have flat, rectangular cross-sections with only a slight bevel on the sides, so they resist twisting. Bevel-edge chisels marketed as “heavy-duty” or “construction” are usually a compromise – beveled enough for general carpentry but still 5mm+ thick. Avoid anything labelled “paring” or “ultra-thin bevel.”
Length matters too. A 250-280mm overall length gives you enough lever without making it hard to control. The 400mm+ framing chisels are overkill indoors and you will mark the wall trying to swing them. Steel striking caps, acetate or polypropylene handles, and a bolster you can actually hit are more useful than a fancy wood handle here. Wood handles split when you use a metal hammer on paint-locked joints.
If you can, choose chisels quoted as impact rated or with a stated Rockwell hardness. Anything listed only as “hardened steel” with no HRC is usually at the cheap end and more likely to bend than spring.
Heavy-duty chisel types compared for architrave work
Not all “strong” chisels are the same. This is how the main categories behave when you use them to break a paint seal and lever a 70mm architrave pinned with two 40mm lost-heads per leg:
| Type | Blade Thickness at Shoulder | Handle Strength | Bending Risk When Prying | Best Use |
|---|---|---|---|---|
| Firmer / Registered Chisel (socket or through-tang) | 5.5 – 7mm | Very high – socket or steel cap | Low – will spring back under moderate load | Primary choice for lifting architraves and skirtings |
| Heavy-Duty Bevel-Edge (construction grade) | 5 – 6mm | High – hooped / capped | Low to medium – ok for short levers | Good all-rounder if you only buy one set |
| Standard Bevel-Edge Bench Chisel | 3 – 4mm | Medium – tang in wood | High – permanent bend common | Keep it for joinery, not prying |
| Demolition / Wrecking Chisel (e.g., SDS-style hand chisel) | 8 – 12mm | Extreme – one-piece steel | Very low – but will damage plaster | Only for architraves you are binning |
In practice, a heavy duty firmer chisel set with 25mm and 38mm sizes will lift architraves cleanly without taking a set, while a standard bench chisel of the same width will show a 1-2mm bow after two or three heavy lifts. That bow is enough to make it useless for accurate paring later.
Technique that prevents bending and wall damage
Even the stiffest chisel will bend if you use it as a 10-inch pry bar. The trick is to never take the full load on the chisel alone.
First, score the paint line where architrave meets plaster with a sharp utility knife. On old work there can be five or six coats bridging the gap, and breaking that film with a chisel edge pulls plaster with it. Make two passes, just deep enough to cut paint, not paper.
Then start at the middle of the leg, not the mitre. Tap a stiff 25mm firmer chisel behind the architrave with the bevel facing the wall. Only go in 10-15mm. You are not trying to lever it off in one go. Once you have a gap, slip a thin pry bar or a second wide chisel in to take the load and work along the length, opening the gap a few millimetres at a time. Move 150-200mm, lever a little, move again.
Use a timber offcut or a wide stiff putty knife as a fulcrum protector between the chisel and the plaster. This spreads the load and stops the chisel digging a crescent into the wall. If a nail holds, stop levering and tap the architrave back, then drive the chisel in alongside the nail to cut the paint and free the timber around it. Yanking against a fixed nail is how you bend a blade and split the architrave.
Hit with a mallet, pry with a bar. If you are using a steel hammer to break the seal, make sure you are using a chisel with a steel cap. Bashing a wooden-handled bench chisel with a claw hammer mushrooms the hoop in one job and loosens the handle.
What not to use
Do not use long, thin paring chisels, Japanese dovetail chisels, or anything with a polished wood handle and no hoop for this work. They are not heat-treated for impact and the thin lands will fold. The same goes for cheap £5 hardware store sets where the blade is actually two pieces welded at the bolster – those snap at the weld when levered.
A flat pry bar or trim puller is often a better second tool than a second chisel. But do not start the job with a wide wrecking bar alone. The initial insertion is too thick and you will crush the architrave edge or lever a chunk of plaster off before the paint breaks.
Which option to buy
If you only lift architraves occasionally and want one chisel that can stay in your carpenter tool belt pouch without being precious, get a single 32mm or 38mm heavy-duty construction bevel-edge chisel with a through-tang and steel cap. It will do 80% of what a firmer does and still be useful for general site chopping. Expect to pay £15-£25 for a decent single.
If you do refurbs regularly, a set of two or three firmer chisels is worth it. They are heavier, about 30% stiffer in hand, and you will not worry about bending them when an architrave is glued as well as nailed. The trade-off is they are useless for fine dovetail work – the sides are too thick to get into tight corners, so keep them as dedicated site lifters.
For architraves you intend to reuse, prioritise the thinner of the heavy-duty options (around 5mm) and a fulcrum block. For architraves you are skipping, a thicker firmer or even a dedicated demolition chisel hand tool saves time and your good chisels. Buying a cheap, thick beater you do not mind hitting with a lump hammer is often cheaper than re-grinding a bent bench chisel.
Whichever you choose, keep the edge sharp but not razor-sharp. A 25-degree primary bevel with a tiny 30-degree secondary is ideal. A super-thin 20-degree edge chips on hidden plaster nails and makes you push harder, which increases bending load. A slightly stouter edge breaks paint cleaner and needs less force to get behind the timber.