What's inside
As an Amazon Associate I earn from qualifying purchases. This post may contain affiliate links at no extra cost to you.
Trimming a timber window sill is a small job that exposes every weakness in a hand plane. The work may involve removing only 1–3 mm from a front edge, fitting a replacement sill to an uneven reveal, or shortening a sill in place. The best plane depends on access, grain direction and whether the timber is bare, painted or already fixed in the opening.
As an Amazon Associate we earn from qualifying purchases at no extra cost to you.



Sections
Our Top Picks
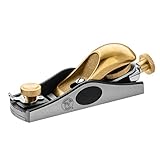
 Rockler Bench Dog No. 60-1/2 Low Angle Block60-1/2 Block Plane6.25 x 1.6 x 6.25 inches0 PoundsCheck on Amazon
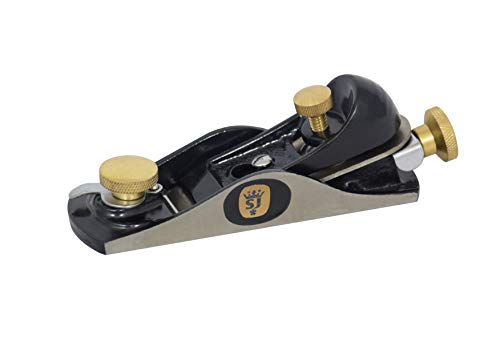 Spear & Jackson CBP95 9 1/2 Carpenters Block9 1/2 In6.89 x 1.77 x 2.76 Inches1.98 poundsCheck on Amazon


What makes a good sill plane?
For most window work, look for a plane with a sharp iron, a sole that is easy to control and enough width to register against the timber. A plane that is too long can bridge a short section and remove material at the wrong points; one that is too short can follow dips rather than flattening them.
Blade adjustment matters more than extra features. You should be able to set a fine cut of roughly 0.1–0.3 mm for final fitting. A coarse setting is useful for removing material quickly, but it increases tear-out and makes it easier to overshoot a scribed line. A mouth opening around 1 mm is suitable for fine trimming, while a wider opening helps with rougher cuts.
A properly sharpened blade is essential. For general softwood and hardwood sill work, a primary bevel around 25° with a small secondary bevel is common. The exact angle matters less than a clean, square edge and a back that is properly flattened near the cutting edge.
The best plane types for window sills
| Plane type | Best use | Advantages | Limitations |
|---|---|---|---|
| Low-angle block plane | End grain, short edges and fitting work | Compact, easy to control, good cutting angle for end grain | Short sole can follow unevenness; limited stock removal |
| Standard-angle block plane | General trimming and small adjustments | Versatile and usually inexpensive | Less effective than a low-angle plane on difficult end grain |
| No. 4-style smoothing plane | Longer edges and fine surface finishing | Stable, accurate and leaves a clean finish | Heavier and awkward in a confined window reveal |
| Jack plane | Removing several millimetres from a loose sill | Faster stock removal and better reference over length | Overkill for installed trim; can remove too much quickly |
| Rabbet or shoulder plane | Cleaning a rebate, step or narrow shoulder | Reaches into a defined corner | Specialist tool, not a general-purpose sill plane |
For a first purchase, a low-angle block plane is usually the most useful choice. It handles end grain at the ends of a sill, small adjustments to the nose and general trimming without taking up much room. A model with a built-in adjustable mouth is preferable if the price difference is reasonable.
Block plane or bench plane?
Choose a block plane when the sill is installed or when you are fitting a short replacement piece. Its one-handed size lets you support the work with the other hand, and its low profile is useful below a frame or beside a plaster reveal. A 60–70 mm blade is typical, with a sole around 150–180 mm long.
Choose a No. 4-style smoothing plane when the sill is loose and you need to straighten a longer front edge or top surface. The longer sole helps prevent local hollows, but it is not automatically better. On a 300 mm repair section, a long plane can bridge the section and leave untouched high spots at both ends.
A jack plane is appropriate if a replacement sill is substantially oversized. It can remove 2–4 mm efficiently with a cambered or slightly rounded blade, followed by a finer plane. Do not use that setup for final fitting beside glass or painted trim. A single heavy pass can destroy a pencil line and leave a gouge that is difficult to disguise.
If the work involves a narrow rebate, a shoulder plane is more accurate than trying to force a block plane into the corner. For occasional DIY work, however, a sharp chisel can clean the last millimetre more cheaply, provided you pare with the bevel facing the waste and avoid levering against the finished edge.
Features worth paying for
Pay for a flat sole, a rigid body and a blade that can be sharpened without drama. A comfortable front knob is useful, but elaborate adjustment systems are not essential for this job. A plane that holds its setting is more valuable than one with a premium finish.
Low-cost block planes can be perfectly adequate for one or two window repairs. Expect to spend time checking the sole, flattening the back of the iron and sharpening the edge. If the blade rocks on the bed or the mouth is badly distorted, the saving disappears quickly. A mid-priced adjustable block plane is the sensible middle ground for regular home maintenance.
For frequent site work, a better-quality plane earns its cost through easier adjustment and better edge retention. Stainless or plated hardware can also help where the tool will be carried in a damp tool bag, though it does not replace wiping the sole and applying a light rust preventive.
How to trim the sill without damaging it
Mark the waste clearly and use a sharp pencil or knife line. If you need to remove 2 mm, mark the final line and make a second reference line 1 mm inside it. Plane to the inner line first, then take light passes toward the final line. This leaves room to correct a skewed cut.
Support a loose sill close to the work area. Unsupported stock can flex under the plane and spring back, producing a hollow surface. Clamp it with padded jaws, but keep clamps away from the plane’s path. On an installed sill, check for screws, nails, grit and old paint before starting. A hidden fastener will chip the iron immediately.
Plane with the grain whenever possible. At the ends, make a few shallow strokes from each outside corner toward the middle. This prevents the common breakout failure where the plane tears a wedge from the far corner. A strip of masking tape over a fragile painted edge can reduce chipping, but it cannot prevent damage from a blunt blade.
Check the fit every few passes with a straightedge and a feeler gauge or folded paper. For a painted external sill, a clearance of about 1–2 mm at a meeting joint is often safer than a tight dry fit because paint and seasonal movement need room. Follow the existing construction and local weatherproofing details rather than creating a water-trapping ledge.
Supporting tools you will need
A sharpening stone, honing guide, combination square and marking knife are more useful than buying a second mediocre plane. Keep a 150–240 grit abrasive sheet available for removing paint or smoothing a damaged edge, but use the plane for controlled timber removal.
When the sill must be reduced by more than about 4–5 mm, a saw or router may be faster, followed by a plane for the final 1 mm. The plane should be the finishing and fitting tool, not an excuse to wrestle through excessive stock.