What's inside
As an Amazon Associate I earn from qualifying purchases. This post may contain affiliate links at no extra cost to you.
Cutting a stopped dado by hand is mostly a matter of control. You need to remove waste from a confined area, keep the shoulder square, and avoid bruising the finished surface at the closed end. A good chisel helps, but the wrong size or a poorly supported cut can still ruin the joint.
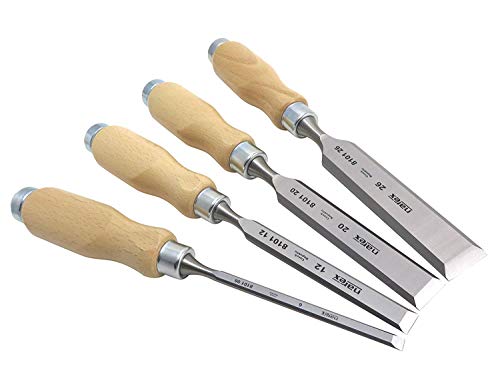
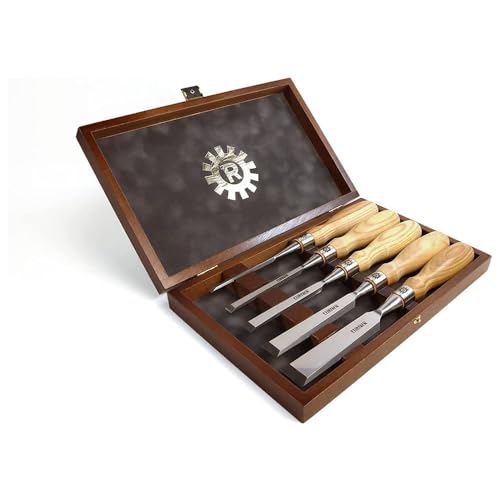
For most furniture and cabinet work, the best setup is a sharp bevel-edge bench chisel in 1/4-inch, 3/8-inch, and 1/2-inch sizes, plus a narrower chisel for the stopped end. A short butt chisel can be particularly useful because its compact length gives better control inside a cabinet or near a panel edge. You can see current options in this bevel-edge bench chisel set search.
As an Amazon Associate we earn from qualifying purchases at no extra cost to you.


Sections
Our Top Picks


What Makes a Chisel Good for Stopped Dados
A stopped dado has three working areas: the long sides, the bottom, and the closed end. One chisel rarely does all three jobs equally well.
For the sides, use a chisel slightly narrower than the dado. A 3/8-inch chisel is a good general choice for a 1/2-inch dado because it leaves enough room to work without wedging. For a 3/4-inch dado, a 1/2-inch chisel removes waste efficiently. Avoid using a chisel exactly the width of the dado for the first cuts; a small error can jam the blade against both walls and break a corner.
Bevel-edge bench chisels are the default choice. Their narrow side bevels let you get close to a corner without leaving a wide triangular fillet. A mortise chisel is stronger, but its thick body and large side shoulders make it less convenient for cleaning the end of a stopped dado. It is useful for heavy waste removal, not usually as the only chisel in the kit.
Best Chisel Types for the Job
| Chisel type | Best use | Main advantage | Limitation |
|---|---|---|---|
| Bevel-edge bench chisel | General dado work and final fitting | Good access to corners; suitable for light striking | Can be damaged by twisting or heavy levering |
| Butt chisel | Stopped ends and work inside cabinets | Short length gives control in tight spaces | Less reach and sometimes less steel behind the edge |
| Paring chisel | Final bottom and shoulder cleanup | Excellent control and slicing action | Should not be struck with a mallet |
| Mortise chisel | Rapid waste removal in deep or wide dados | Strong enough for hard blows and levering | Too bulky for precise end cleanup |
A 1/4-inch chisel is the most useful narrow size for stopped work. It can establish the end cleanly and remove the last strips beside the walls. A 3/8-inch or 1/2-inch chisel does the faster work in the middle. If you only want one chisel, choose a 3/8-inch bevel-edge bench chisel and expect to make more passes.
Edge Geometry and Handle Design
For typical softwood and hardwood dados, a primary bevel around 25 degrees works well. A small secondary bevel at roughly 27 to 30 degrees makes sharpening faster and gives the edge a little more durability. A very low angle cuts cleanly, but the edge is more likely to roll when you strike it or hit a knot.
Choose a handle made for impact if you expect to use a mallet. Plastic, composite, or hooped handles tolerate repeated blows better than delicate turned handles. A wooden handle is comfortable and can last for decades, but a damaged striking end needs attention. Do not use a fine paring chisel for chopping simply because it has a sharp edge; its handle and thin blade may not survive.
Blade length matters more than many buyers expect. A long bench chisel gives useful reach, but it can be awkward when the dado is near the middle of a large panel. A short butt chisel provides a better sightline and less leverage against your wrist. For normal casework, a standard-length bench chisel is adequate; for cabinet interiors, a short butt chisel is worth adding.
How to Cut the Stopped End
Mark the dado with a sharp knife line, then deepen the line with a marking knife or a light chisel cut. Clamp a straightedge or guide block so the first cuts cannot run past the stop. A stopped dado should normally be cut in stages rather than attacked at full depth.
First, make shallow vertical cuts across the waste at the closed end. Work about 1/16 inch inside the final line, then pare back to the knife mark. Keep the chisel bevel toward the waste when chopping near a wall; this helps the flat back register against the shoulder. For the bottom, use bevel-down chopping for controlled depth, then switch to bevel-up paring if you need a cleaner shaving action.
Do not twist a bench chisel to pry out large chips. That is a common way to chip the edge or flare the dado wall. Instead, chop a series of grooves 1/8 to 1/4 inch apart and remove the ridges with the chisel held nearly flat. Leave the final 1/32 inch for a light paring pass. On a 1/2-inch-deep dado, remove the waste in at least three stages rather than trying to reach full depth immediately.
Sharpening and Value
Sharpness is more important than premium steel. A chisel that can shave end grain and leave a continuous bright edge will outperform an expensive chisel with a rounded bevel. For dado work, flatten only the working portion of the back and maintain a consistent bevel. A 1,000/4,000-grit waterstone or equivalent abrasive system is sufficient for most users.
Cheap chisels are fine for site carpentry, softwood, and occasional shelving. They become frustrating when the backs are badly hollow, the edges crumble, or the handles split after a few mallet blows. If you are buying on a budget, spend first on one reliable 3/8-inch chisel and a sharpening setup rather than a large set of mediocre tools. A modest chisel sharpening stone will improve any brand.
For frequent hardwood cabinet work, buy individual bevel-edge chisels in 1/4, 3/8, and 1/2 inch, then add a short 1/4-inch butt chisel if stopped ends are common. That combination covers accurate layout, bulk waste removal, and final fitting without forcing one tool to do jobs it was not designed to handle.