What's inside
As an Amazon Associate I earn from qualifying purchases. This post may contain affiliate links at no extra cost to you.
Sections
Can You Use a Table Saw as a Jointer?
Yes—you can use a table saw as a jointer to straighten a board edge, but only with a securely attached, accurately aligned auxiliary fence and a board that is manageable for you to control. It’s a useful method for occasional edge-jointing; it does not replace a jointer for flattening a board’s face, removing twist, or processing long, bowed stock efficiently.
What this method can—and cannot—do
A jointer cuts a flat reference face or edge. To use a table saw as a jointer, you make one side of the rip fence project slightly beyond the blade. That projection supports the uncut, irregular edge of the board. As you feed the board, the blade trims the opposite edge parallel to the fence.
As an Amazon Associate we earn from qualifying purchases at no extra cost to you.


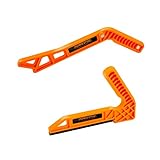
The result is a straight edge relative to the fence—not necessarily a board that is flat overall. If the board rocks, twists, or has a severe bow, sawing one edge won’t correct those problems. It may simply produce a straight edge on a board that still won’t sit flat for glue-up.
Is using a table saw as a jointer right for your shop?
| Situation | Practical choice | Why |
|---|---|---|
| One or two boards occasionally; limited budget or space | Table saw with a purpose-made or carefully built auxiliary fence | Uses a machine you already own, but takes setup and test cuts. |
| Regular edge-jointing on moderate-length boards | Dedicated jointer sized for your typical stock | Quicker setup and better control for repeated work; capacity still limits board width and length. |
| Wide or twisted boards that need a flat face | Jointer and planer, or a suitable sled-based milling workflow | An edge-jointing setup cannot flatten a board’s face or remove twist. |
| Long, bowed, heavy, or difficult-to-control boards | Dedicated equipment, a track-saw rough cut followed by jointing, or professional milling | Handling and feed control—not just saw capacity—become the limiting factors. |
There is no universal maximum board length or width: the saw’s support, fence design, board’s shape and weight, and your ability to maintain control all matter. The figures below are conservative planning ranges, not manufacturer ratings or guarantees.
Practical size guide
| Stock to edge-joint | Typical practicality | What to check |
|---|---|---|
| Up to about 4 ft long and 3 in. wide | Often manageable for a careful, experienced operator | Stable support on both sides of the blade; no rocking or pinching. |
| About 4–6 ft long, or 3–6 in. wide | More demanding; use only with adequate infeed and outfeed support | Can you keep the board flat against the fence without reaching, twisting, or losing control? |
| Over about 6 ft long, very wide, heavy, or badly bowed | Usually a poor candidate for an improvised setup | Consider a jointer, track-saw rough cut, or help from an experienced operator. |
How to set up the table saw as a jointer
-
Inspect the board and saw
Remove nails, screws, grit, and other foreign material. Reject stock that is cracked, loose, or so bowed that it cannot stay supported. Check that the blade is sharp, clean, and appropriate for ripping, and that the riving knife is installed and aligned as directed by the saw’s manual.
-
Fit a rigid auxiliary fence
Attach a straight, stiff auxiliary face to the rip fence, using a design that clamps securely and cannot shift into the blade. A purpose-made jointing fence is convenient; a shop-built version should be flat, smooth, and firmly fastened. Keep all fasteners clear of the blade path.
-
Set and check the offset
Adjust the auxiliary face so it extends beyond the blade by a small amount—often roughly 1/32 to 1/16 in. at the blade’s widest point. The exact projection depends on the setup and cut. Too little may leave an uneven edge; too much increases the cut and can make the work harder to control.
Verify the fence is parallel to the blade using the saw maker’s alignment procedure. The offset must remain consistent through the cut. Disconnect power before making measurements or adjustments near the blade.
-
Make a test cut
Use scrap of similar thickness to check that the board feeds freely and the cut is continuous. If the work binds, shifts, or leaves a tapered edge, stop and correct the setup rather than forcing the feed.
-
Feed the board with steady control
Place the irregular edge against the auxiliary fence and keep the board flat on the table. Use push blocks or push sticks where appropriate, keeping hands away from the blade. Maintain a steady feed; do not pull the board backward while the blade is engaged. Use a helper or properly positioned support for long stock, but never let a helper pull or steer the work from behind.
-
Check the edge, then stop
Turn off the saw and wait for the blade to stop before inspecting the cut. Check the edge with a straightedge. If it needs another pass, reset only after the saw is stopped and the work can still be controlled safely. Remove just enough material to get a straight edge.
Safety limits that matter
- Do not use the rip fence as a substitute for safe blade guarding. Keep the guard and riving knife in place when the operation and saw design allow it. Follow the manufacturer’s instructions for any configuration that requires a change.
- Never freehand the cut. The board must be controlled against the fence and table. If it cannot stay flat and stable, choose another method.
- Watch for kickback conditions. Pinching, a shifting auxiliary fence, a dull blade, or a board that closes against the blade can make the workpiece dangerous. Stop if feeding becomes difficult or the stock moves unpredictably.
- Don’t overreach or rely on a short table. Infeed and outfeed support should hold the board level without interfering with the cut. Avoid stands that can catch the work or tip.
- Use eye and hearing protection. Keep loose clothing and hands clear of the blade, and make adjustments only with the saw disconnected from power.
When a dedicated jointer is the better buy
Buy a jointer when edge-jointing is frequent enough that fence setup and repeated test cuts are slowing you down, or when your stock is consistently too long or awkward to control on the saw. A jointer is also the right tool for flattening one face before planing the opposite face parallel. Check its actual cutting width, bed length, fence height, dust-collection requirements, and available floor space against the wood you normally mill.
For occasional work, a table-saw setup can be economical, especially if you already have the saw and can build or buy a rigid auxiliary fence. For a rough, highly bowed edge, first consider a straightedge-guided track saw cut that removes the worst irregularity; then joint the remaining small amount. This reduces the amount of material the blade must remove and makes the feed easier to control.
Common setup and ownership mistakes
The auxiliary fence is the part most likely to cause trouble: it can loosen, flex, or drift out of alignment. Check its fasteners and straightness before use, and recheck the blade-to-fence relationship after any bump or adjustment. Pitch and resin buildup on the blade or fence can also increase friction; clean them with products intended for woodworking equipment, following their directions. Replace or sharpen a blade that is dull or damaged rather than compensating with a slower, forceful feed.
For a few manageable boards, using a table saw as a jointer can be a sensible workaround. For frequent milling, face flattening, or stock that is difficult to support and control, a dedicated jointer—or a different milling method—is the safer, more efficient choice.