What's inside
As an Amazon Associate I earn from qualifying purchases. This post may contain affiliate links at no extra cost to you.
Sections
Our Top Picks
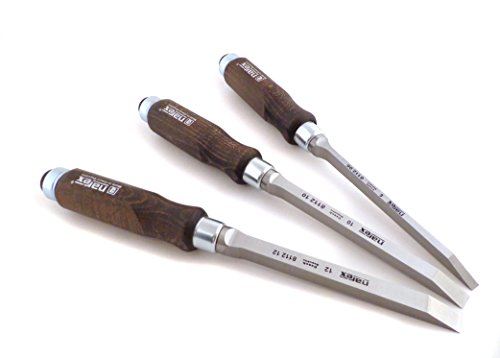
 Narex 4 Piece Richter Mortise Chisel SetOne Size Fits All0 x 0 x 0.1 inches2.2 poundsCheck on Amazon


The short answer
Use a narrow chisel to remove most of the waste from a mortise, then switch to a wider chisel for the final clean-up. A 6 mm (1/4-inch) chisel is a useful general-purpose size for starting and deepening the cut. A 10–12 mm (3/8–1/2-inch) chisel works faster for clearing the middle of a larger mortise and leaves a flatter bottom.
The best choice depends on the mortise width, its depth, and how much control you need. A wide chisel removes more wood per strike, but it needs more room and is easier to wedge or damage if you twist it. A narrow chisel reaches tight corners and starts cuts safely, but clearing a large mortise with one is slow and can leave a rough, uneven bottom.
As an Amazon Associate we earn from qualifying purchases at no extra cost to you.



Match the chisel to the mortise
As a working rule, choose a chisel no wider than about half to two-thirds of the mortise width for waste removal. This leaves enough space on either side for chips to lift and gives the blade room to move without binding.
| Mortise width | Useful first chisel | Useful clearing chisel | Main advantage |
|---|---|---|---|
| 6–8 mm (1/4–5/16 in) | 6 mm (1/4 in) | Same size | Control in a small opening |
| 10–12 mm (3/8–1/2 in) | 6 mm (1/4 in) | 10 mm (3/8 in) | Good balance of speed and accuracy |
| 16–20 mm (5/8–3/4 in) | 6–10 mm (1/4–3/8 in) | 12–16 mm (1/2–5/8 in) | Fast waste removal without excessive force |
| 25 mm (1 in) or wider | 10–12 mm (3/8–1/2 in) | 18–25 mm (3/4–1 in) | Efficient clearing across the middle |
These are working sizes rather than rigid rules. In softwood, you can often use a wider chisel earlier. In hard oak, beech, or ash, a narrower blade makes controlled progress with less risk of bruising the mortise walls.
Why start with a narrow chisel
After laying out the mortise, make a series of shallow cuts rather than trying to drive a wide chisel to full depth. A narrow blade lets you establish the opening without putting much sideways pressure on the fibers at the edges. Start about 1–2 mm inside the layout lines, especially across the end grain, and leave the final boundary for paring.
Drive the chisel with the bevel facing the waste when you are roughing out. The bevel helps the blade rise out of the cut and tends to push the waste away from the wall you want to preserve. Work in the center first, taking roughly 3–5 mm (1/8–3/16 inch) per series of strikes. Once the waste is loose, lever it out with the chisel or break it into shorter chips.
A narrow chisel is also safer when the mortise is deep. The sides of a wide blade can rub both walls at once, causing it to stick. If you then hit harder, the handle, blade, or workpiece can suffer. A 6 mm chisel has more clearance and makes it easier to keep the cut vertical.
For a small job, a good 1/4-inch bevel-edge wood chisel is often all you need. The cheaper option is fine if the handle is sound, the blade is reasonably straight, and you are prepared to sharpen it before use.
Where a wide chisel wins
Once the mortise is established and the waste is below the mouth, a wide chisel clears material much faster. One 12 mm blade can remove a strip twice as wide as a 6 mm blade with each cut. That matters when you are cutting several mortises or working in a 20 mm-deep opening.
Use the wide chisel in the middle of the mortise, not directly against the layout lines. Keep the blade aligned with the mortise and make moderate mallet strikes. If the chisel stops after a few millimeters, do not twist it to free it. Pull it out, clear the chip, and try a shallower cut. Twisting is a common cause of chipped edges and distorted mortise walls.
A wide chisel is particularly useful for flattening the bottom. Hold it nearly flat and take controlled paring cuts across the grain where possible. Do not expect a mortise bottom to be polished; it only needs to be flat enough that the tenon seats fully without being stopped by high spots.
For this stage, a 1/2-inch bevel-edge wood chisel suits many furniture-sized mortises. For larger joinery, a heavier mortise chisel may be better because its thicker blade tolerates mallet work and resists bending.
Bevel-edge or mortise chisel?
Ordinary bevel-edge chisels are versatile and usually cheaper. Their bevels provide clearance in a narrow mortise, and they work well for occasional doors, benches, and furniture repairs. They are also useful for paring shoulders and cleaning the ends of a mortise.
Mortise chisels have thicker blades and stronger backs. They are designed for repeated mallet blows and are less likely to bend when levering out compacted waste. The trade-off is weight: a thick mortise chisel is less nimble for delicate paring, and a full set costs more. If you cut only a few shallow mortises each year, a basic mortise chisel set may be unnecessary.
A practical cutting sequence
Mark the mortise clearly with a sharp knife or marking gauge. Chop a shallow groove at both ends to protect the shoulders. Then remove the center waste with a narrow chisel, working from both ends toward the middle if the mortise is deep. Do not drive straight to full depth in one pass; a sequence of 5 mm steps gives the blade less opportunity to split the stock.
At about 2–3 mm short of the final depth, use the wider chisel to level the bottom. Finish the ends and sides with the narrow chisel, bevel facing the waste or, for fine paring, with the bevel flat against the surface being trimmed. Test the matching tenon frequently. A mortise that is 0.5 mm wider than planned may still work, but a wall chipped beyond the layout line cannot be put back.
What to buy
If your work is occasional, buy one sharp 6 mm chisel and one 12 mm chisel rather than a large inexpensive set. Spend more on steel that holds an edge and a handle that accepts controlled mallet taps, but do not pay for premium branding if the blades arrive flat and sharpen easily. For regular frame-and-door work, add a 10 mm or 16 mm mortise chisel according to the joinery sizes you commonly cut.
The important specification is not the widest blade in the set. It is whether the chisel stays sharp, fits the mortise without binding, and can be controlled near the finished walls. Narrow for starting, wide for clearing, and sharp for both: that combination removes waste quickly without turning a straightforward mortise into a repair job.